Preparing to Apply the Wallrock
You will need: Your Wallrock Thermal Liner, Liner Adhesive, scissors or heavy duty snap knife, roller and/or brush, hanging brush or wallpaper smoother, and a plumb line and pencil.
Firstly, make sure your walls are clean and free of any loose wallpaper or flaking paint. It is recommended that all surfaces are sanded down and ‘sized’ with adhesive before you start.
Applying the Wallrock
- Mark out straight lines on the wall using the plumb line to make sure your Wallrock is applied vertically.
- Apply Liner adhesive to the wall or ceiling generously. You can use a roller or brush for this. Make sure you apply more over textured or damaged surfaces. It is worth applying enough adhesive to complete one length each time, ensuring the entire surface to be papered is covered with the adhesive.
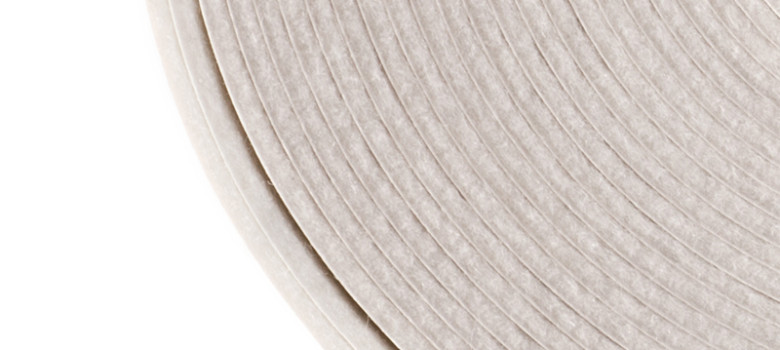
- Apply the thermal liner with fluffy side down. You can cut a length each time or hang directly from the roll.
- Cut excess paper with scissors or knife. Be careful not to trim too much!
- Do not overlap the paper, as you add new lengths, ensure they are tight to the length next to it. Remove excess adhesive as required using a sponge and clean water.
- Let the walls dry for a day naturally. That means no heating systems, except if the room is especially cold.
- Now you can paint over the top or hang standard wallpaper to cover the Wallrock*. Ensure any small gaps are filled with flexible, non-shrinking filler.
*Note that wallpaper used should be ‘paste-to-wall’ or ‘non-woven paper’. Otherwise thermal expansion may cause buckling or folding of the paper.


Can be applied on ceiling? Our house is made of paneling even the ceiling
Hi Anna,
Unfortunately it’s likely that the weight of the Wallrock would be too heavy to stay up on a ceiling and you’d have problems with it falling down.
Many thanks,
Harriet
Hi- I ordered the thermal adhesive and 2 times it has not arrived thru Ebay. I have the wallpaper heavy liner. what other adhesive can I use since I cannot get the wallrock thermal adhesive. Or am in stuck with roll of the wallpaper and nothing will work?? I am in the US.
Hiya We have just put the Graphite insulating lining paper up but it’s the wrong way could we use the adhesive and stick up thick lining paper on top before normal wall paper, would it stick?
Hi stupidly I know ,read instructions wrong ,just dont now hell did but Ive put smooth side down of thermall lining k600 . It stuck fine ,dried fine. I then after 3 days applied the fibre liner on top dried fine,, I realised what don when finished wall. I know how can 1 be so stupid ? I painted and took bit longer dry than expected but oddly nuff looks fine…. Im now worried will it now affect the thermal properties of the paper.. I could cry honestly as worked so hard on it ! Ive never ever papered put wall paper on but due to Covid as at high risk didnt want anyone in. Live in a old victorian house and cant have cavity wall in that room & cos of beautiful features didnt want spoil by doing another way… Id be very grateful for your reply ,Thanku
😂😂😂😂😂😂