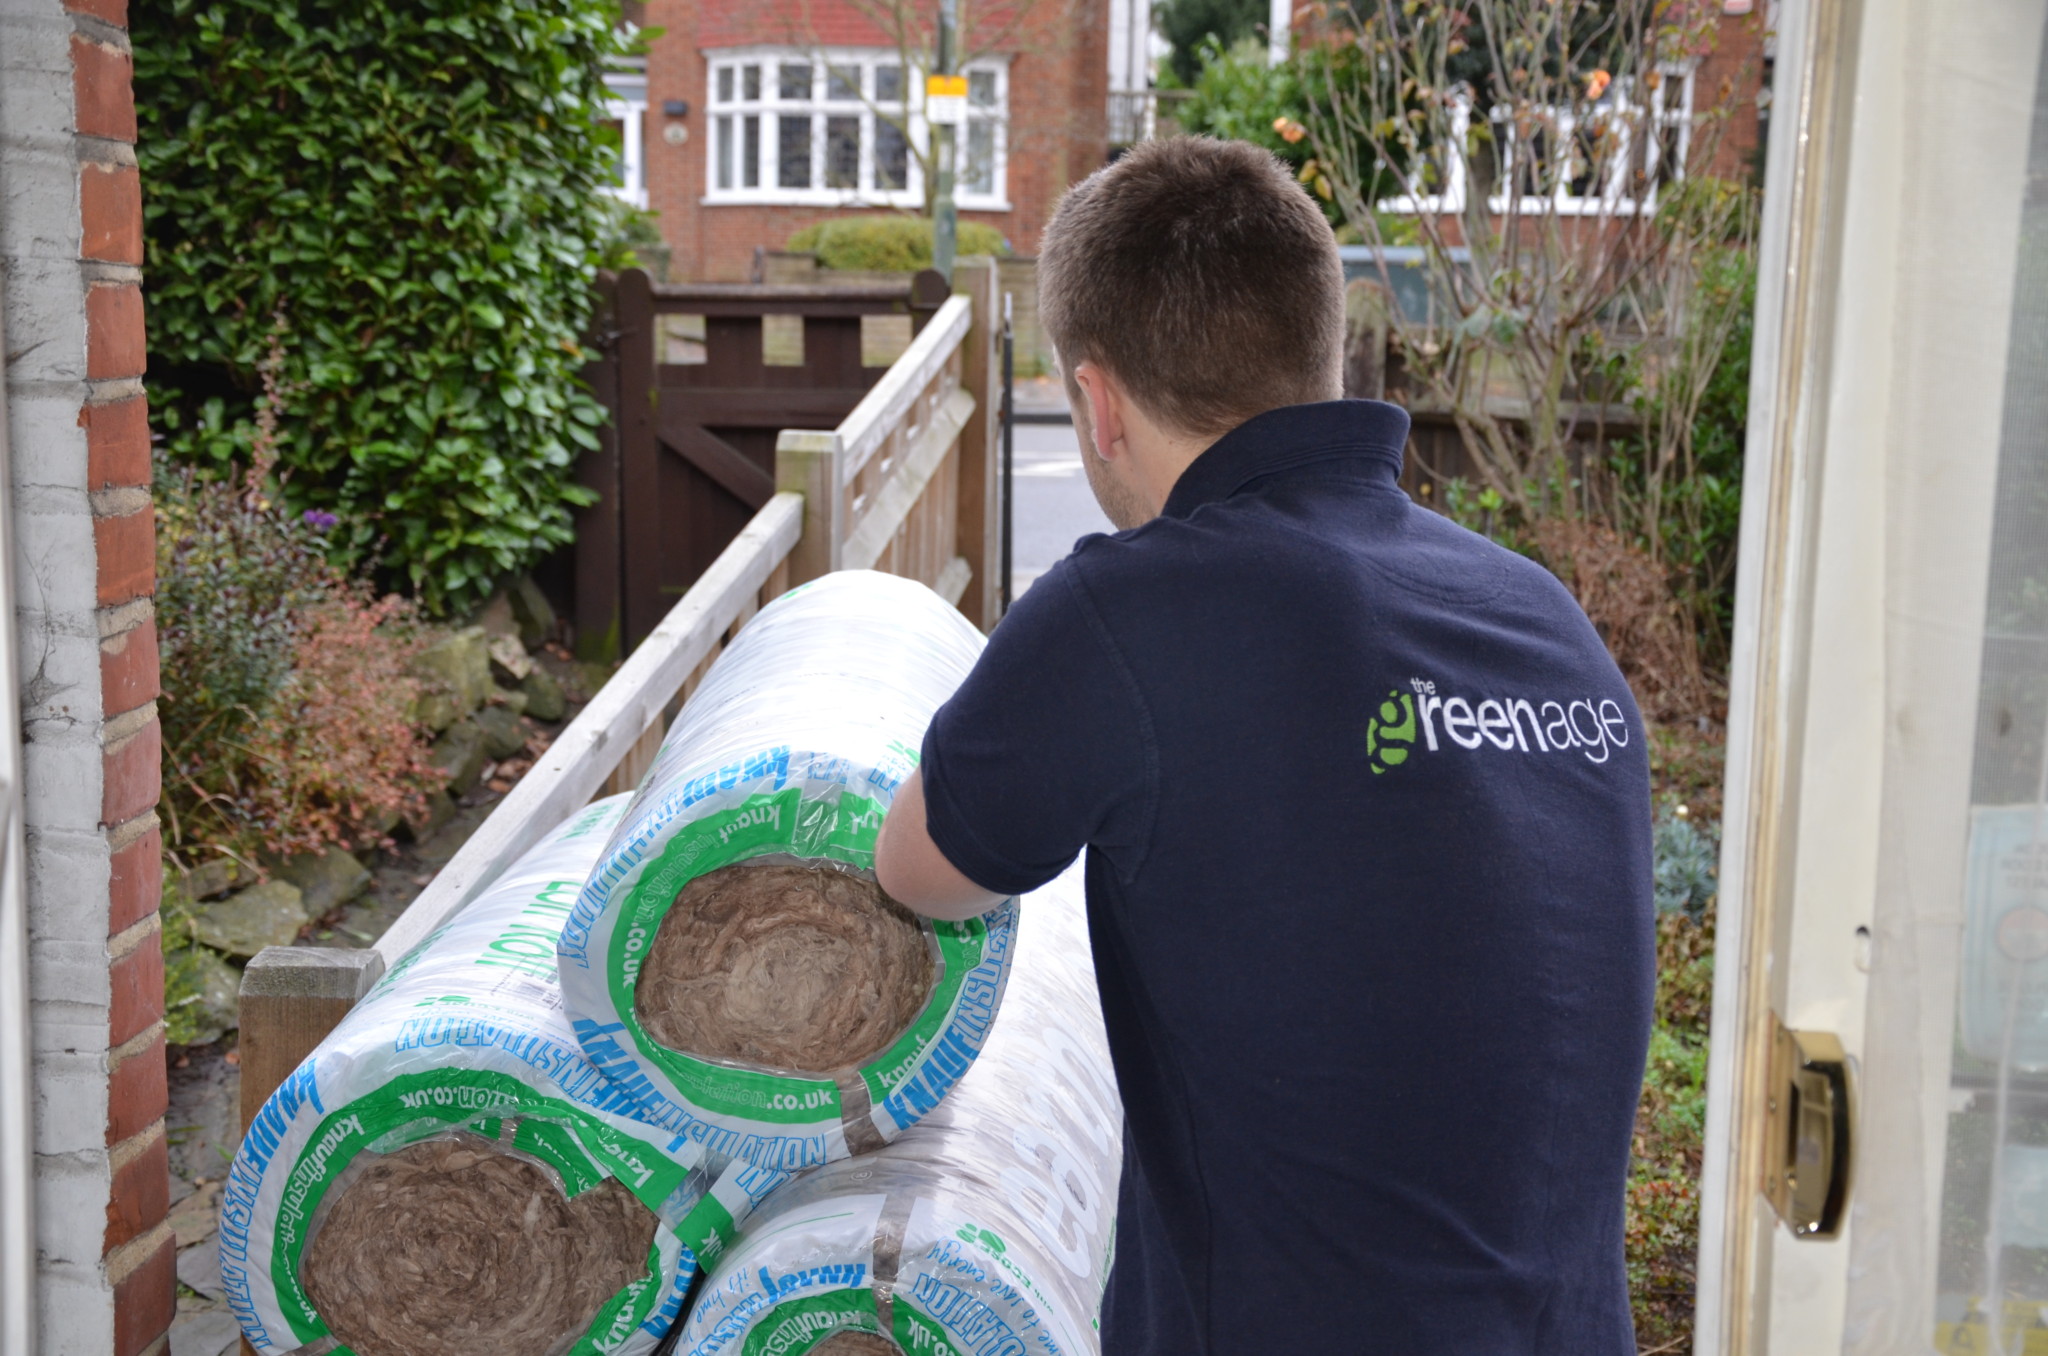
Insulating your loft is one of the best ways to improve the EPC rating of your home. If you have a virgin loft (i.e. 25mm or less of insulation) then insulating it will produce massive savings on your energy bill and the great thing is that for many of us, the energy companies offer this insulation free.
Without proper loft insulation, a lot of the warmth produced by your heating system escapes through the roof of your property; in fact, as much as 25% of the heat in an uninsulated house is lost in this way. Loft insulation acts as a barrier, slowing the movement of heat out of the property during the winter and into the property during the summer.
Even if you can’t get it installed for free, it is an incredibly easy DIY job. In the tabs above, you can find out exactly how to do it.
The first decision to make is whether you are looking to create a warm loft or cold loft. The majority of us just use the loft space for storage so normally a cold loft will more than suffice, but for some we use the loft space for a games room or a study. To be honest, insulating your loft as a cold loft is far easier than trying to produce a warm loft – mainly because you don’t need to fight gravity. The method of insulating your loft varies considerably whether you have decide to push forward for a warm loft or a cold loft, but since the vast majority go for a cold loft lets start there – at the joists.
Insulating your loft at the joists
The purpose of insulation is to produce a barrier that slows the movement of heat either in or out of the property. When you produce a cold loft, you need to lay insulation directly above the ceiling to produce this barrier to slow the movement of heat out of the home during the winter and visa versa in the summer to prevent the home overheating.
The latest building regulations stipulate you need to reach a U-value of 0.16 to conform – now for most of us who don’t talk ‘U-values’, this simply means you need a 300mm blanket of wool insulation (if you decide to use rigid insulation board like celotex or Kingspan then you can achieve this u-value with less thickness).
What materials can you use to insulate joists?
Mineral wool
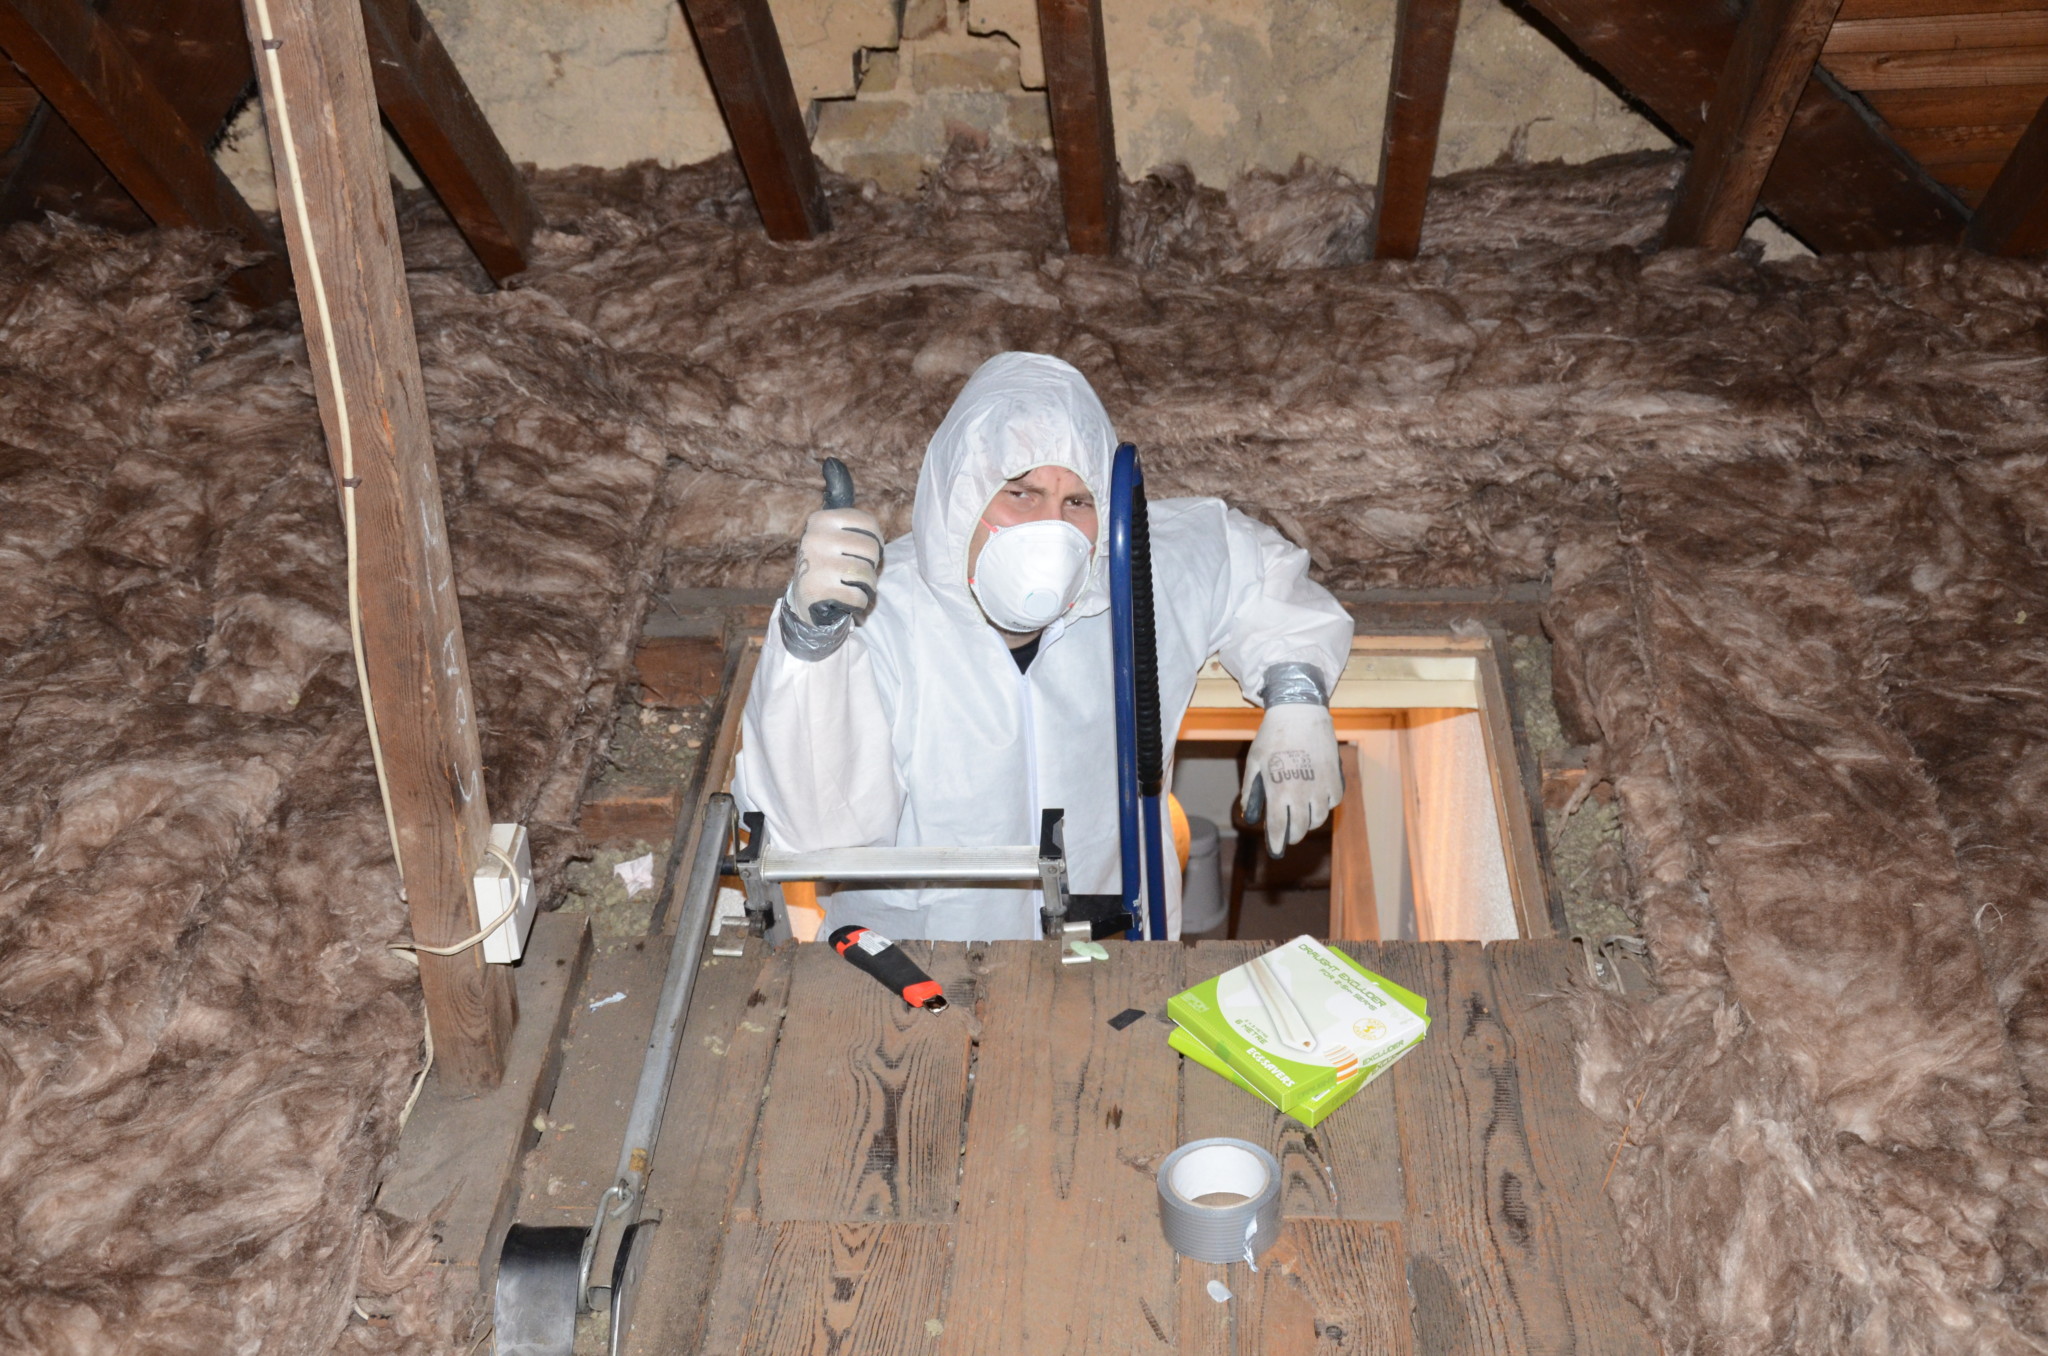
We describe the main types of wool insulation in detail here. Each have their own advantages and disadvantages, but all of them work in a similar way. The wool traps air, which provides an insulating barrier. They are all fairly easy to work with, in that they can be cut to measure, shaped to fit around immovable objects and also rolls of wool insulation are cheap.
The main issue with wool insulation is that it compresses if you put any weight on it, which lowers its insulating efficiency. If you lay wool insulation to a depth of 270mm, it is also difficult to locate the joists, which you should use as support if you are in the loft space. Never stand between the joists, otherwise you will more than likely come through the ceiling!
Wooden boards can then be laid over all the insulation if you need to make the loft usable for things like storage. The insulating mineral wool used normally comes in rolls of blanket, which is a consistent thickness and width.
Sheep wool insulation
If you are using sheep wool insulation you will get the added benefits of the material being able to absorb moisture as well. Warm air rises from the heated rooms below and condenses when it comes into contact with cold insulation materials. Unlike other wool products, sheep wool can absorb some of this moisture and protect the joist timbers from rotting, without affecting its own insulating properties.
Loose-fill loft insulation
Insulating your loft floor using loose-fill is great as a top-up process for a pre-insulated space. It tends to be light material such as recycled newspapers and mineral wool, which can be spread to cover any gaps between the joists. You simply open the bags of insulating material and pour into any spaces that were previously lacking an adequate level of insulation. This process is a fairly simple do-it-yourself job.
Rigid insulation boards
These boards, produced by companies like Celotex, are ideal for insulating loft spaces. They are more expensive than the wool, however they offer double the insulating capacity (therefore where you would normally use 270mm of wool, you would only require 135mm of the insulating board). In addition, since they are rigid it is easy to store items directly on top of them without laying board on top of them first. They can be cut to size using a saw to fit between the joists and also drilled to allow room for light fittings.
Blown fibre insulation
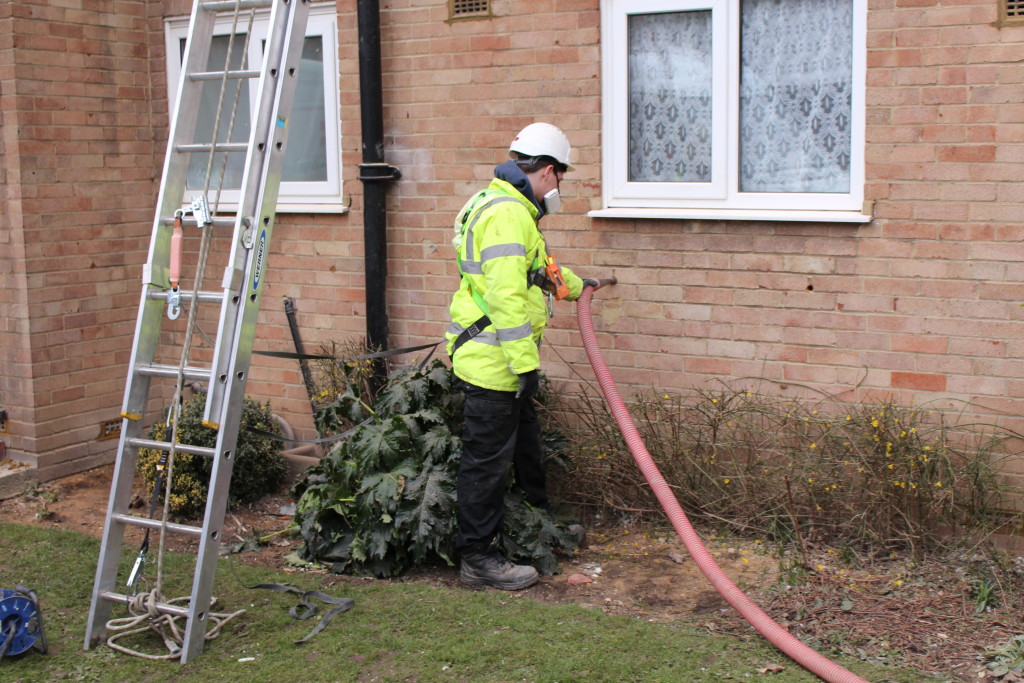
Another type of loft insulation is blown fibre insulation, which must be installed by a professional. An installer will use specialist equipment to blow insulation material into the gaps that require it.
Having a carpet of insulation in your roof will significantly reduce heat loss out of your home. The reason why we are such advocates of loft insulation and consider it the no.1 method of saving energy in the home is basically because the insulation is incredibly cheap to buy and the process of producing a cold loft is so easy.
Now a couple of important things to mention; while this is certainly the cheapest way to go, the loft space itself will be very cold in the winter. This means that anything you really value should be kept in the home itself, not in the loft. In addition you need to insulate any pipework and cold water tanks up in the loft as these may now be liable to freezing and the cost of repairing bursting pipes will far outweigh the energy savings produced!
For detailed instructions on how to insulate your loft to produce a cold loft please click the tab here.
Insulating your loft at the rafters
Gravity is a pain – it makes producing a warm loft that much harder. Unfortunately if one tries to insulate between the rafters by squishing in lots of wool insulation then 9 times out of 10 it will just fall out.
However if your heart is set on creating a warm loft space then it is definitely possible. There are four main ways to insulate your rafters; the first is to use netting and wool insulation. Using solid insulation board is again a really good way to minimise heat loss out of your home. The third way is simply to use reflective foil stapled to the rafters – this doesn’t produce significant energy savings but is by far the simplest way to go, requiring just reflective foil and a staple gun. You might want to use reflective foil anyway even if you do opt for a cold loft.
What materials can you use to insulate between rafters?
The materials you should use to insulate the rafter space will depend on the way you have chosen to insulate, however the products used will tend to be denser and more rigid than those used for joists.
If you are looking to insulate between the rafters you can use both wool or insulation boards.
If you are looking to insulate below the rafters then you may choose to use insulation boards or reflective foil.
Normally the process you decide on depends how deep the actual rafters are. If the depth is rather shallow the best option will be to insulate below the rafters. You can in theory increase the depth yourself by attaching planks of wood top of the rafter, but then you are giving yourself more work and adding complexity to the process.
Mineral wool for insulating between the rafters
This can be glass wool, rock or mineral wool and it comes in rolls. You will need to wear protective material, a mask and have the adequate tools to fix this to the space between the rafters. The material is then fixed to the space between the rafters, whilst ensuring there is gap to the roof membrane to avoid condensation.
The difficulty in creating a warm loft with mineral wool insulation is basically due to the thickness of wool insulation needed to hit the necessary U-value as specified by building regulations (300mm) although to be honest, if you are doing this yourself, you are not required by law to conform. The way to keep the insulation in place is to use a net that you can then staple to the rafters which acts as a hammock for the insulation.
Sheep wool for insulating between the rafters
If you are using sheep’s wool, which is not an irritant, then you can handle the material without wearing protective clothing. If you are using sheep wool insulation you will also get the added benefits of the material being able to absorb moisture. Warm air rises from the heated rooms below and condenses when it comes into contact with cold insulation materials. Sheep wool, unlike other wool products, can absorb some of this moisture and protect the rafter timbers from rot, without it affecting its own insulating properties. When insulating rafters, a more rigid form of sheep’s wool insulation can be used, which is more suited to rafter insulation.
Insulation boards for insulating between or below the rafters
Insulating board can be fitted between the rafters or below the rafters. Note: Because the material is thick, if you are going below the rafter space you will certainly lose headroom in the loft space. If your rafters are shallow then you have no choice and have to insulate below.
These boards, produced by companies like Celotex or Kingspan, are ideal for insulating loft spaces. They are more expensive than the basic mineral wool, however they offer double the insulating properties (therefore where you would normally use 200mm of wool, you would only require 100mm of the insulating board). They can be cut to size using a saw to fit between the spaces and drilled through for cabling.
Reflective foil for insulating below the rafters
A thin layer of reflective material is placed below the rafters to prevent heat escaping from the property. This is the most simple way to insulate your loft via the rafters, but obviously the insulating properties on this type of insulation are very limited compared to either mineral wool or insulating board.
As mentioned, the foil is by far the easiest way to insulate your loft; you simply staple it to the rafters. It is worth starting at the apex of the ceiling and then working down the rafters, overlapping the foil to achieve a continuous reflect surface. You can then tape over the joins.
Spray foam
A layer of foam is sprayed into the rafters and sets hard. This can only be installed professionally.
When professionals come in and install spray foams, they can achieve high thermal efficiency with very little depth. The two downsides of this firstly that it is very expensive compared to the other methods and also it doesn’t allow the roof to breath, locking in the water next to the timber – which as we have mentioned previously can lead to problems.
While having a warm loft space is great because you can then use the space – you are now heating an extra ‘room’ that you wouldn’t normally heat if you insulated just above the ceiling (i.e. a cold loft) – which means your heating bill will be higher.
Benefits
A warmer home.
Can be done cheaply.
Potential savings on your energy bills.
CO2 saving of 210kg to 730kg p/a.
Limitations
None
Installing loft insulation
Interested in installing loft installation? The Green Homes Grant is a Government run scheme, offering grants of up to £10,000.
If you are interested in this scheme, we advise you look in to this on the Government website.
Not all windows need to be draught-proofed. Double or triple glazed windows installed since 2002 should be sufficiently well-built and installed so as not to require any. Older double glazing and single glazed windows can be draught-proofed, however. If you are unsure on the age of your double glazing, you should check for either a FENSA certificate, which you will have received with any windows installed since 2002, or a stamp in the metal seal of the window.
Where to look for draughts
The gaps between the window and the frame
Caulk on the outside of the window frame
The area around any locks or catches
Although the potential for draughts to occur around the edge of one window is not equal to that of an external door, the accumulated draught from every window in your house can account for huge amounts of energy loss. Therefore it is crucial to draught-proof these areas. In order to complete a successful draught-proofing of a window, you must firstly pinpoint the gaps that require work. After locating the area that requires draught-proofing, there are a few methods to consider.
How can I draught-proof my windows?
How should I draught-proof a window that opens?
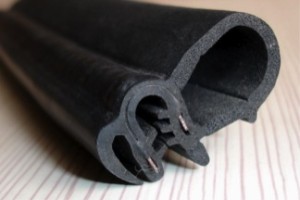
Firstly, compression seals provide a professional finish and prevent draughts, as well as dust and moisture entering the home. The seals are sometimes held by metal, plastic or wooden carriers, which are fixed onto the frames through pre-drilled fixing holes. This maintains the ‘memory’ or ‘bounce-back-ability’ of the seal, enabling it to return to its original shape even after periods of crushing, due to normal everyday use of the window. The carrier is cut to length and must be less than 25mm from the cut end to avoid any snagging on unwanted items such as clothing. However they may also be glued to the frame. While these compression seals, as well as the similar tubular seals, provide excellent performance on narrow window gaps, they are not the best option when draught-proofing sash windows on larger properties.
How should I draught-proof a window that doesn’t open?
The best method for draught-proofing a window that does not open is a silicone-based sealant. After the gaps in the framework have been located and cleaned to remove any dust that may reduce the longevity of the draught-proofing method, a gunned silicone sealant can be easily applied. This is a cheap and easy way to DIY draught proof.
How should I draught-proof a sash window?
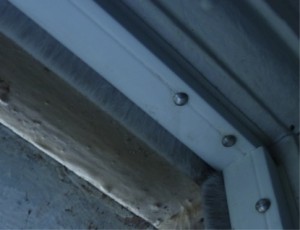
If you are looking to draught-proof a sash window or if the gaps between the window and its frame are not consistent due to seasonal changes, brush strips may provide the best solution. While mainly used in the draught-proofing of doors, it is not rare to see this method around larger windows. This solution involves brushes or blades fixed into a carrier, which is pinned onto the frame. While they may be painted to reduce their visibility, this does decrease their efficiency. However the brushes or blades may be contained using wooden carriers, which may provide a more aesthetically-pleasing solution to window draughts.
Another method of draught-proofing your window, and common when taking the DIY approach, is low-friction seals in loose strips or carriers. This solution involves the rubbing of wipers or blades, which are fixed onto the frame, against the closing window. While they may also be fixed using an adhesive-based foam strip, this method (although cheap) does not comply with British standards and is therefore not recommended.
Using gunned silicone as a sealant
A DIY-friendly and relatively cheap solution to your window draught-proofing needs is gap-filling seals with gunned silicone sealant. In order to ensure that maximum draught-proofing is achieved, you must cover the part of the window that comes into contact with the frame in a release agent. This prevents the sealant from sticking to the window as opposed to the frame. The window is then shut to provide a temporary mould for the sealant before it sets. While it provides an efficient solution to the draught-proofing issue, if it isn’t carried out correctly, the result may look untidy.
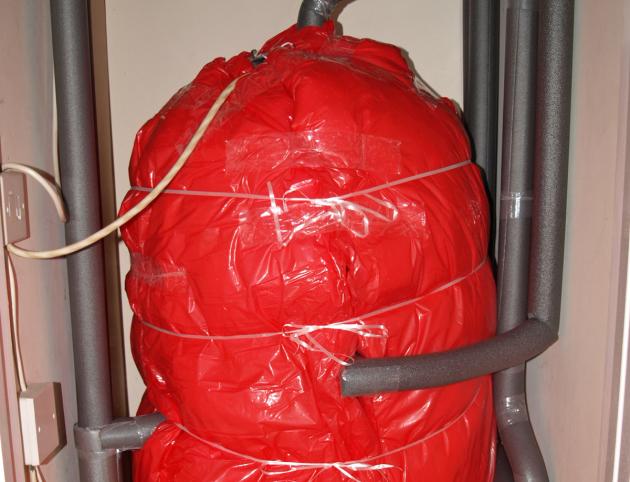
Water Tank and Pipe Insulation
Insulation
What is pipe insulation?
There is a complex network of water pipes in most homes in the UK. As many of these pipes are located in the loft, they are more likely to freeze in the winter (if cold water pipes), but also they can lose heat (if hot water is sitting in them). To minimise the risk of both freezing and heat loss, these copper pipes can be insulated fairly cheaply with pipe insulation, often referred to as pipe lagging. Lagging is simply a tube of insulating material with a slit all the way down its length, which is fitted over the pipe and then held in place with electrical tape if necessary (it should be a snug fit, so this tape might not be needed).
Fitting insulation to pipes is easy if the pipes are accessible and will cost from around £10. Professional help may be required to fit insulation to harder to reach pipework, which would naturally incur extra cost.
Insulating your hot water cylinder is one of the simplest and easiest ways to save energy and money. Fitting a British Standard ’jacket’ around your cylinder will cut heat loss by over 75%. If you already have a jacket fitted, check that it’s at least 80mm thick. If not, it’s well worth treating your old cylinder to a new winter coat! When purchasing the tank insulation jacket, it is worth going to your DIY store knowing the height and girth of your water cylinder to ensure you buy one that fits snuggly, and it is important the jacket that you buy conforms to British Safety Standard BS 5615 (1985).
If everyone in the UK topped up their hot water tank insulation to the full recommended thickness of 80mm, there would be enough CO2 saved per year to fill 5.3 million double decker buses.
A hot water cylinder jacket is a low cost product and is a simple DIY job.
Benefits
Fitting a British Standard ’jacket’ around your cylinder will cut heat loss by over 75%.
A new, 75mm thick hot water cylinder jacket will save you around £35 per year.
Insulation for hot water pipes will save you around £10 a year.
You will save about 170kg of carbon dioxide (CO2) when you fit a British standard hot water cylinder jacket and around 60kg of CO2 with pipe insulation.
Limitations
Payback time is not particularly cost effective, unless you use a lot of gas.
Cost
A new hot water tank jacket will save you about £35 per year, and cost you about £15 to install as a DIY job. This means it will payback in under 6 months and will also reduce your carbon footprint by 170kg per year.
Primary pipe insulation will save you about £10 per year, and cost you the same to install as a DIY job. This means it will payback in about a year and will also reduce your carbon footprint by 50kg per year.
Insulating a floor means adding an insulating material beneath the floorboards, thereby reducing heat escaping through the floor into the ground. Approximately 15% of heat is lost from a house via this route. Insulation also acts to prevent draughts coming up through the floorboards. In addition the household should also consider insulating the gaps between the skirting boards and the floor, which also helps in reducing draughts.
Floor insulation is most commonly done when putting a new floor in place, but most floors can be retrofitted with insulating material, and this will make a large saving to your overall heating bill. Depending on how confident you are with DIY, it is possible to install floor insulation yourself.
Filling the gap between the skirting boards and the floor can save about £25, recouped within the year (assuming a £20 material cost).
Since the insulation will slow the movement of heat through the floor, the home will feel more comfortable and warmer in the winter, but cooler in the summer months.
You can reduce your carbon footprint by about 240kg per year by installing floor insulation and almost 100kg if you fill the gaps between the floor and skirting boards.
According to the Energy Saving Trust, installing floor insulation underneath a wood surface saves about £60 per year, which would mean a payback of 2 years based on recouping the material costs (approximately £100).
Limitations of floor insulation
If you are wishing to installing the floor insulation as a DIY project, you will need to move furnishings and potentially remove carpets and floorboards.
Additional costs may add up, if once you remove the floorboards, you discover that some are rotten, therefore the overall insulation costs may be higher than previously predicted.
Cost of floor insulation
Professional installation costs start at £770, dependant on the size of the floor space installation.
DIY Cost for wooden floor insulation cost approximately £100 and it will cost about £20 to buy the materials to fill the gaps between the floor and the skirting boards.
Installing floor insulation
Interested in having floor insulation installed? The Green Homes Grant is a Government run scheme lasting until March 2022. The scheme offers grants up to £10,000, under-floor insulation is a primary measure that can be installed utilizing the scheme.
If you are interested in the Green Homes Grant, we advise looking in to this on the Government website.
Think we missed something? Do you have a different opinion?
Solar PV panels have reduced in price by approximately 40% as a result of falling manufacturing costs and increased competition in the market. This means you can now get a decent sized solar PV system installed on your roof for between £4,000 and £6,000.
We would always recommend trying to maximise the number of solar panels that you go for – but this is often limited by the size of the roof space.
A 250w solar panel will typically cost between £300 and £500 and each panel is approximately 1.7m2. Therefore for a 3.5kW system, you are looking at a price of between £4,200 and £7,000, and this would take up approximately 23.8m2.
For a smaller 2.0kW system, you are looking at paying between £2,400 and £4,000 and this size system would take up approximately 13.6m2.
Obviously, the more solar panels you have on the roof, the more electricity you can produce. This therefore means you need to buy less electricity from the grid (as you can use the electricity you produce).
You can also get payment from your energy supplier, provided they are signed up to the Smart Export Guarantee (SEG).
The SEG is a legal obligation for any electricity supplier that supplies at least 150,000 customers to offer an export tariff to those with solar panels for each kWh produced.
The actual export tariffs these energy companies offer can be flat, variable or smart rate (adjusting based on wholesale prices), however the tariff must always be greater than zero (even when wholesale prices of electricity are negative).
There is quite a large discrepancy between the different SEG rates from the different providers – for example in August 2020, Utility Warehouse offer £0.02 / kWh, while Octopus are offering £0.055 / kWh.
SEG versus FIT
The SEG was introduced in January 2020 to replace the older Feed in Tariff (FIT) scheme, which closed to new customers on 31st March 2019.
The main difference between SEG and the FIT scheme was that the FIT scheme paid the owner of the solar panels for both producing the electricity and also for exporting it, while the SEG only pays for exporting it – therefore the SEG is far less generous.
Eligibility for the SEG
To be eligible for the SEG, the solar system being installed needs to be under 5MW (or approximately 20,000 solar panels – so most homes should be okay!). The solar system must also be installed by an MSC certified installer. Finally you need to have a smart export meter installed to measure how much of the electricity is being exported back to the grid.
SEG Tariff vs. using the electricity at home
To maximise the return from the solar PV installation, you will want to use as much of the electricity you produce in your home as possible. In the most basic terms, if you use the electricity you produce in the home, then you don’t need to buy it from your energy provider (a saving of around 15p/kWh). If you export it, you only get paid a fraction of this (£0.05 at most!) – so if you can use it in the home, then it is strongly recommended to use it!
By incorporating battery storage technology into your solar system setup – it allows you to store the electricity you produce to use as and when you need it. You can learn more about battery technology by clicking here.
Solar PV worked examples
So, to start with, we will look at a typical 3kWh system (installed on a new build with a ‘higher’ energy efficiency requirement rating) and see the annual return, based on the percentage you use in the home versus how much you export. Over a year, a 3kW system would expect to be around 90% efficient and generate about 2700 kWh of electricity (an average home used 4,800 kWh per year).
Worked Examples – % of Electricity used in the Home : % of Electricity Exported to the Grid
100% : 0%
75% : 25%
50% : 50%
25% : 75%
Total kWh/year
2700kWh
2700kWh
2700kWh
2700kWh
SEG (@£0.05/kWh)
£0
£33.75
£67.5
£101.25
Used by household (£0.15/kWh)
£405
£303.75
£202.5
£101.25
TOTAL RETURN
£405
£337.50
£270
£202.5
These numbers are correct as of 18th August 2020.
What impacts the initial cost of your solar PV installation?
The cost of your solar PV system is dependent on two things:
1. The size of the installation
Obviously the larger the system you install, the more electricity it has the potential to produce. The average solar PV system installed in the UK now is 3.5KW, which – working at 90% efficiency – will produce approximately 3150kWh of electricity (depending how much sun you get in your part of the country). As reference, an average house uses approximately 4,800kWh. The number of panels you can install will probably be limited by either the amount you can afford or the size of your roof. Suppliers will also charge different prices for their installation services and it’s important to ensure they are MCS-accredited to qualify for the SEG
2. The quality of the solar panels used
Not all solar panels are the same!
See our guide to the different types of solar panels for more details, but in a nutshell there are three types:
Monocrystalline solar cells (made from single crystals grown in isolation) are the most efficient at 15-22%, but they are also the most expensive type of solar cell.
Polycrystalline cells are cheaper than monocrystalline, but their efficiency is far lower at just 13-17%.
The cheapest solar cells of all are amorphous solar cells, which also have the bonus of being more efficient in low-light (great if you live in the UK!) but they are the least efficient overall at 9%.
How are the efficiency figures calculated? Well it is determined by how many watts of power are produced in a square meter. 100% efficiency means that a square meter of panel would create 1,000 watts. Therefore a panel rated at 18% would create 180 watts from every m2; it follows that panels with higher efficiency ratings create more electricity (per meter squared) and this is reflected in the price.
As you can see in the table above, the actual price of your installation varies depending on the types of panel you get installed, so a 4kW system could cost as little as £4,800, or as much as £8,000. In the table below we have assumed we are exporting 50% (so this is eligible for the SEG) and 50% is used within the home (so a saving on the electricity bill).
System A
System B
System C
Cost
£4,800
£6,400
£8,000
Type of Panel
Amorphous
Poly
Mono
Efficiency of Panel
9%
15%
20%
Output (kWh)
3200
3500
3700
SEG (£)
80
87.5
92.5
Savings on electricity bill (£)
240
262.5
277.5
Annual Return (£)
320
350
370
Payback of your Solar System
So looking at ‘System A’ in the table above, the system costs £4,800 and the annual return is £320 per year, so it will take approximately 15 years to pay back. In addition, electricity prices are expected to go up over time, so the £0.15 you save for every kWh of electricity you use in your home will actually increase – and could be nearer 20 pence in just 5 years – therefore the absolute return could actually become bigger.
Once you have ‘made your money back’, then any money you make is paid directly to you as profit – so you will be in line to receive the SEG indefinitely while you are exporting electricity.
There are a few other costs to think about with solar PV
Maintenance
There are maintenance costs associated with your solar PV installation, including cleaning them at least twice a year to ensure they are working as efficiently as they can.
Replacing Inverters
In addition, despite the solar panels being good for 20 years plus, the inverters have a lifespan of about 10 years, and replacing these will cost just shy of £1,000 – so factor this in to your calculations when your solar installers give you a quote.
You will need to insure you solar PV array as part of your home insurance, so your insurance premium payments will slightly increase.
Planning Permission
Installing solar panels on your roof does normally not require planning permission. However if you live in a conservation area or world heritage site, you will need to speak to your planning authority to get the necessary permission. Note: there will also be legal fees associated with this.
Installing Solar PV
Are you thinking about installing a solar PV system at home? We have scoured the country for the best tradespeople, so that we can make sure we only recommend those we really trust.
If you would like us to find you a local installer to help install a solar PV system in your home, just fill in the form below and we will be in touch shortly!
Can I get cavity wall insulation for free?
July 21, 2016
Cavity wall insulation is a great way to increase the energy efficiency of your home – and increased energy efficiency means lower energy bills.
Until relatively recently, pretty much everyone was entitled to free cavity wall insulation. However in the last few months things have changed slightly.
The reason for this is that cavity wall insulation installers are paid via a scheme known as ECO. Basically installers get paid an amount per tonne of carbon saved. This sounds a bit ridiculous, but imagine your home uses a certain amount of energy for heating – once the cavity wall insulation is installed, the amount of energy the home uses should drop because there is less heat loss. This saved energy is converted to carbon tonne savings (gas produces CO2 when it burns).
Typically, bigger houses will tend to see greater energy savings when the cavity wall insulation is installed.
big house – 10% saving of 45,000kWh of gas is 4,500kWh
small house – 10% saving of 17,000kWh of gas is 1,700kWh
This means the amount of funding a larger property gets will tend to be bigger than a smaller property. The same is true when a property has a very old boiler, the savings are greater in these types of home.
ECO rates have dropped
The reason that 100% free cavity wall insulation doesn’t really happen that much any more is that despite the carbon savings being the same as they have always been, the rates the cavity wall installers are paid per tonne of carbon saved have dropped considerably.
Imagine an average cavity wall job costing £1,000 on a 3-bed end of terrace property. Previously, under ECO, the installer would have been paid £1,500 to carry out the install and hence this was 100% free for the homeowner.
Now though, the installer may only be getting £500 from ECO funding, so to cover the rest of the job they need a homeowner contribution.
Homeowner contributions for cavity wall insulation
As we have hopefully explained clearly above, it is rare now for a house to get 100% funding for free cavity wall insulation. Instead, the household will have to make some contribution to get the insulation installed. How much is entirely dependent on the energy performance certificate carried out by a qualified energy assessor – this will all be calculated by the cavity wall installer who will pay for an assessor to carry out this report.
The difficulty is that the homeowner contribution can vary from house to house; so while your next door neighbour (with a bigger property and more wall to insulate) may only pay £200, you could be given a quote for £500 or more. The key though is to find a good tradesman.
Avoid cowboy cavity wall installers!
Cavity wall insulation is a fantastic energy saving solution and is installed on millions of properties across the UK, however it is does not have a 100% success rate. There are some cavity walls that should not be filled with cavity wall insulation, regardless of whether the energy savings make it an attractive proposition. Properties that are privy to driving rain, or that are located on the coast, should not have cavity wall injected into the void between the skins of brick.
Most installers would know not to install cavity wall insulation where it is not suitable. Others, often desperate for work, will not make you aware of the potential issues that may occur further down the line. Unfortunately there are lots of unscrupulous ‘cowboy’ installers out there, so the key is to avoid them and only get good qualified tradesmen.
How to ensure you are getting good quality free cavity wall insulation
The number one thing you need to do to ensure you are getting a highly rated installer is to check whether the company offering you free cavity wall insulation has the Green Deal Quality Mark and PAS2030 processes in place.
PAS2030 is the certification that a company needs to carry out work under ECO scheme and will provide you with the guarantees and piece of mind that the work will be carried out to a high standard. For any company to achieve the PAS2030 mark of quality, they will need to have gone through rigorous testing to ensure their business practises are up to scratch, helping avoid the prospect of cowboys. Unfortunately, even PAS2030 doesn’t completely remove cowboys but it should certainly help!
If you do want to get a decent installer you may wish to ping us through your details below:
We only work with PAS2030 installers and we seek feedback on all our installers ensuring they know what they are talking about!
Interested in learning more about the funding streams within ECO? Read on to learn more!
HHCRO, CSCO and CERO
So ECO works on the energy savings from your home. However just to complicate things, there are three different streams of ECO funding – HHCRO, CSCO and CERO.
ECO is designed to address two areas: one, to help vulnerable members of society meet the rising cost of energy prices by increasing insulation and offering more efficient sources of heat; and two, to help make more expensive measures like insulating solid and hard-to-treat wall insulation more cost effective. HHCRO addresses the first area while CSCO and CERO address the second.
Postcodes and Free Cavity Wall Insulation – CSCO / CERO
Some houses in the UK fall into CSCO / CERO postcodes – these areas are eligible for cavity wall insulation grants. The properties are situated in areas of low income, vulnerable households in rural areas or the properties are identified as hard to ‘hard to treat’ (e.g. thinner cavities).
You can use the link below to see if your property falls into one of these areas:
Currently, around 25% of properties fall into the postcode area, but even if you are in those locations, you may still need to make a contribution depending on the carbon savings resulting from the install of cavity wall insulation.
Qualifying for Free Cavity Insulation through Income – HHCRO
There is another avenue of ECO grant funding based on your circumstances; this is called the ‘Home Heating Cost Reduction Obligation’ (HHCRO), or Affordable Warmth. If the householder is on income support (with related top-ups), receives pension credit or tax credits, you could be eligible for free insulation. In this instance, all that is required is an Energy Performance Certificate (EPC) on the property, and you will also need to provide proof of your entitlements.
Paying for Cavity Wall Insulation
If you know for a fact that you don’t qualify for insulation through any of the means mentioned above, you can still get it installed; and after loft insulation, it offers one of the fastest returns on investment.
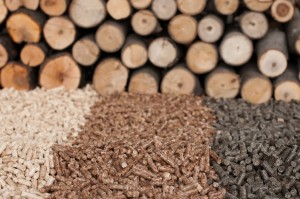
Biomass boilers are very similar to conventional gas boilers that you will be familiar with, providing you with space heating and hot water for the entire home, but instead of using gas (or oil) to produce the heat, they combust sustainably sourced wood pellets.
Using wood in place of fossil fuels helps to prevent long-term climate change, since the carbon dioxide released during the combustion was actually absorbed while the tree was growing, so they are essentially carbon neutral.
Each year, approximately 8.5 million tonnes of wood goes into landfill in the UK; this waste wood could be used in either biomass boilers (if converted into the pellets) or burned in wood burning stoves. This would not only provide heat and hot water, but in doing so, it would also ease the pressure on landfill capacity.
How does a biomass boiler work?
A biomass boiler works in a very similar way to conventional boilers, combusting fuel to produce heat that is then used to heat water. Biomass boilers are normally substantially bigger than their fossil fuel-burning brothers though, for a number of reasons. Firstly since they are burning wood pellets as opposed to gas, the boiler needs to be larger to hold the larger volume of fuel.
In addition, you may wish to install an automatic feed hopper on your biomass boiler, which will require additional room. This hopper stores a large volume of the wood pellets that are then automatically fed into the boiler as required, meaning that the boiler needs to be refuelled very infrequently.
It is also a good idea to have a store of the wood pellets at your property so you can keep producing heat if for some reason there is an issue with your fuel supplier. Ideally this should be close to where the fuel is delivered to your home, to minimise the distance you have to carry it.
Most residential biomass boilers can also run on logs as well as the wood chips, so if these are in plentiful supply or if you can source them cheaply or even for free, it will dramatically reduce the operational running cost of your biomass boiler.
Every four weeks or so, the biomass boiler will need to be emptied of the ash. This can be put straight onto a compost heap to help fertilise the soil.
Biomass boilers are designed to work all year round; however you may choose to turn them off in the summer. They can be coupled with solar heating or an electric shower, providing you with your hot water for washing only, during the warmer summer months.
How does biomass measure up against traditional fuels?
Biomass boilers measure up very favourably in terms of running costs vs. natural gas, heating oil and especially electricity. The numbers can all be seen in the table below.
Figures courtesy of Biomass Energy Centre
Fuel Type
Price per Unit
kWh per unit
Pence per kWh
Wood Chips
£100 / tonne
3,500kWh / tonne
2.9p / kWh
Wood Pellets
£200 / tonne
4,800kWh / tonne
4.2p / kWh
Natural Gas
4.8p / kWh
1
4.8p / kWh
Heating oil
60p / litre
10kWh / litre
6.0p / kWh
Electricity
14.5p / kWh
1
13.4p / kWh
Standalone boilers
A biomass boiler might simply be too big for your home, but smaller standalone wood burning stoves are also available, which are normally used to heat one room by burning logs or waste wood. These wood burning stoves can be fitted with a back boiler that uses the heat produced when the wood is combusted to heat water, that can then be used for either space heating elsewhere in the home or for hot water only.
Both standalone wood burning stoves and biomass boilers will need a vent, designed specifically for wood fuel appliances, with sufficient air movement for proper operation of the stove. Your existing chimney can be fitted with a lined flue, which is relatively inexpensive.
Can I get a free biomass boiler?
Under the Domestic Renewable Heat Incentive scheme, you will be eligible for payments towards the cost of installing the technology. These are quarterly, and over seven years, so you will still have to find the money to cover the upfront costs. How much funding you will receive depends on how energy efficient your home was before you installed your biomass boiler. You will start by having an EPC survey, and then payment rates are calculated by multiplying the ‘heat demand figure’ on your report by the current rate for biomass boilers. This means that some models will eventually be paid for fully by RHI payments, but many – especially top-end models – will not be covered completely. Find more information here.
Remember a carbon monoxide detector
It is really important when burning any type of hydrocarbon fuel (natural gas, coal, biomass) that you install a carbon monoxide detector in your home. In theory if all the fuel is 100% burned you produce heat, water and carbon dioxide, but in reality not all of the fuel burns. This means sometimes harmful gases like carbon monoxide can be emitted, which can be deadly. As long as you have a working carbon monoxide detector, you will be able to make full use of all the benefits a biomass boiler can bring.
Benefits
Biomass fuels are considered a renewable fuel – the carbon dioxide they produce when they are burnt is offset by the carbon dioxide they absorb while they are growing. Savings in carbon dioxide emissions are significant – up to 9.5 tonnes per year when a wood boiler replaces a solid (coal) fired system or electric storage heating.
Fuel savings are less significant, and if you replace a gas heating system with a wood burning system you may end up paying more for your fuel. But if you replace solid fuel or electric heating with the cheapest biomass fuel you could save between £170 and £390 per year. Typically, heating and hot water costs for a year will be around £1,000 in a detached property.
If you have a ready supply of logs at home you can effectively heat your home for free.
Limitations
There are increased maintenance requirements with this technology; for instance the wood pellets must be loaded on a regular basis to ensure it continues to provide energy. In addition, the ash bins need to be emptied from time to time.
You will need storage space to store the fuel at your home.
Wood costs often depend on the distance from your home to a wood supplier and whether you can buy and store wood in large quantities. If you have your own supply of wood fuel then this can significantly reduce your costs.
Cost
A standalone pellet stove may cost about £4,300 including installation; however for an automatically fed pellet boiler the cost is considerably higher at about £11,500.
A wood burner will cost anywhere between £500 and £3,000 depending on the size and style.
Installing a biomass boiler
Are you thinking about installing a biomass boiler? We have scoured the country for the best tradespeople, so that we can make sure we only recommend those we really trust.
If you would like us to find you a local installer, just fill in the form below and we will be in touch shortly!
Introduction to Solar Thermal
Renewables
What is solar thermal?
Solar thermal (also known as solar heating) harnesses the energy provided by the sun to provide thermal energy to heat water. The hot water produced by the solar heating can be used to supplement your domestic hot water (although the temperature might need to be topped up by a boiler), larger stores of water (like swimming pools), underfloor heating, and for space heating/cooling.
Unlike a solar photovoltaic cell array, which is designed to produce electricity, a solar heating system is designed simply to produce heat. A well-designed solar heating system will provide approximately 55% of your annual domestic hot water requirement. However, as it is reliant on the sun, your solar heating system will produce more heat in the summer months.
Types of solar thermal system
Solar heating systems all have a few components in common: a solar collector, insulated heat transport piping and heat storage. More complex systems also have electronic controls and freeze-prevention mechanisms (when situated in colder climates). There are three main types of solar collectors:
1. Flat panel solar collectors
These are the most common type of solar heating technology and consist of a box with a piece of glass on the top and a dark absorber plate on the bottom. Sunlight passes through the glazing on the top of the box, heating up the absorber plate and converting the solar energy into thermal energy. Copper pipes are attached on the top of the absorber plates, and the liquid flowing through these pipes absorbs the heat, which is then pumped away and stored until it is needed in the house.
2. Evacuated tube solar collectors
The evacuated tube systems tend to be more efficient, especially in cold or cloudy climates; however their advanced design makes them more expensive. These solar collectors consist of rows of parallel, transparent glass tubes. Each tube contains an absorber assembly and the entire tube is evacuated of any air (so it operates within a vacuum). The sunlight enters the glass tubes and hits the absorber assembly where it is absorbed. As this is operating within a vacuum, heat does not travel back from the absorber to the glass, so these are more efficient. A fluid transfers the heat from the absorber assembly through to the storage tank, where it can be used.
The two major advantages of evacuated tube collectors are that they can produce warmer water (so you will not need to supplement the temperature with a boiler) and they can also produce more hot water than flat-panelled solar collectors.
3. Plastic collectors
These are the cheapest type of solar collector and consist of black plastic pipe treated to withstand UV degradation. Hot water is simply pumped through the black plastic pipes, where it warms up (as the plastic absorbs the suns energy). Plastic collectors are most susceptible to ambient temperatures as there is no insulation in place, so if the outside temperature is cold, very little heat will be produced.
These are an ideal solution for swimming pools though, as they amplify the effects of the weather and its seasons. For example, most swimming pools are used in the summer, so installing plastic collectors will allow you to use the pool sooner in the year, and it will keep the temperature consistently higher.
Things to consider before installing a solar thermal heating system
As with solar photovoltaic cells, solar heating technologies require sunlight, so ideally you would install the technology on a south-facing roof that receives sunlight for most of the day to maximise the benefits. Likewise, the amount of heat you can produce is directly proportional to the amount of installed surface area you have; therefore if you only have a small roof, then this technology may not be appropriate.
In addition, you will produce more hot water in the summer, as the energy from the sun is more intense at this time, therefore you may well have to supplement the temperature of the water in the winter using a boiler. To boost the system, your boiler must be compatible with your solar heating system, but currently most combi or CHP boilers are not compatible. It is therefore very important that you check with your installer before undergoing any works.
If you live in much colder climates you may need to have some sort of antifreeze within your system (when water freezes it turns to ice it expands, potentially causing cracks in the pipes).
If you live in a listed building please note the restrictions. Like with many green technologies, it is worth contacting the local planning office to get permission to place the panels, to save yourself problems further down the line.
Installing solar thermal normally requires a new hot water tank
For many of us with old heat-only boilers, we have a hot water tank hidden away in the airing cupboard. Typically these hot water tanks are heated by a boiler and were purpose-built.
Since the introduction of the RHI, there has been a huge increase in the number of people installing solar thermal in their homes.
If you decide to install solar thermal in your home you will need a hot water tank to store the hot water produced from your collector – the problem though, is that you can’t plumb one of these systems into the older hot water tanks that are historically found with boilers.
Twin coil cylinders
The reason for this is that inside the hot water tank there needs to be a separate coil for each ‘hot water source’. In this case you would need a coil for the solar thermal and one for the hot water. Normally in a residential solar store (i.e. a hot water tank with a solar coil), the solar is connected to the lower coil and the boiler (or main heating source) is connected to the top coil.
Solar coils are much larger than traditional boiler coils because they need a far bigger surface area to transfer their heat into the water compared to a boiler. The reason is that the hot water travelling through the solar thermal coil is at a much lower temperature than the water travelling through a boiler coil.
As a guide, the surface area of a solar thermal coil needs to be in excess of 1.5m2, while a boiler coil can be as little as 0.6m2 – this increased surface area maximises the opportunity for heat transfer and is a must based on the lower water temperature flowing through the coil.
If you cast your mind back to your GCSE science, you will know that heat rises and therefore within a hot water tank, the water at the top of the tank is far warmer than the bottom of the tank.
In a solar thermal store, it is important that this temperature differential is maximised and this is achieved by making the hot water tank rather large and tall. So while the top of the tank could achieve temperatures of 600C plus, the water at the bottom of the tank might be as low as 150C degrees. What this means is that even if the solar thermal is only producing water to 200C degrees, it will still contribute to the hot water demand of the property.
Storing the hot water you produce on sunny days
Since the hot water tanks used for solar thermal systems tend to be big, they tend to be able to store far more hot water than is actually required by most families that install one of them. Since solar thermal is intermittent, (i.e. it produces much more hot water when the sun is shining), this oversized heat tank allows you to store the hot water; thereby taking advantage of favourable conditions a day or two later to help minimise the need to use the boiler.
Maximising return on your investment
The Renewable Heat Incentive (RHI) is now up and running, which works in a similar way to the Feed-in Tariff, rewarding you for any hot water you produce from renewable sources. You can find all the information you need about the RHI on our page here.
Benefits
Solar water heating will provide hot water throughout the year, although less so in winter.
Once you have installed the equipment, it provides a free source of hot water.
Limitations
All solar technologies are reliant on the sun shining; hot water will not be produced at night.
The maximum water temperature that can be achieved via solar heating is significantly lower than that achieved with gas or electricity-based water heaters.
Cost
The cost of installing a solar hot water system ranges from approximately £1,500 for a DIY system, to £2,000-£5,000 for a commercially installed system. These prices however, are dependent on the size of the system. The savings resulting from the installation will be approximately £50 – £90 per year.
Installing Solar Thermal
Interested in installing a solar thermal system at home? We have scoured the country for the best tradespeople, so that we can make sure we only recommend those we really trust.
If you would like us to find you a local installer to help install a solar thermal system in your home, just fill in the form below and we will be in touch shortly!
Windmills (now in the form of wind turbines) have been used for millennia to convert the wind’s kinetic energy into mechanical energy. As early as 200 B.C., mechanical energy was used for specific tasks including grinding grain and pumping water. Nowadays, wind turbines harness kinetic energy from the air and convert it into electricity via a generator.
Much like solar PV installations, you can purchase a domestic wind turbine to supply as much or as little electricity as you want. If you are hoping to limit your dependence on the mains as much as possible, you will need a larger turbine, or multiple smaller turbines. If you are simply looking to produce enough electricity for a light in your garden shed, you can get away with a very small turbine.
Below we look at the different types of wind turbine system you can install in your property.
Battery-less grid tied systems
Battery-less grid tied systems are the simplest, most effective and most environmentally-friendly wind turbine systems. Their role is simple: to produce the most electricity possible to provide electricity for your home and also feed into the grid. Due to the availability of grants such as the feed-in tariffs in the UK, this type of system has grown enormously in popularity in recent years. In these installations, the home owner can effectively sell the surplus energy back to the utility company. There are no batteries in the system, so this removes a lot of the system complication and maintenance. The lack of batteries also makes it cheaper to install.
If your aim is to become completely unreliant on the grid, then you need to ensure the electricity produced by your battery-less grid tied system is in excess of your total electricity usage for the year. However, this system should suit most budgets, because it will reduce reliance on the energy companies, by significantly reducing your bills. If you cannot produce all your electricity, the shortfall is simply made up with electricity from the grid.
There is one major drawback with this setup, and that is that if there is a electrical power cut then you will have no power for your home, because the inverter your energy goes through is connected to mains power, so you may require a generator (powered by diesel or oil) as a back-up policy.
Grid-tied system with battery backup
This is essentially the same as the grid-tied system above, but has a bank of batteries which means that if there is a grid power cut, the inverter can still get the electricity it requires to operate, so the installation will keep providing you with electricity. The constraints of this system are primarily associated with the batteries, which are expensive and require regular maintenance. Finally, add extra inefficiency into the system (ranging from 5 – 40%) and this is added to the constraint side.
Off-grid systems
This system has no connection at all to the grid, relying instead on batteries to operate if no wind is blowing. However if the capacity of these batteries is too low, then you could be without any power for a prolonged period of time. Having a system off-grid presents an ideal situation as you become completely independent from the grid, and you produce all the electricity you need. However, this type of system tends to be the most expensive and also is maintenance-heavy. If you have a garden shed that needs lighting then this system can work out relatively cheaply, but as soon as you are looking to upscale then it becomes very expensive.
In the next section we look at the components that you need for a successful wind turbine installation.
Benefits
Wind turbines allow you to produce 100% clean, free electricity.
Limitations
Wind turbines can be considered a bit of an eyesore and often have to be limited to rural areas.
Cost
Entirely dependent on the size of the wind turbine, from £1k – £10k.
Green Deal Home Improvement Fund GDHIF Re-launch
October 8, 2014
UPDATE: As of 30 March 2016, the government has stopped funding and the Green Deal Home Improvement Fund is closed to new applications. You can read about it here.
Green Deal Home Improvement Fund (GDHIF) – latest news on relaunch
We have just had official confirmation from DECC that the Green Deal Home Improvement Fund (or GDHIF as it is more commonly known) is due to relaunch on the 10th December 2014 at 9am.
An additional £30m of funding has been made available by the Government for this second phase of the scheme – although it is now split into two pots, £24m for solid wall insulation and £6m for the two measures from the list of home improvements under the scheme.
What are the Headline GDHIF changes for this 2nd round of funding?
The relaunch of GDHIF this December will see a reduction in the amount of funding available for solid wall insulation – this has been reduced from £6,000 under the old scheme to £4,000 under the revised version. It also will now only cover 67% of the total cost of works, while under the old scheme it covered 75%.
While the funding is obviously lower, in our opinion it is still a fantastic time to take advantage of the offer if you live in a solid wall property!
The other major change this time round is that flue gas heat recovery units are not allowed, therefore people installing boilers with these units will no longer be able to do so. You will however still be able to install a boiler + another measure and get the £1,000 back.
The £100 towards the Green Deal Report is still in place (which allows you to access GDHIF) as well as the £500 new home owners bonus for those that have bought a property in the last 12 months.
This means you can still get a non-means tested grant totalling £5,600 to improve the energy efficiency of your home – so pretty good in out opinion.
If you want to learn more about the relaunched GDHIF scheme, please go to our main page which can be accessed by clicking here. This provides details about the eligibility requirements for the scheme as well as detailing the different measures you can get installed.
GDHIF Case Studies and Success Stories
When the previous GDHIF was live, TheGreenAge facilitated 1000’s of successful Green Deal Assessments, and with our partners in the Greater London area, we carried out 100’s of successful installations including heating systems, solid wall insulation and cavity wall insulation to name but a few.
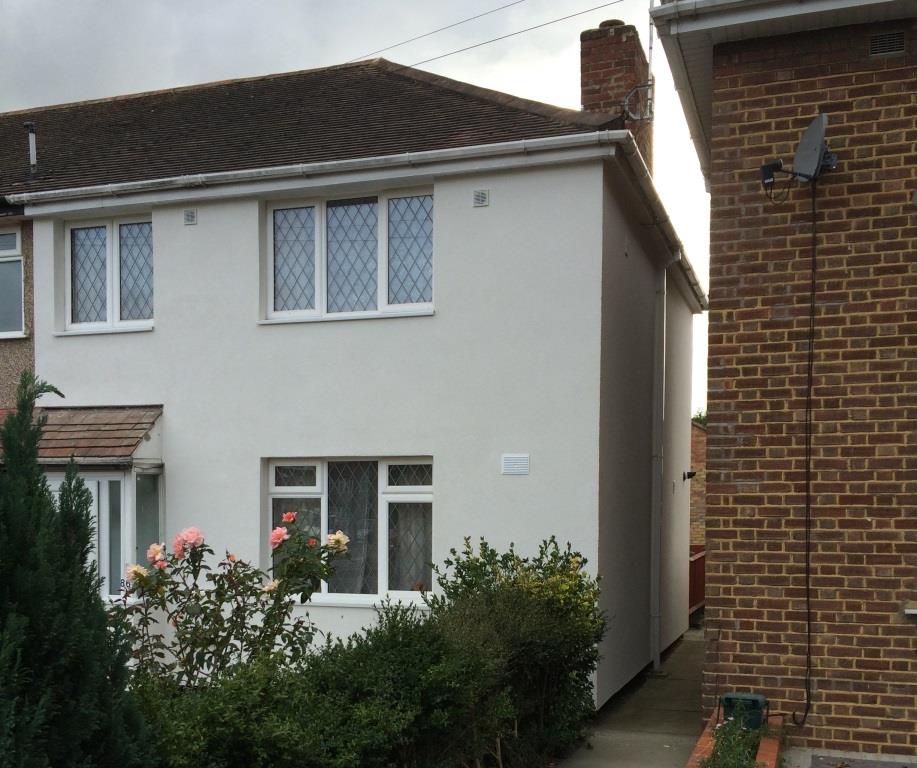
You can see more detailed case studies of some of our installations by clicking here. Below however is a small snapshot of what has been successfully installed (solid wall insulation, high energy efficient boilers and double glazing):
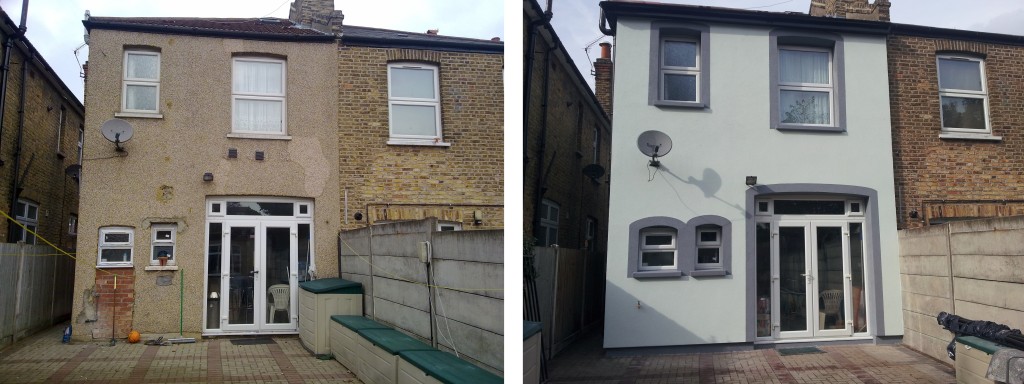
EWI Solid Wall insulation installed on a semi-detached property in Hounslow, London
External solid wall insulation at the back of the property, Tooting London.
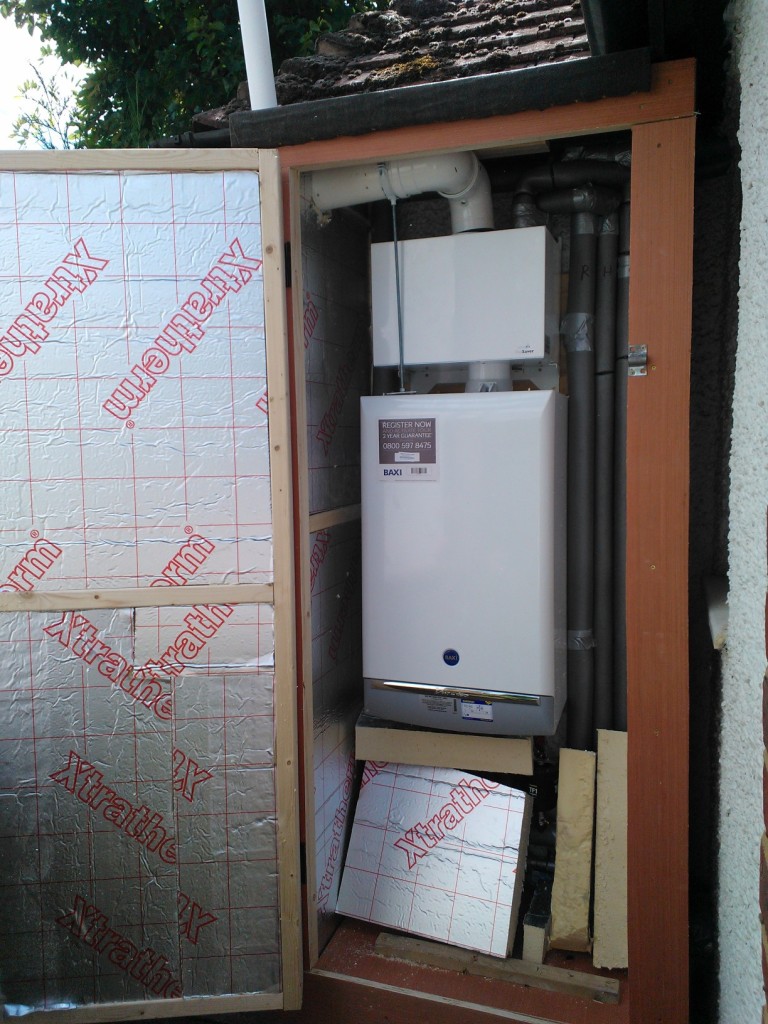
Baxi Duotec high energy efficient boiler with a flue gas heat recovery system
GDHIF – how do I apply?
When the previous scheme was up and running, earlier in 2014, it proved to be extremely popular and in fact over subscribed, resulting in the funds being spent rather too quickly. Many customers were disappointed to miss out on the vouchers, which has probably prompted the Government to act and re-instate the scheme.
If you are interested in the GDHIF and would like some more information please sign-up using the form below and we will call you back to discuss a few more details. Otherwise if you have any other questions please send us an email us to: mailbox@thegreenage.co.uk. Otherwise stay tuned to these pages for further updates.
Remember, our Green Deal Assessments are just £132, but if you decide to go through with the GDHIF scheme you are eligible for a £100 rebate on the cost of assessment so the total cost to you is just £32!
Think we missed something? Do you have a different opinion?
Comment below to get your voice heard…
This website uses cookies. By continuing to use our website you agree to our Data Protection Policy, which you can view here.OK
Privacy & Cookies Policy
Privacy Overview
This website uses cookies to improve your experience while you navigate through the website. Out of these, the cookies that are categorized as necessary are stored on your browser as they are essential for the working of basic functionalities of the website. We also use third-party cookies that help us analyze and understand how you use this website. These cookies will be stored in your browser only with your consent. You also have the option to opt-out of these cookies. But opting out of some of these cookies may affect your browsing experience.
Necessary cookies are absolutely essential for the website to function properly. This category only includes cookies that ensures basic functionalities and security features of the website. These cookies do not store any personal information.
Any cookies that may not be particularly necessary for the website to function and is used specifically to collect user personal data via analytics, ads, other embedded contents are termed as non-necessary cookies. It is mandatory to procure user consent prior to running these cookies on your website.