The Cost of a Solar PV System
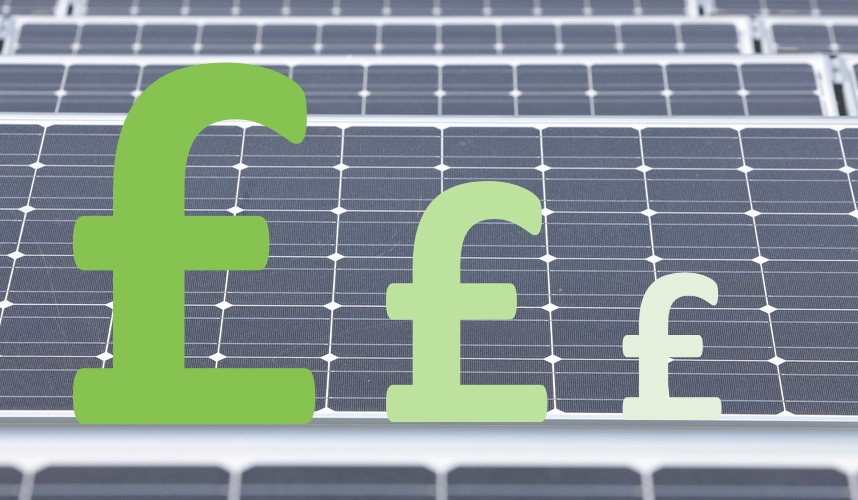
    Renewables

How much do solar panels cost?

Solar PV panels have reduced in price by approximately 40% as a result of falling manufacturing costs and increased competition in the market. This means you can now get a decent sized solar PV system installed on your roof for between £4,000 and £6,000.

We would always recommend trying to maximise the number of solar panels that you go for – but this is often limited by the size of the roof space.

A 250w solar panel will typically cost between £300 and £500 and each panel is approximately 1.7m2. Therefore for a 3.5kW system, you are looking at a price of between £4,200 and £7,000, and this would take up approximately 23.8m2.

For a smaller 2.0kW system, you are looking at paying between £2,400 and £4,000 and this size system would take up approximately 13.6m2.

Obviously, the more solar panels you have on the roof, the more electricity you can produce. This therefore means you need to buy less electricity from the grid (as you can use the electricity you produce).

You can also get payment from your energy supplier, provided they are signed up to the Smart Export Guarantee (SEG).

The SEG is a legal obligation for any electricity supplier that supplies at least 150,000 customers to offer an export tariff to those with solar panels for each kWh produced.

The actual export tariffs these energy companies offer can be flat, variable or smart rate (adjusting based on wholesale prices), however the tariff must always be greater than zero (even when wholesale prices of electricity are negative).

There is quite a large discrepancy between the different SEG rates from the different providers – for example in August 2020, Utility Warehouse offer £0.02 / kWh, while Octopus are offering £0.055 / kWh.

SEG versus FIT

The SEG was introduced in January 2020 to replace the older Feed in Tariff (FIT) scheme, which closed to new customers on 31st March 2019.

The main difference between SEG and the FIT scheme was that the FIT scheme paid the owner of the solar panels for both producing the electricity and also for exporting it, while the SEG only pays for exporting it – therefore the SEG is far less generous.

Eligibility for the SEG

To be eligible for the SEG, the solar system being installed needs to be under 5MW (or approximately 20,000 solar panels – so most homes should be okay!). The solar system must also be installed by an MSC certified installer. Finally you need to have a smart export meter installed to measure how much of the electricity is being exported back to the grid.

SEG Tariff vs. using the electricity at home

To maximise the return from the solar PV installation, you will want to use as much of the electricity you produce in your home as possible. In the most basic terms, if you use the electricity you produce in the home, then you don’t need to buy it from your energy provider (a saving of around 15p/kWh). If you export it, you only get paid a fraction of this (£0.05 at most!) – so if you can use it in the home, then it is strongly recommended to use it!

By incorporating battery storage technology into your solar system setup – it allows you to store the electricity you produce to use as and when you need it. You can learn more about battery technology by clicking here.

Solar PV worked examples

So, to start with, we will look at a typical 3kWh system (installed on a new build with a ‘higher’ energy efficiency requirement rating) and see the annual return, based on the percentage you use in the home versus how much you export. Over a year, a 3kW system would expect to be around 90% efficient and generate about 2700 kWh of electricity (an average home used 4,800 kWh per year).

Worked Examples – % of Electricity used in the Home : % of Electricity Exported to the Grid

100% : 0% 75% : 25% 50% : 50% 25% : 75%
Total kWh/year 2700kWh 2700kWh 2700kWh 2700kWh
SEG (@£0.05/kWh) £0 £33.75 £67.5 £101.25
Used by household (£0.15/kWh) £405 £303.75 £202.5 £101.25
TOTAL RETURN £405 £337.50 £270 £202.5

These numbers are correct as of 18th August 2020.

What impacts the initial cost of your solar PV installation?

The cost of your solar PV system is dependent on two things:

1. The size of the installation

Obviously the larger the system you install, the more electricity it has the potential to produce. The average solar PV system installed in the UK now is 3.5KW, which – working at 90% efficiency – will produce approximately 3150kWh of electricity (depending how much sun you get in your part of the country). As reference, an average house uses approximately 4,800kWh. The number of panels you can install will probably be limited by either the amount you can afford or the size of your roof. Suppliers will also charge different prices for their installation services and it’s important to ensure they are MCS-accredited to qualify for the SEG

2. The quality of the solar panels used

Not all solar panels are the same!

See our guide to the different types of solar panels for more details, but in a nutshell there are three types:

How are the efficiency figures calculated? Well it is determined by how many watts of power are produced in a square meter. 100% efficiency means that a square meter of panel would create 1,000 watts. Therefore a panel rated at 18% would create 180 watts from every m2; it follows that panels with higher efficiency ratings create more electricity (per meter squared) and this is reflected in the price.

>>> How solar return changes based on pitch and shading <<<

As you can see in the table above, the actual price of your installation varies depending on the types of panel you get installed, so a 4kW system could cost as little as £4,800, or as much as £8,000. In the table below we have assumed we are exporting 50% (so this is eligible for the SEG) and 50% is used within the home (so a saving on the electricity bill).

System A

System B

System C

Cost

£4,800

£6,400

£8,000

Type of Panel

Amorphous

Poly

Mono

Efficiency of Panel

9%

15%

20%

Output (kWh)

3200

3500

3700

SEG (£)

80

87.5

92.5

Savings on electricity bill (£)

240

262.5

277.5

Annual Return (£)

320

350

370

Payback of your Solar System

So looking at ‘System A’ in the table above, the system costs £4,800 and the annual return is £320 per year, so it will take approximately 15 years to pay back. In addition, electricity prices are expected to go up over time, so the £0.15 you save for every kWh of electricity you use in your home will actually increase – and could be nearer 20 pence in just 5 years – therefore the absolute return could actually become bigger.

Once you have ‘made your money back’, then any money you make is paid directly to you as profit – so you will be in line to receive the SEG indefinitely while you are exporting electricity.

There are a few other costs to think about with solar PV

Maintenance

There are maintenance costs associated with your solar PV installation, including cleaning them at least twice a year to ensure they are working as efficiently as they can.

Replacing Inverters

In addition, despite the solar panels being good for 20 years plus, the inverters have a lifespan of about 10 years, and replacing these will cost just shy of £1,000 – so factor this in to your calculations when your solar installers give you a quote.

>>> Microinverters can also increase Solar PV return – click to find out more <<<

Insurance

You will need to insure you solar PV array as part of your home insurance, so your insurance premium payments will slightly increase.

Planning Permission

Installing solar panels on your roof does normally not require planning permission. However if you live in a conservation area or world heritage site, you will need to speak to your planning authority to get the necessary permission. Note: there will also be legal fees associated with this.

Installing Solar PV

Are you thinking about installing a solar PV system at home? We have scoured the country for the best tradespeople, so that we can make sure we only recommend those we really trust.

If you would like us to find you a local installer to help install a solar PV system in your home, just fill in the form below and we will be in touch shortly!

    Introduction To Wind Turbines

    Renewables

What are wind turbines?

Windmills (now in the form of wind turbines) have been used for millennia to convert the wind’s kinetic energy into mechanical energy. As early as 200 B.C., mechanical energy was used for specific tasks including grinding grain and pumping water. Nowadays, wind turbines harness kinetic energy from the air and convert it into electricity via a generator.

Much like solar PV installations, you can purchase a domestic wind turbine to supply as much or as little electricity as you want. If you are hoping to limit your dependence on the mains as much as possible, you will need a larger turbine, or multiple smaller turbines. If you are simply looking to produce enough electricity for a light in your garden shed, you can get away with a very small turbine.

Below we look at the different types of wind turbine system you can install in your property.

Battery-less grid tied systems

Battery-less grid tied systems are the simplest, most effective and most environmentally-friendly wind turbine systems. Their role is simple: to produce the most electricity possible to provide electricity for your home and also feed into the grid. Due to the availability of grants such as the feed-in tariffs in the UK, this type of system has grown enormously in popularity in recent years. In these installations, the home owner can effectively sell the surplus energy back to the utility company. There are no batteries in the system, so this removes a lot of the system complication and maintenance. The lack of batteries also makes it cheaper to install.

If your aim is to become completely unreliant on the grid, then you need to ensure the electricity produced by your battery-less grid tied system is in excess of your total electricity usage for the year. However, this system should suit most budgets, because it will reduce reliance on the energy companies, by significantly reducing your bills. If you cannot produce all your electricity, the shortfall is simply made up with electricity from the grid.

There is one major drawback with this setup, and that is that if there is a electrical power cut then you will have no power for your home, because the inverter your energy goes through is connected to mains power, so you may require a generator (powered by diesel or oil) as a back-up policy.

Grid-tied system with battery backup

This is essentially the same as the grid-tied system above, but has a bank of batteries which means that if there is a grid power cut, the inverter can still get the electricity it requires to operate, so the installation will keep providing you with electricity. The constraints of this system are primarily associated with the batteries, which are expensive and require regular maintenance. Finally, add extra inefficiency into the system (ranging from 5 – 40%) and this is added to the constraint side.

Off-grid systems

This system has no connection at all to the grid, relying instead on batteries to operate if no wind is blowing. However if the capacity of these batteries is too low, then you could be without any power for a prolonged period of time. Having a system off-grid presents an ideal situation as you become completely independent from the grid, and you produce all the electricity you need. However, this type of system tends to be the most expensive and also is maintenance-heavy. If you have a garden shed that needs lighting then this system can work out relatively cheaply, but as soon as you are looking to upscale then it becomes very expensive.

In the next section we look at the components that you need for a successful wind turbine installation.

Benefits

Limitations

Cost


    Micro Hydroelectric Power

    Renewables

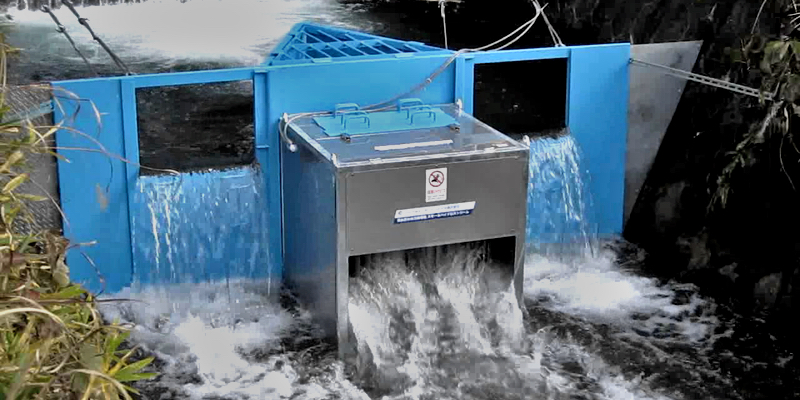
Hydroelectric power on a residential scale

It is well known that energy is generated by building dams over giant underwater turbines; however it is possible to use micro hydro generators (<100kW) or pico hydro generators (<5kW) on more modest water flows. In this section we explore where the technology can be used in a small scale area, for example the home or a community project. More about industrial size dams and solutions can be found in the green commercial section.

Obviously, there is a fundamental requirement on a steady stream of moving water, however they have an advantage over solar power (both solar PV and solar heating) and wind, in that they can run day and night and in any weather conditions provided the we don’t have a prolonged drought period where streams and brooks can dry up.

The amount of energy produced is reliant on two things:

The flow of water

The flow of water is simply the quantity of water flowing in the water source, which is measured in litres per second.

The head

The other key factor is the head – this refers to the pressure at which the water hits the turbine blades, and is the vertical distance from the water source to the generator. The larger the distance that the water falls before it hits the blade, the higher the head. Ideally both the flow and the head will be high, however if one of these is particularly high, while the other is low there is still the potential for a rich source of electricity.

You can estimate the number of kilowatts of energy produced by multiplying the flow (litres/sec) by the head (m) and multiplying by 9.81 (gravitational constant). Remember a typical house uses 4500kWh per year.

How does micro hydroelectric work?

The type of turbine that is used varies depending on the type of flow available, however typically a residential generator uses a pipe to collect water from a river or a stream. Using gravity the water moves through the pipe ‘downhill’ and a generator situated within the pipe acts to change the kinetic energy from the water flow into electrical energy.

When you have high head (the vertical distance from the water source to the generator), you are best using an impulse turbine (such as a Pelton turbine). This turbine is not submerged in the water, instead it sits in the air, and consists of buckets around a central hub. The nozzle at the end of the pipe converts the water into a fast moving jet. This jet of water is directed at the buckets, and the force of the the water causes the turbine to spin generating the power. The smallest type of high head turbine requires a head of at least 10-14 metres, and a water flow of 3-4 litres/ second, and this is rated at producing 200 watts of power.

For medium head water flows, it is best to use a reaction turbine. With a 3-12 metre head and a water flow of 45 litres/ second, you can get a reaction turbine that will produce about 3000 watts of power. Obviously as with the high head turbines, if either the head or the flow increases, you will see dramatic increases in the potential electricity your system is capable of generating.

For low head water flows, you obviously require a high flow rate, and in this situation an old style water wheel is the best. So the water fills the buckets which fill up, then pulling the wheel down, so the next bucket is filled, and this process is continued so the wheel spins (albeit very slowly). However the advantage of this type of system is that any potential blockages just simply wash through the system. Gearing can be used in conjunction with water wheels to increase the speed that the generator spins to help electricity production. Water wheels are also aesthetically pleasing on the eye!

Summary of micro hydroelectric power

If you are lucky enough to have a water flow source on your property that either has high head or sizeable flow, a micro hydroelectric generating system may be the perfect solution for your energy needs. Despite potential seasonal fluctuations in flow and head, a micro hydroelectric system will provide you with electricity 24/7, with very little maintenance necessary.

    Maximising Wind Turbine Return

    Renewables

Maximising wind turbine returns

To maximise the electricity contribution that a wind turbine can provide you with, two interlinked questions need to be considered:

How much electricity do you need your turbine to produce?

You first you need to decide exactly what you are trying to achieve by installing a wind turbine on your property. Are you trying to become completely independent from the grid? Are you simply trying to decrease you electricity bills having received a capital lump sum that you can invest? Do you simply want a wind turbine to power a light in your garden shed? Obviously the larger the turbine, the more electricity it will produce; however larger turbines will be more costly.

By looking at utility bills from previous quarters, you can get a feel for your total electricity usage over a year. You can get more accurate readings if you go around your property and complete an energy assessment of your current load (simply the total energy that each appliance in your house uses over a certain period of time). This involves producing a table with each appliance, its draw in watts (measured using a watt plug in meter – sometimes known as a wattmeter), and the estimated time of use in a 24 hour cycle. With all this information you can complete a much more accurate total yearly assessment of usage of your house (by multiplying usage for a 24 hour cycle by 365 days).

Having a feel for your total energy usage should help you decide what you are trying to achieve with your turbine. There are several wind turbine setups which we have described in more detail below.

How much electricity can your system produce?

It is really important that you have a target electricity figure in your mind that you are aiming to achieve, be it 50% of your total energy requirements, or becoming fully self sufficient. However, this may not be possible if there are constraints on your property, such as lack of space or low average wind speed.

Wind speed

This is the key factor and we usually use average wind speed as the measurement for your particular location. You cannot directly affect the average wind speed at your home; however your choice of site and tower height can have a dramatic impact on the wind resource. The power available for the wind that is blowing is the cube of the wind speed – this is absolutely fundamental, and this can be seen in the simple sums below:

This is excellent news, as the further you get away from the surface of the earth and its many obstructions (e.g. houses), the higher the wind speed: therefore the more power in the wind. This means it is important to try and maximise the height of any tower you use, to try to maximise the wind potential of your wind turbine system.

Swept area

The swept area is the circle that the turbine produces when spinning, so this is the diameter of the blades. The blades are driven by the power in the wind, so the larger your swept area, the more energy you can harness. Again the easiest way to illustrate this is with some more simple sums (apologies for those adverse to maths!), where the area of a circle is half the diameter2 x π. (π = 3.14)

Taking into account these two factors, you can see the maximum electricity you can produce. Remember that wind speed is free (although towers obviously cost more money the higher they are), while investing in bigger and bigger turbines gets more expensive.

What size turbine should you be looking at?

The size of your wind turbine is therefore determined by the amount of electricity you are looking to produce (but potentially constrained by windspeed and space), and secondly the amount of cash you have available.

Unlike solar photovoltaic cells that can be added to fairly easily as additional funds become available, the turbine blades would need to be replaced, and potentially the generator changed if you want to produce more power in the future. Home scale generators normally are between 8 and 25 feet in diameter (so a swept area of between 50 – 500 feet2). If you have an average wind speed of 10 mph, these could produce between 1,000 and 15,000 kWh. An average house uses approximately 4,800 kWh per year, so a 25 foot diameter turbine is going to produce a serious excess of power to sell back to the grid, or power more than one house.

Final thoughts on wind turbines

Planning permission

Contact your local council to ask about planning permission if you’re considering installing a wind turbine. The majority of local authorities are keen to encourage the installation of renewable energy systems. However it is a good idea to consult your neighbours before investing time and money into the planning phase, to allow them to voice any objections.

Average wind speed

Before you even consider investing in a wind turbine, you need to check your average wind speed. The Carbon Trust have created a tool that allows you to estimate the wind yield at your home location. You are looking for an average wind speed in excess of 5m/s. By providing simple information regarding your location and type of turbine, the tool will give you average wind speed and potential energy output.

Subsidies

In the UK, as a wind turbine owner you can benefit from the Feed-in tariffs. There are different allowances depending on the power output of your equipment. Wind turbines above 5MW are classified as commercial and alternatively benefit from the Renewable Obligation Certificates. The Feed-in tariffs basically provide you with a source of income for every kWh of electricity you produce. This is independent from any excess electricity you sell back to the grid, which you further benefit from in the form of the export tariff. This can really help a wind turbine become an economically viable system to put into your house.

    Wind Turbine Components

    Renewables

How does a wind turbine work?

When air hits the wind turbine, the blades spin, converting the wind’s kinetic energy into mechanical energy. This rotary motion then travels down the shaft and drives a generator where the electricity is produced. Typically most wind turbines are mounted in the horizontal plane (like the propeller of a plane), and therefore it is key the blades are facing directly into the wind.

The yaw angle is the difference in angle between the wind direction and the direction in which the rotors are facing. The aim is to minimise the yaw angle as much as possible, so most residential wind turbines tend to have tails which orientate the turbine to best capture the wind. Wind turbines should therefore be able to rotate 3600 on yaw bearings.

The turbine

There are 2 main styles of urban wind turbines:

Horizontal Axis Wind Turbines (HAWT)

This is a propeller type rotor mounted on the horizontal axis. As mentioned previously, the blades need to be aligned with the wind and this is done by either a simple tail, or an active yaw. These are more efficient at producing electricity than VAWTs however they are impacted more by changes in wind direction.

Vertical Axis Wind Turbines (VAWT)

These are aligned in the vertical axis (like the rotor blades on a helicopter). These are only really deployed within urban areas, where the flow of air is more uneven. Due to their alignment, wind direction has little impact on this type of turbine; however it is apparent that these are less efficient than their HAWT cousins.

In addition to HAWTs and VAWTs there are hybrid turbines that are cylindrical (imagine a gyroscope) – such as the energy ball.

At TheGreenAge, we suggest sticking with the HAWTs as they are the more proven technology, and are offered by more suppliers, so you will be able to get better value for money.

Most turbines tends to have two or three blades, two bladed turbines are cheaper but suffer from blade chatter which puts stress on the system, which can lead to increased maintenance further down the line. If you can afford to get a three bladed turbine, we suggest doing so, as these don’t suffer from this problem at all.

The tower

Three types of tower exist: tilt-up, fixed guyed and free standing. The purpose of these towers is to position the turbines in the best possible position to take advantage of the wind.

Tilt-up towers are held in position by four guy ropes one of which can be released, allowing you to lower the tower, so you can work on the turbine.

Fixed guyed towers are similar to tilt-up towers, except they are permanently fixed in place so you need to climb the tower to do any maintenance.

Free standing towers have no guy ropes. As such they require a very solid foundation. Therefore these are certainly the most expensive, but may well be the most aesthetically pleasing.

The inverter

Most wind turbines produce AC current, so this should be able to be directly fed into your home and the grid, however the voltage and frequency of the power produced is very erratic, so an inverter is used to convert the erratic AC to DC, then back to a smoother AC which can be synchronised with the grid, or for use directly into your home. Battery-based wind turbines normally operate at 12 or 48 Volts, and therefore the inverter must also act to convert this relatively low voltage to high voltage (UK mains is 240 volts). Battery-less systems may produce electricity with a voltage significantly higher (100 volts or more). Therefore in this situation, the inverter needs to be able to handle this higher voltage.

Batteries

In most wind turbine systems, the electricity does not power any appliances directly. Instead the electricity produced is stored in deep-cycle lead acid batteries which look very similar to the ones found in most cars today (although structurally different). The two most popular types of battery are GEL and Absorbed Glass Mat (AGM), which store the charge very well and do not degrade nearly as fast as the common lead acid (wet cell) battery. Both types of batteries are designed to gradually discharge slowly and recharge 80% of their capacity hundreds of times.

An automotive battery is a shallow-cycle battery, and this is designed to discharge only about 20% of its electricity so is unsuitable for solar photovoltaic cell set-up. The reason is that if any more than 20% is drawn more than a few dozen times, it will get damaged and no longer take charge.

Wind turbine batteries tend to operate at 12v, and can be arranged in banks (multiple batteries), increasing the storage potential of your wind system set up. A bank of batteries organised in a series increases the capacity of your storage but also increases the voltage delivered from your bank; while multiple batteries organised in a parallel circuit increase the capacity, but the voltage stays the same.

Charge controllers

Charge controllers are used in wind turbine systems to prevent the batteries from being overcharged. If you decide to implement a grid tie system, a charge controller is not necessary, as any excess electricity that you don’t use at any particular moment is sold directly back to the grid. However, for any battery setup, a charge controller is necessary as it prevents damage to the battery by monitoring the flow of electricity in and out. If your system overcharges the battery it will damage it. The same is also true if you completely discharge all the charge held within the battery.

Most charge controllers associated with wind turbines have dump load capability associated with them. This allows any additional charge to be diverted from the batteries when they are full, potentially to a hot water heating system (so the electricity is not completely wasted). Obviously if you are connected to the grid, this electricity would instead be sold there, providing you with an additional income stream.

Most charge controllers are also equipped with maximum power point (MPPT) charging. The principle of MPPT is to extract the maximum available power from the wind turbine by making them operate at the most efficient voltage (known as the maximum power point voltage). The algorithm included in the MPPT charge controller compares the output from the wind turbine with the battery voltage and then fixes it at the best charging voltage, to get the maximum charge into the battery.

Safety equipment   

Disconnects are simply switches that allow you to isolate parts of the system so you can troubleshoot or repair faulty parts without the risk of being electrocuted. In addition many wind turbine systems are grounded, so that if there is surge in current anywhere in the system it is safely dissipated rather than damaging the system or more importantly you!

Installing a wind turbine

Are you thinking about installing a wind turbine at home? We have scoured the country for the best tradespeople, so that we can make sure we only recommend those we really trust.

If you would like us to find you a local installer to help install a wind turbine at home, just fill in the form below and we will be in touch shortly!


    Interested in wind turbines?

    I would like to be contact by a local installer/supplier

    I would like to receive occasional news from TheGreenAge

      Introduction to Solar PV

      Renewables

    What is solar PV?

    The process of converting light (photons) to electricity (voltage) is called the solar photovoltaic (PV) effect. Photovoltaic solar cells convert sunlight directly into solar power (electricity). They use thin layers of semi-conducting material that is charged differently between the top and bottom layers. The semi-conducting material can be encased between a sheet of glass and/or a polymer resin.

    When exposed to daylight, electrons in the semi-conducting material absorb the photons, causing them to become highly energised. These move between the top and bottom surfaces of the semi-conducting material. This movement of electrons generates a current known as a direct current (DC). This is then fed through an inverter, which converts the power to alternating current (AC) for use in your home.

    Types of solar panel

    Different types of solar PV installations require slightly different components. However in the next two sections we have explained in detail all the main components that will make up your solar PV array and provide you with 100% renewable, free electricity.

    The solar panel is the key component of any solar photovoltaic system, which takes the sun’s energy and converts it into an electrical current. There are three main types of solar panel (as well as the hybrid version) currently in commercial production, all of which are based on silicon semiconductors:

    Monocrystalline solar cells

    This type of solar cell is made from thin wafers of silicon cut from artificially-grown crystals. These cells are created from single crystals grown in isolation, making them the most expensive of the three varieties (approximately 35% more expensive than equivalent polycrystalline cells), but they have the highest efficiency rating – between 15-24%.

    Polycrystalline solar cells

    This type of solar cell is also made from thin wafers of silicon cut from artificially grown crystals, but instead of single crystals, these cells are made from multiple interlocking silicon crystals grown together. This makes them cheaper to produce, but their efficiency is lower than the monocrystalline solar cells, currently at 13-18%

    Amorphous solar cells

    These are the cheapest type of solar cell to produce, are relatively new to the market and are produced very differently to the two other types. Instead of using crystals, silicon is deposited very thinly on a backing substrate.

    There are two real benefits of the amorphous solar cell; firstly the layer of silicon is so thin it allows the solar cells to be flexible, and secondly they are more efficient in low light levels (like during winter).

    This, however, comes at a price; they have the lowest efficiency rating of all three types – approximately 7% – 9%, requiring approximately double the panel area to produce the same output. In addition, as this is a relatively new science, there is no agreed industry-wide production technique, so they are not as robust as the other two types.

    Hybrid solar cells

    This is not a type of solar cell in its own right; instead it is a combination of both amorphous solar cells and monocrystalline solar cells. These are known as HIT solar cells (Heterojunction with Intrinsic Thin Layer – a bit of a mouthful!), and have higher efficiency ratings than any of the other three types of solar cell alone. In addition, they are also better suited in sunnier climes, where temperatures often exceed 250C, creating up to 10% more electricity.

    We think in many cases polycrystalline cells are the most suitable option, as they provide value for money while still also being relatively efficient.

    Future solar technologies

    Solar PV inverters

    All the electricity produced by the solar panels is produced as direct current (DC), which differs from the electricity that is distributed through the grid and we use in our homes, which is alternating current (AC). For this reason most solar photovoltaic systems are now connected up with some type of inverter, which changes the DC to AC, allowing the individual to sell the electricity back to the grid (in grid-tied systems) or to be used easily in homes.

    There are 2 major types of inverter that can be installed in your solar photovoltaic system:

    1. String inverters (also known as central inverters)

    These are used in grid-tied systems where the solar panels are wired together in series, which is known as a string of panels. Each string of panels is connected to a string inverter, which converts the DC current to AC for use in the home and selling back to the grid. You can imagine each string as a mini power station, producing electricity.

    The main issue with string inverters is that if one of the panels in the string fails or produces less electricity (from things like shading), this impacts the output of all the panels. They will all operate at the output of the worst panel, so a small amount of shading or debris on your solar array can disproportionally reduce the total output of your entire solar photovoltaic system.

    They also have relatively short lifespans when compared to micro inverters.

    The benefits include simple wiring and that you can use thinner wires within your solar PV system, so less copper is used which makes the system cheaper. Buying one string inverter (which is normally the case of most home solar PV systems) is also considerably cheaper than buying multiple micro inverters.

    2. Micro inverters

    These are a newer technology and service each solar panel individually, so each panel requires its own micro inverter and acts as an individual power station.  As a result, micro inverters do not suffer the same performance reduction as a result of shading because any power reduction in a particular solar panel is handled by one micro inverter, having little effect on the combined power output from the entire solar photovoltaic system.

    Micro inverters are much more expensive than the string inverters. However much of this cost is offset by the increased performance (25% more power produced using micro inverters) and the fact that they are more reliable than string inverters (warranties for micro inverters are up to 25 years).

    Buying inverters for your solar PV system

    When looking for which inverters to buy, ideally you want your alternating current (AC) to match that provided by the utility companies. Waveform relates to the quality of the AC signal that an inverter produces. Cheaper inverters will provide modified sine wave signal, while the more expensive versions will produce the pure sine wave signal. Some appliances (such as computers) simply don’t work unless they are powered by a pure sine wave signal, so we recommend strongly that you spend a little more to get this type of inverter.

    Grid tie inverters differ slightly from your regular inverters in that the AC pure sine wave signal has to be perfectly coordinated with the waveform from the grid. As such, these tend to be more expensive than the typical inverters that you buy. They also have a built-in safety feature to cut off power from the solar array if the electricity grid goes down for any reason.

    It is also worth noting that most inverters now also have ‘Maximum Power Point Tracking’ (known as MPPT) installed within them, which helps to maximise the electrical output of your solar photovoltaic array system.

    The principle of MPPT is to extract the maximum available power from the photovoltaic module by making them operate at the most efficient voltage (known as the maximum power point voltage). The algorithm included in the MPPT inverter compares the output from the photovoltaic module with grid voltage and then fixes it at the most efficient voltage, to allow you to export the maximum amount of kWh of electricity back to the grid. An MPPT charger in your solar photovoltaic system will improve your power gain by 20-45% in the winter and 10-15% in the summer.

    Benefits

    Limitations

    The battery

    One of the major issues with solar PV systems is that they only produce electricity when the sun is shining. If you are looking to go ‘off-grid’ or have battery back up in times of grid blackouts, you will need batteries within your solar PV system.

    In these systems, electricity produced from the solar cells is either used in the home as required, or if there is no demand in the home, it is converted to chemical energy in the form of batteries. These batteries can then produce the electicrity at night to allow you to use your solar PV system ’24/7′.

    The electricity produced by your solar system is stored in deep-cycle lead acid batteries that look very similar to the ones found in most cars today (although structurally different). The two most popular types of battery are GEL and Absorbed Glass Mat (AGM), which store the charge very well and do not degrade nearly as fast as the common lead acid (wet cell) battery. Both types of batteries are designed to gradually discharge slowly and recharge 80% of their capacity a multiple number of times.

    An automotive battery is a shallow-cycle battery, and this is designed to discharge only about 20% of its electricity so is unsuitable for solar photovoltaic set-up. The reason being is that if any more than 20% is drawn more than a few dozen times, it will get damaged and no longer take charge.

    Solar photovoltaic batteries tend to operate at 12 volts, and can be arranged in banks (multiple batteries), increasing the storage potential of your solar photovoltaic set up. A bank of batteries organised in a series increases the capacity of your storage but also increases the voltage delivered from your bank, while multiple batteries organised in a parallel circuit increase the capacity, but keep the voltage the same (mains electricity runs at higher voltage, so if you have a grid tie system it is likely you will try to match this by running the batteries in series).

    Solar Charge Controllers

    Solar Charge Controllers (also known as Solar Charge Regulators) are used in solar photovoltaic systems to prevent the batteries from being overcharged. If you decide to implement a ‘grid-tied’ system, a solar charge controller is not necessary, as any excess electricity that you don’t use at any particular moment is sold directly back to the grid.

    However, for any of the other three setups, a charge controller is necessary; it acts to regulate the flow of electricity between the solar photovoltaic modules, the batteries and your appliances (known as the load).

    When the load is drawing power (e.g. you are watching television), the charge controller allows electricity to flow from the solar panels directly (if the sun is shining), or from the battery, or from a mixture of the two. The charge controller also prevents damage to the battery by monitoring the flow of electricity in and out. For instance if your system overcharges the battery, it will damage them. The same is also true if you completely discharge all the charge held within the battery.

    At night, when the solar units are no longer producing electricity, the solar charge controller prevents reverse current flowing from the batteries back into the solar panels.

    Solar charge controllers also are equipped with highly effective charging programs that maximise the charging speed, while still preventing overcharging.

    Most are also equipped with maximum power point (MPPT) charging. The principle of MPPT is to extract the maximum available power from the photovoltaic module by making them operate at the most efficient voltage (known as the maximum power point voltage). The algorithm included in the MPPT solar charge controller compares the output from the photovoltaic module with the battery voltage and then fixes it at the best charging voltage, to get the maximum charge into the battery. The maximum power produced by the solar photovoltaic module is dependent on the amount of sun hitting the solar cells and the temperature of the cells. Incorporating a MPPT charger into your solar photovoltaic system will improve your power gain by 20-45% in the winter and 10-15% in the summer.

    Solar array mounting

    As discussed earlier, the amount of power that your solar photovoltaic system produces is dependent on the intensity of light hitting your solar array. There are three types of mounting you can get for your solar panels to help maximise the amount of light that they receive.

    Fixed solar array mountings

    These are the simplest of all the mounting systems, and also the cheapest. In this system, the solar panels will not move at all at any time during the year, so you want to ensure that when you put in the panels they are facing the equator to maximise sunlight.

    Manually adjustable solar mountings

    These can be changed a few times a year to adjust for the winter and summer sun. The sun is highest in the sky during the summer months and lower in the winter, so by being able to adjust the angle of your solar array ensures that the sunlight hits the array at the best angle to avoid reflection.

    Fully automated tracking solar mount

    These mountings track the sun, to ensure that at all times the angle of the solar array is maximising sunlight. These are certainly the most expensive type as they are constantly moving, but they are also by far the most efficient. Despite this, it has been proven to be more cost effective to add an extra solar panel to your array and use the fixed or adjustable mountings.

    Installing Solar PV

    Are you thinking about installing a solar PV system at home? We have scoured the country for the best tradespeople, so that we can make sure we only recommend those we really trust.

    If you would like us to find you a local installer to help install a solar PV system in your home, just fill in the form below and we will be in touch shortly!

      Types of Solar PV Setup

      Renewables

    Each solar setup has its own benefits and limitations, and it is important to gain a real understanding of these before you invest in a potentially expensive solar PV system, to help avoid disappointment further down the line.

    Grid-tied solar PV Systems

    99% of solar systems installed on people’s homes in the UK are what’s known as ‘grid-tied’ systems. These grid-tied systems allow you to use the free electricity you create from the solar PV system, as well as electricity from the National Grid. This gives you flexibility, since you have a constant supply of electricity, whether or not the sun is shining.

    Any shortfall in supply from your solar PV array can be met by additional electricity supplied via the grid, but there is also the added benefit of being able to sell any surplus back to the grid. In essence, a grid-tied system will go some way to reducing your dependence on the utility companies, and also save you money, while still giving you the comfort of as much electricity as you need from the grid. The lack of batteries also makes this type of solar setup cheaper to install.

    Grid-tied solar PV installations have become incredibly popular in the UK recently due to generous government subsidies (guaranteed for 25 years from the date of installation).

    Off-grid/standalone solar PV systems

    Producing 100% of your own electricity in a clean and sustainable manner is the dream scenario for many people; the thought of never paying another electricity bill, and never suffering from grid blackouts is obviously a very attractive proposition.

    However, an off-grid system does not need to be very sophisticated and grand in scale – it can simply power a light in your garden shed, or a water fountain in your garden. For this reason, off-grid installations are the most common type of solar installation across the globe, providing electricity to any isolated location (normally where no other electricity source is readily available).

    The disadvantage is that you essentially become the utility company, so any costly repairs fall under your remit. Also, if there is a problem with your supply for any reason, you will not have electricity. Solar power is also an intermittent source (i.e it doesn’t power 100% of the time), so if you need electricity during the night (for lighting etc), you will need to install batteries within your system. These enable you to store energy during the day and use it when you are not generating.

    The rewards for installing an off-grid system are clear; however the increased responsibility of owning your home’s electricity supply could make this kind of system a potentially daunting task for solar PV beginners.

    Grid-tied with battery backup systems

    The issue with this system is its added complexity compared to the grid-tied solar PV system described above. The batteries will require additional maintenance and add significantly to the final cost, and they will also introduce additional inefficiencies within your system – potentially a 15% loss in overall performance.

    Grid fallback systems

    This is where electricity is taken from the batteries and run through an inverter to provide the electricity required in the home. Once the batteries begin to go flat, the system automatically switches over to grid power, allowing the solar panels to once again charge the bank of batteries, and the process starts again.

    Installing Solar PV

    Are you thinking about installing a solar PV system at home? We have scoured the country for the best tradespeople, so that we can make sure we only recommend those we really trust.

    If you would like us to find you a local installer to help install a solar PV system in your home, just fill in the form below and we will be in touch shortly!

      Maximising Solar PV Return

      Renewables

    Maximising your solar PV return

    It goes without saying that the bigger your solar array, the more electricity it will produce, but how else can you be sure you are maximising your return?

    Orientation of the panels

    Solar panels in the northern hemisphere perform best when facing due south. This ensures that they receive the maximum exposure from the sun as it travels east to west. There is little point putting solar panels on a north-facing roof, so you may need to install them on a solar array mounting on the ground to ensure you can get the panels angled in a southerly direction.

    There are different types of solar array mounting, but you can get fully automated tracking solar mounts. These mountings track the movement of the sun to ensure that the angle of the solar array is maximising exposure to sunlight at all times. These are expensive, but they also make sure you are getting the best yield.

    Casting shadows on your solar PV array

    It is important to ensure that shadows won’t fall on the solar panels during the peak sunlight hours, as this will obviously adversely affect the output of your solar system.

    The effect of shadowing is amplified if your solar PV array has been set up with string inverters. In this setup, each panel is connected to the next panel in a series of strings, with each panel feeding a DC current to the inverter. When a cell underperforms, bypass diodes reroute the current around the underperforming cells. The problem is that rerouting the current loses not only the potential energy from these cells, but also lowers the entire string’s voltage.

    The inverter then has to decide whether to optimise the voltage of the underperforming string or maximise the energy harvest from the unaffected strings. Normally the inverter chooses to optimise the voltage of the underperforming string, causing the performance of the whole string of panels affected to drop significantly. Just 10% shading of a solar PV panel can result in a 50% decline in output in this type of setup.

    Solar arrays with micro inverters do not suffer anywhere near as badly from shading compared to the arrays with string inverters.

    As a result of the shading issue, it is important to ensure that shadows won’t fall on the solar cells during peak sunlight hours as this will obviously adversely affect the output of your solar system. It is also important to have the foresight to predict tree growth in the coming years, as solar panels should go on producing electricity for 25 years; therefore trees that are currently of no concern could very easily grow to sufficient size in 15 years to cast shadows, diminishing the power producing capability of the solar photovoltaic system.

    Keeping your solar panels clean

    The operating efficiency of a solar PV panel is dependent on the amount of sunlight that hits it, so if you panels are covered in dirt they are going to produce less electricity. It is suggested to wash your solar panels 2-3 times per year for maximum efficiency. We cover the various techniques for cleaning your solar array here.

    You should also coat your solar panels with protectant to reduce reflection and increase transmissivity.

    Ambient temperatures of the panels

    One of the key factors impacting the amount of electricity your solar panels produce is the temperature at which they operate. It is easy to presume more sun and therefore heat results in more electricity but this is wrong. Different solar panels react slightly differently to the operating ambient temperature, but in all cases the efficiency of a panel will decrease as the temperature increases.

    The negative impact of temperature on solar panel efficiency is known as the temperature coefficient.

    Solar panels are power tested at 250C, so the temperature coefficient percentage illustrates the change in efficiency as it goes up or down by a degree. For example if the temperature coefficient of a particular type of panel is -0.5%, then for every 10C rise, the panels maximum power will reduce by 0.5%.

    So on a hot day, when panel temperatures may reach 450C, a panel with a temperature coefficient of -0.5% would result in a maximum power output reduction of 10%. Conversely, if it was a sunny winter’s morning, the panels will actually be more efficient.

    It is therefore really important to maximise airflow around the panels to try to keep them cool so their efficiency isn’t negatively impacted. Rather than installing panels flat against your roof, you could try lifting them slightly to allow air to circulate underneath.

    Use more of the electricity in your home

    As mentioned in the solar PV costs section, it is best to use the electricity you produce from your solar PV array in your home, since that means you don’t need to buy it at 15p from the electricity company. Selling the electricity back to the grid means you are eligible for the export tariff which is only 4.5p/kWh.

    One way to do this is with a solar diverter. These send excess energy that isn’t being used by your appliances to your immersion heater instead, helping to heat your water.

    You can also make behavioural changes to ensure that you are using as much of your self-generated energy as possible. It is worth changing some of your energy usage behaviour. For example, it is better to run washing machines and dishwashers during the day – so set them to start as you leave for work.

    The other way to use all the electricity you produce is by incorporating batteries into your solar PV array. Batteries will increase the upfront cost of your array and will require maintenance, but can be really worthwhile in the long run. Any electricity you produce during the day can be stored in the batteries and then used as and when you require it.

    Final thoughts on investing in a solar PV system

    Having received quotes for solar PV installation, you need to run the numbers to see if it makes financial sense for you to invest. It is important to bear in mind though, that solar photovoltaic arrays are modular, therefore new panels can be introduced at later dates as finances allow, further increasing the electrical output potential of your system.

    Installing a solar photovoltaic array on your property should not be solely a financial decision though; you should also take into account energy security.

    As demand for electricity in the UK continues to increase, the supply side is not keeping up. Over the next 3 years, 8 of the UK’s coal power plants are going to close, due to EU legislation on emissions, and by the end of the decade some of our nuclear capacity is also due to be decommissioned. Experts have predicted that the UK could face blackouts in the next few years.

    A solar photovoltaic system can therefore reduce your reliance on energy companies, helping to minimise the impact of energy scarcity on you and your family in the future.

    Installing Solar PV

    Are you thinking about installing a solar PV system at home? We have scoured the country for the best tradespeople, so that we can make sure we only recommend those we really trust.

    If you would like us to find you a local installer to help install a solar PV system in your home, just fill in the form below and we will be in touch shortly!

      Solar PV and Planning Permission

      Renewables

    When is Solar PV a Permitted Development?

    A solar photovoltaic array is normally considered a permitted development, as long as certain criteria are met which are detailed below.

    Solar PV fixed to your home, or another building within your grounds must meet the following criteria:

    Solar PV not fixed to your home or roof, but situated somewhere on your land must follow the following criteria:

    Installing Solar PV

    Are you thinking about installing a solar PV system at home? We have scoured the country for the best tradespeople, so that we can make sure we only recommend those we really trust.

    If you would like us to find you a local installer to help install a solar PV system in your home, just fill in the form below and we will be in touch shortly!

      Planning permission for wind turbines

      Renewables

    General guidance for wind turbines

    Planning permission for wind turbines depends on which region you live in the UK. If you live in England or Scotland, then certain wind turbines are permitted without planning permission, but they require adherence to strict conditions.

    In England, building-mounted wind systems were relaxed as part of 2011 legislation, but in Scotland you will still require planning permission for this.

    Permitted development for wind turbines in England

    It is possible to install a wind turbine as a permitted development, although it needs to fulfil all of the following criteria:

    A wind turbine mounted on a building:

     A wind turbine installed as a stand-alone installation:

    Can also be considered as a permitted development if the following criteria are adhered to:

    Permitted development of wind turbines for Scotland

    In Scotland a building mounted development requires planning permission, but on the other hand, a standalone development doesn’t, unless it contravenes the following points:

    You also need to make sure that the developer that is building the wind turbine speaks to the local authority and gets clearance for the size and type of wind turbine being installed.

    Planning permission for Wales & Northern Ireland

    If you live in Wales or Northern Ireland you will require planning permission no matter what the type of system you are going for.

    Concluding comments on planning permission

    With any wind turbine it is worth checking with your local planning authority to find out whether your proposed installation will require planning permission.

    Pin It on Pinterest