One of the major results of COVID-19 has been the huge increase in demand for home offices. With more and more of us working from home, the home office is the perfect solution to help separate home life from work life.
One of the major stumbling blocks with a home office though is the cost – with a brand-new office costing anywhere form £7,500 and upwards. Much like many other UK businesses, we have also been hit hard by COVID and as a result I am working from home more and more, so I thought I would see if it is possible to create a home office from my garden shed.
The plan was to convert the shed in two stages. The first was to work on the outside of the shed, insulating externally (and in the end I also needed to replace the roof), so it is weatherproof and can be used effectively as an office even during the coldest winter months.
The second stage, which I will do in the spring is to get the inside of the shed up to ‘office’ standard, so plasterboard, spotlights in the roof, new floor and insulate above the ceiling to get that final office feeling!
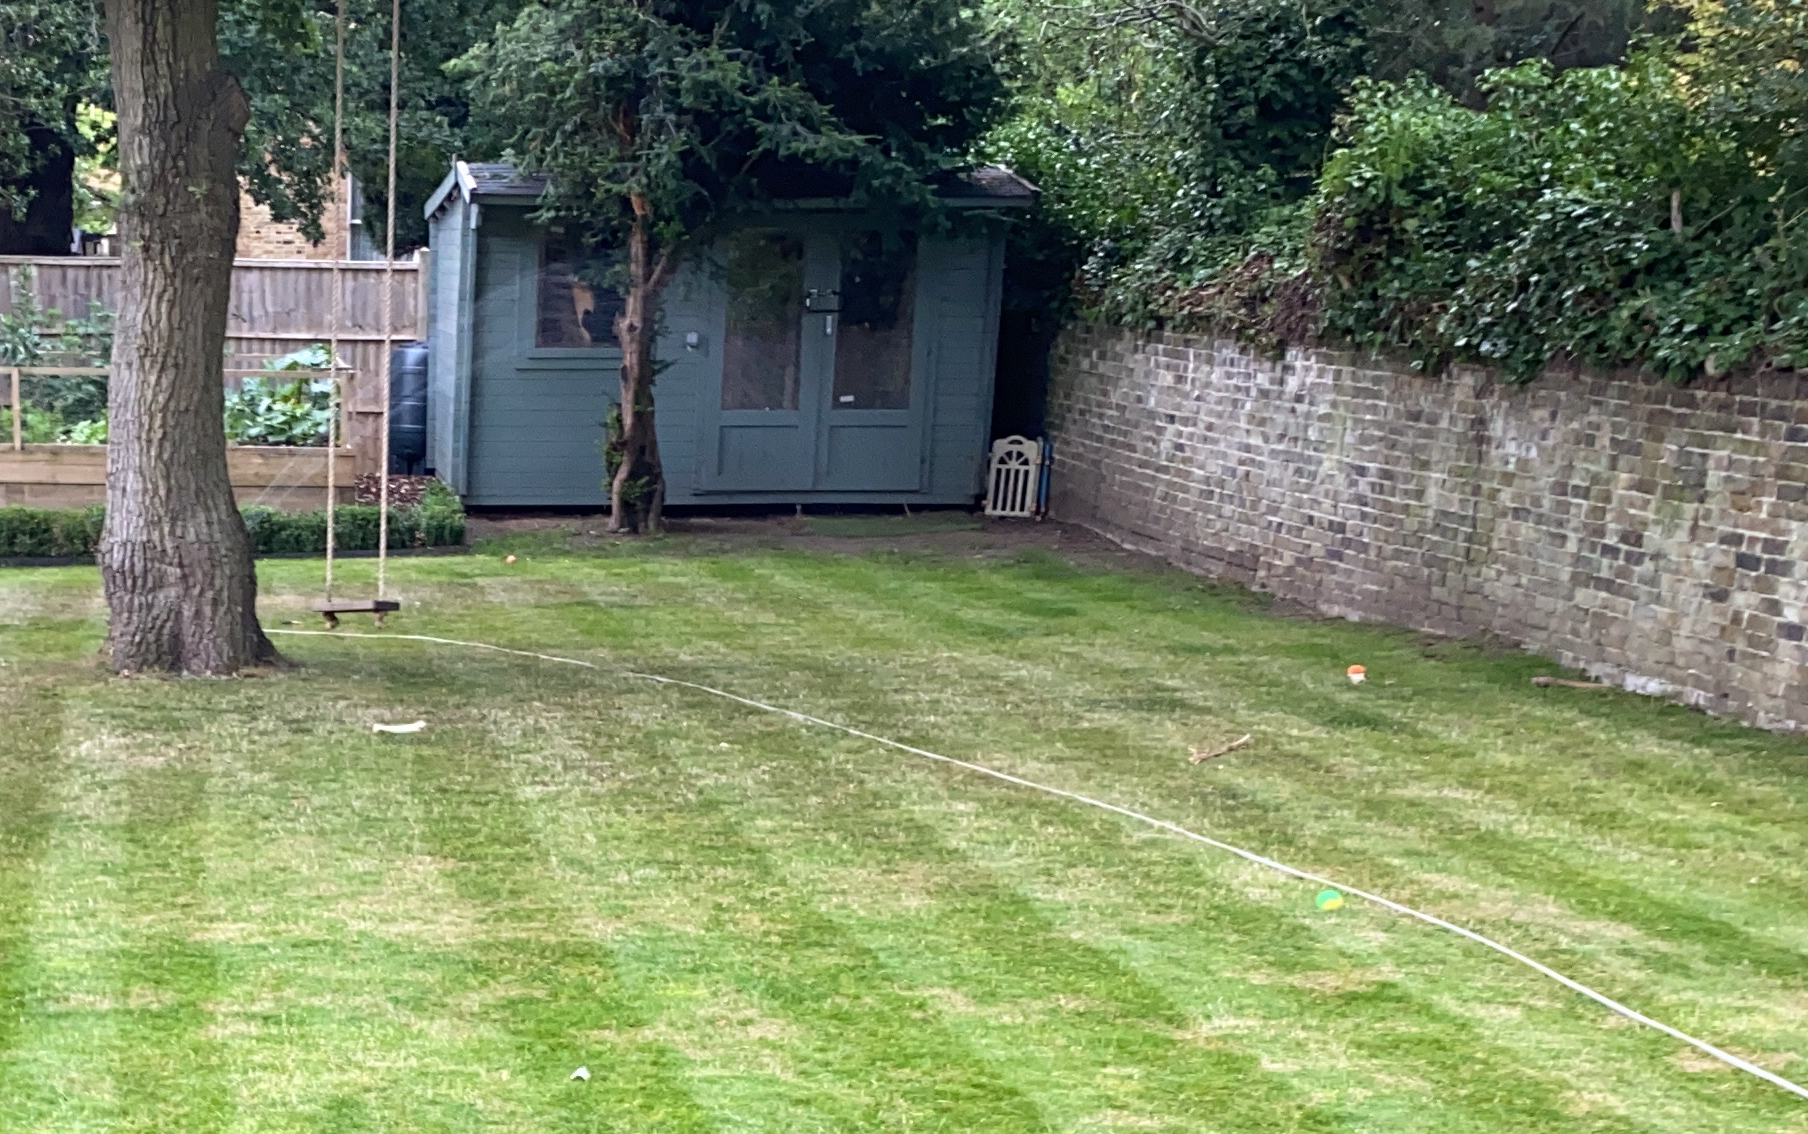
Below is the shed before I started!
In this blog I am going to go through the stages I went through to get the loft weatherproof and insulated. I am very grateful to EWI Store for providing the materials at a fantastic price (A little plug there but genuinely they were great!) and EWI Pro, who manufacturer the materials for their patience and technical expertise.
Preparing my shed retrofit
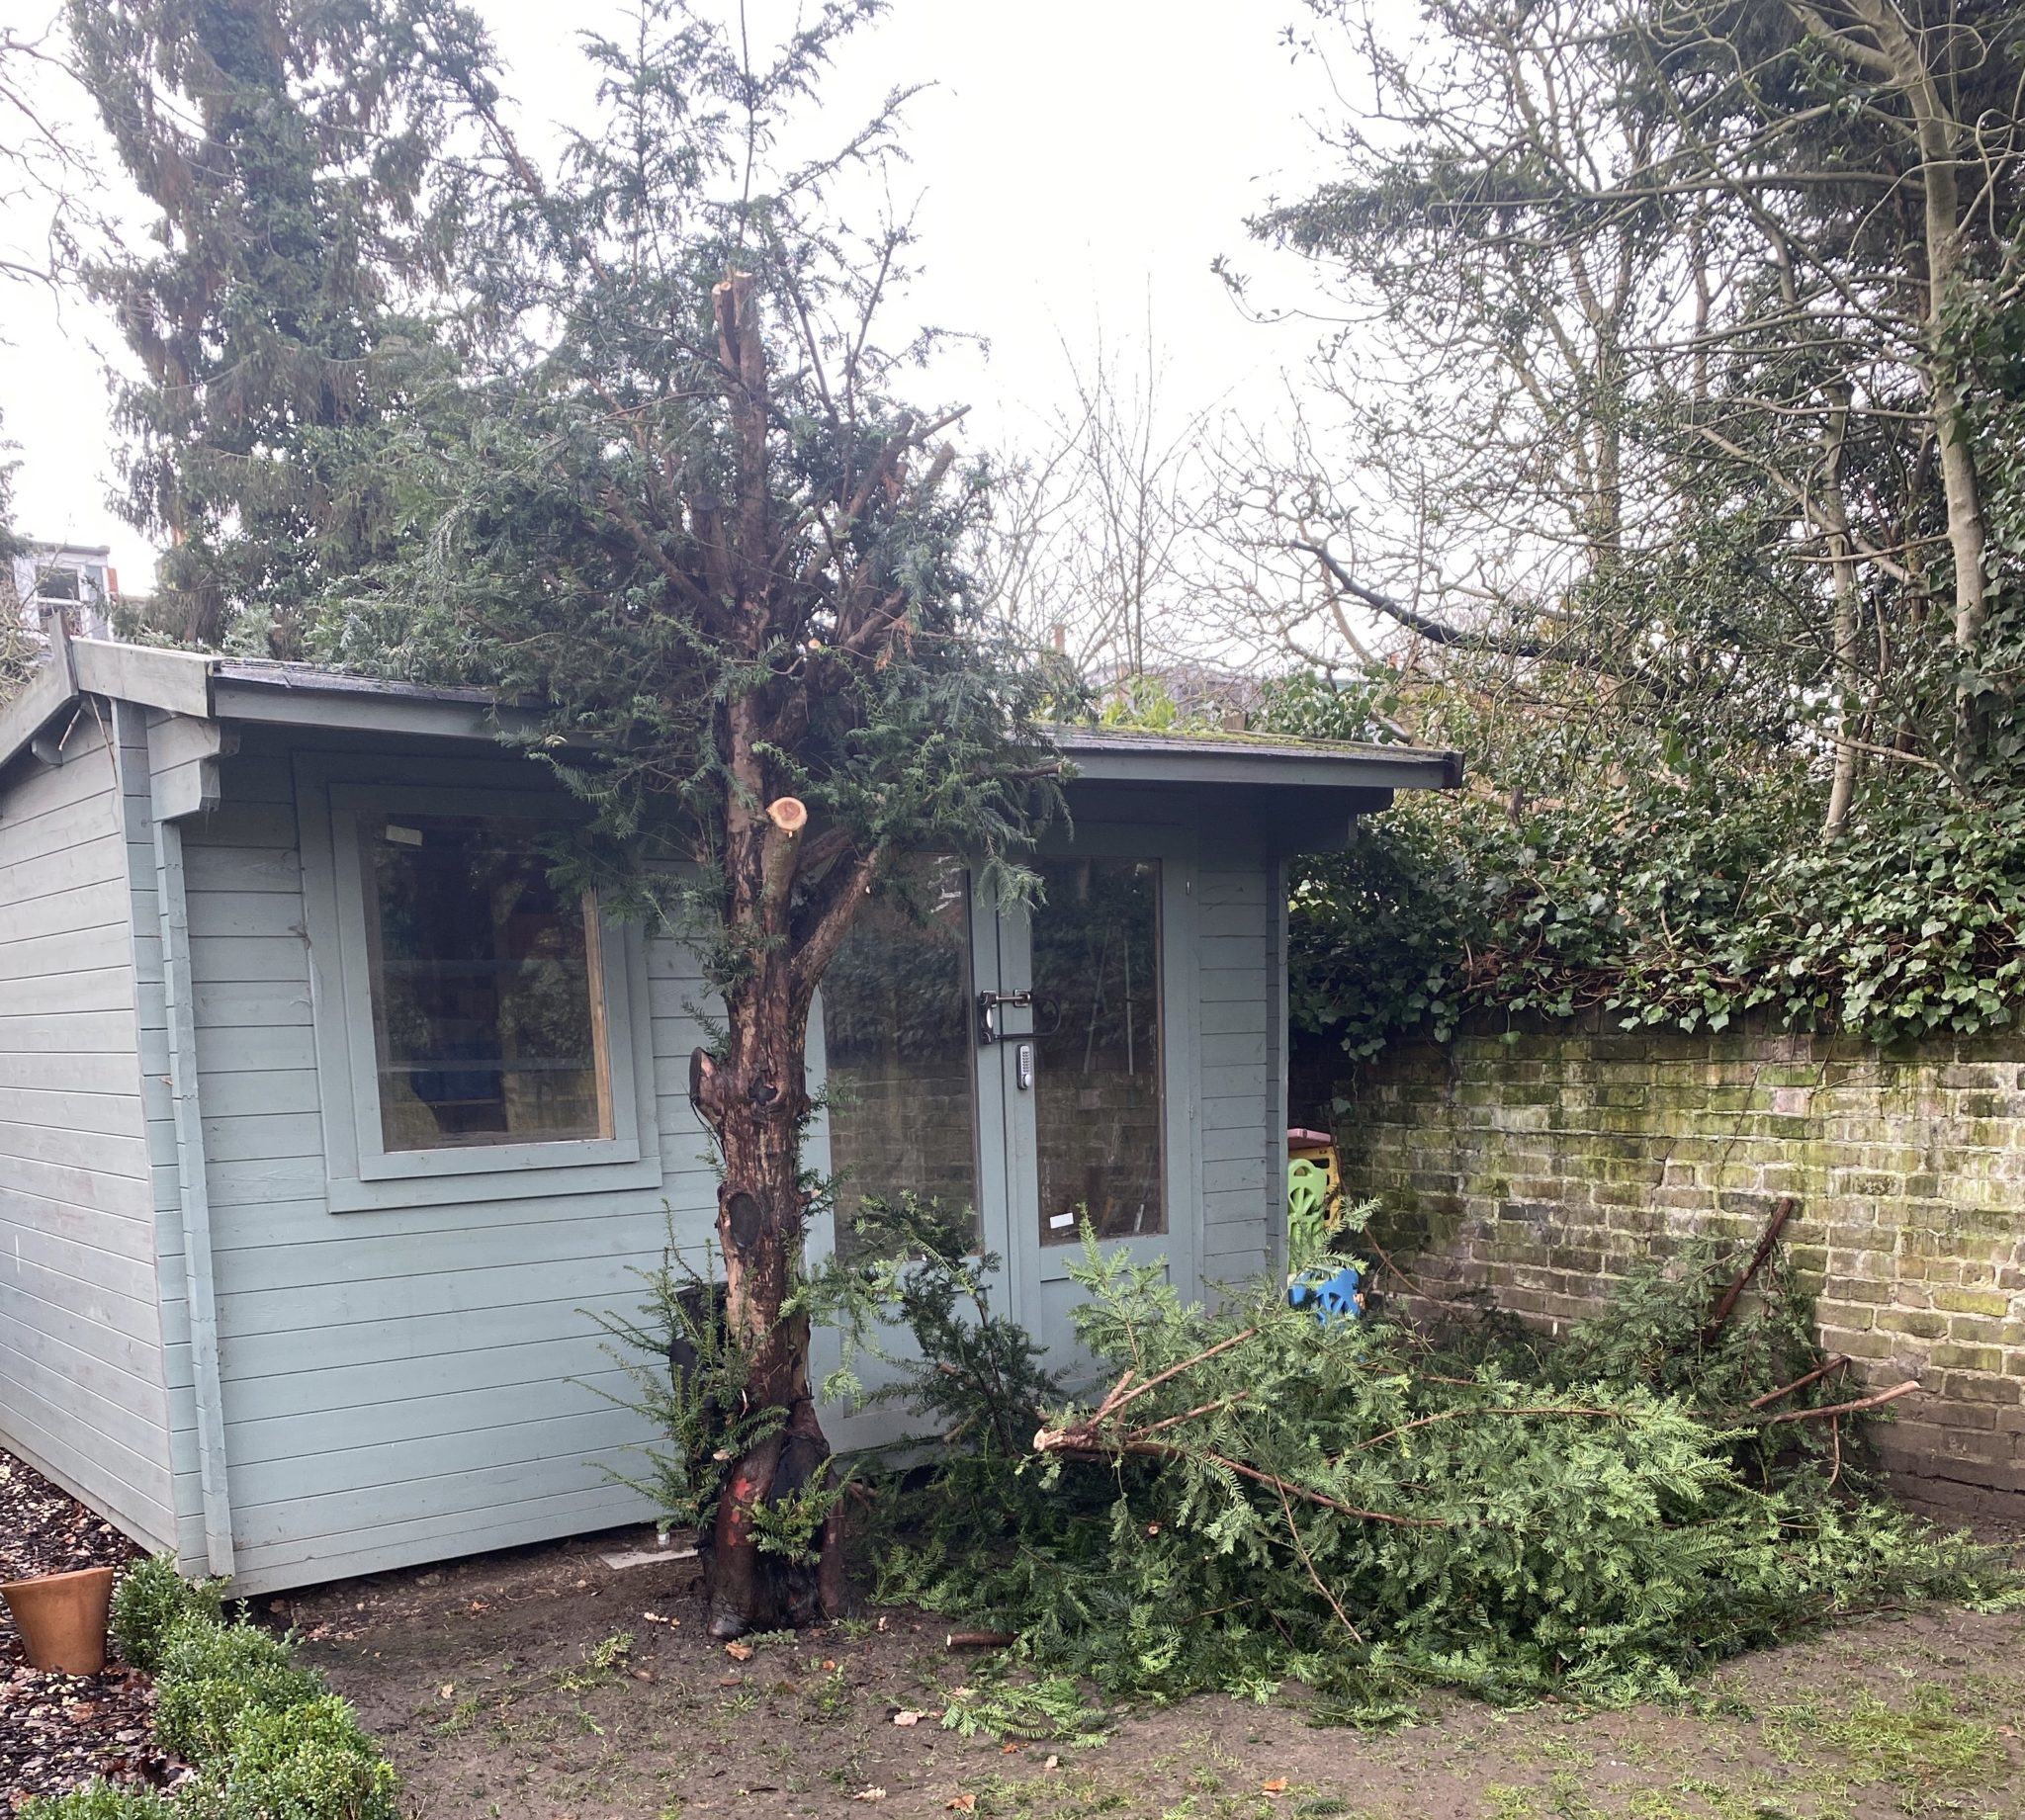
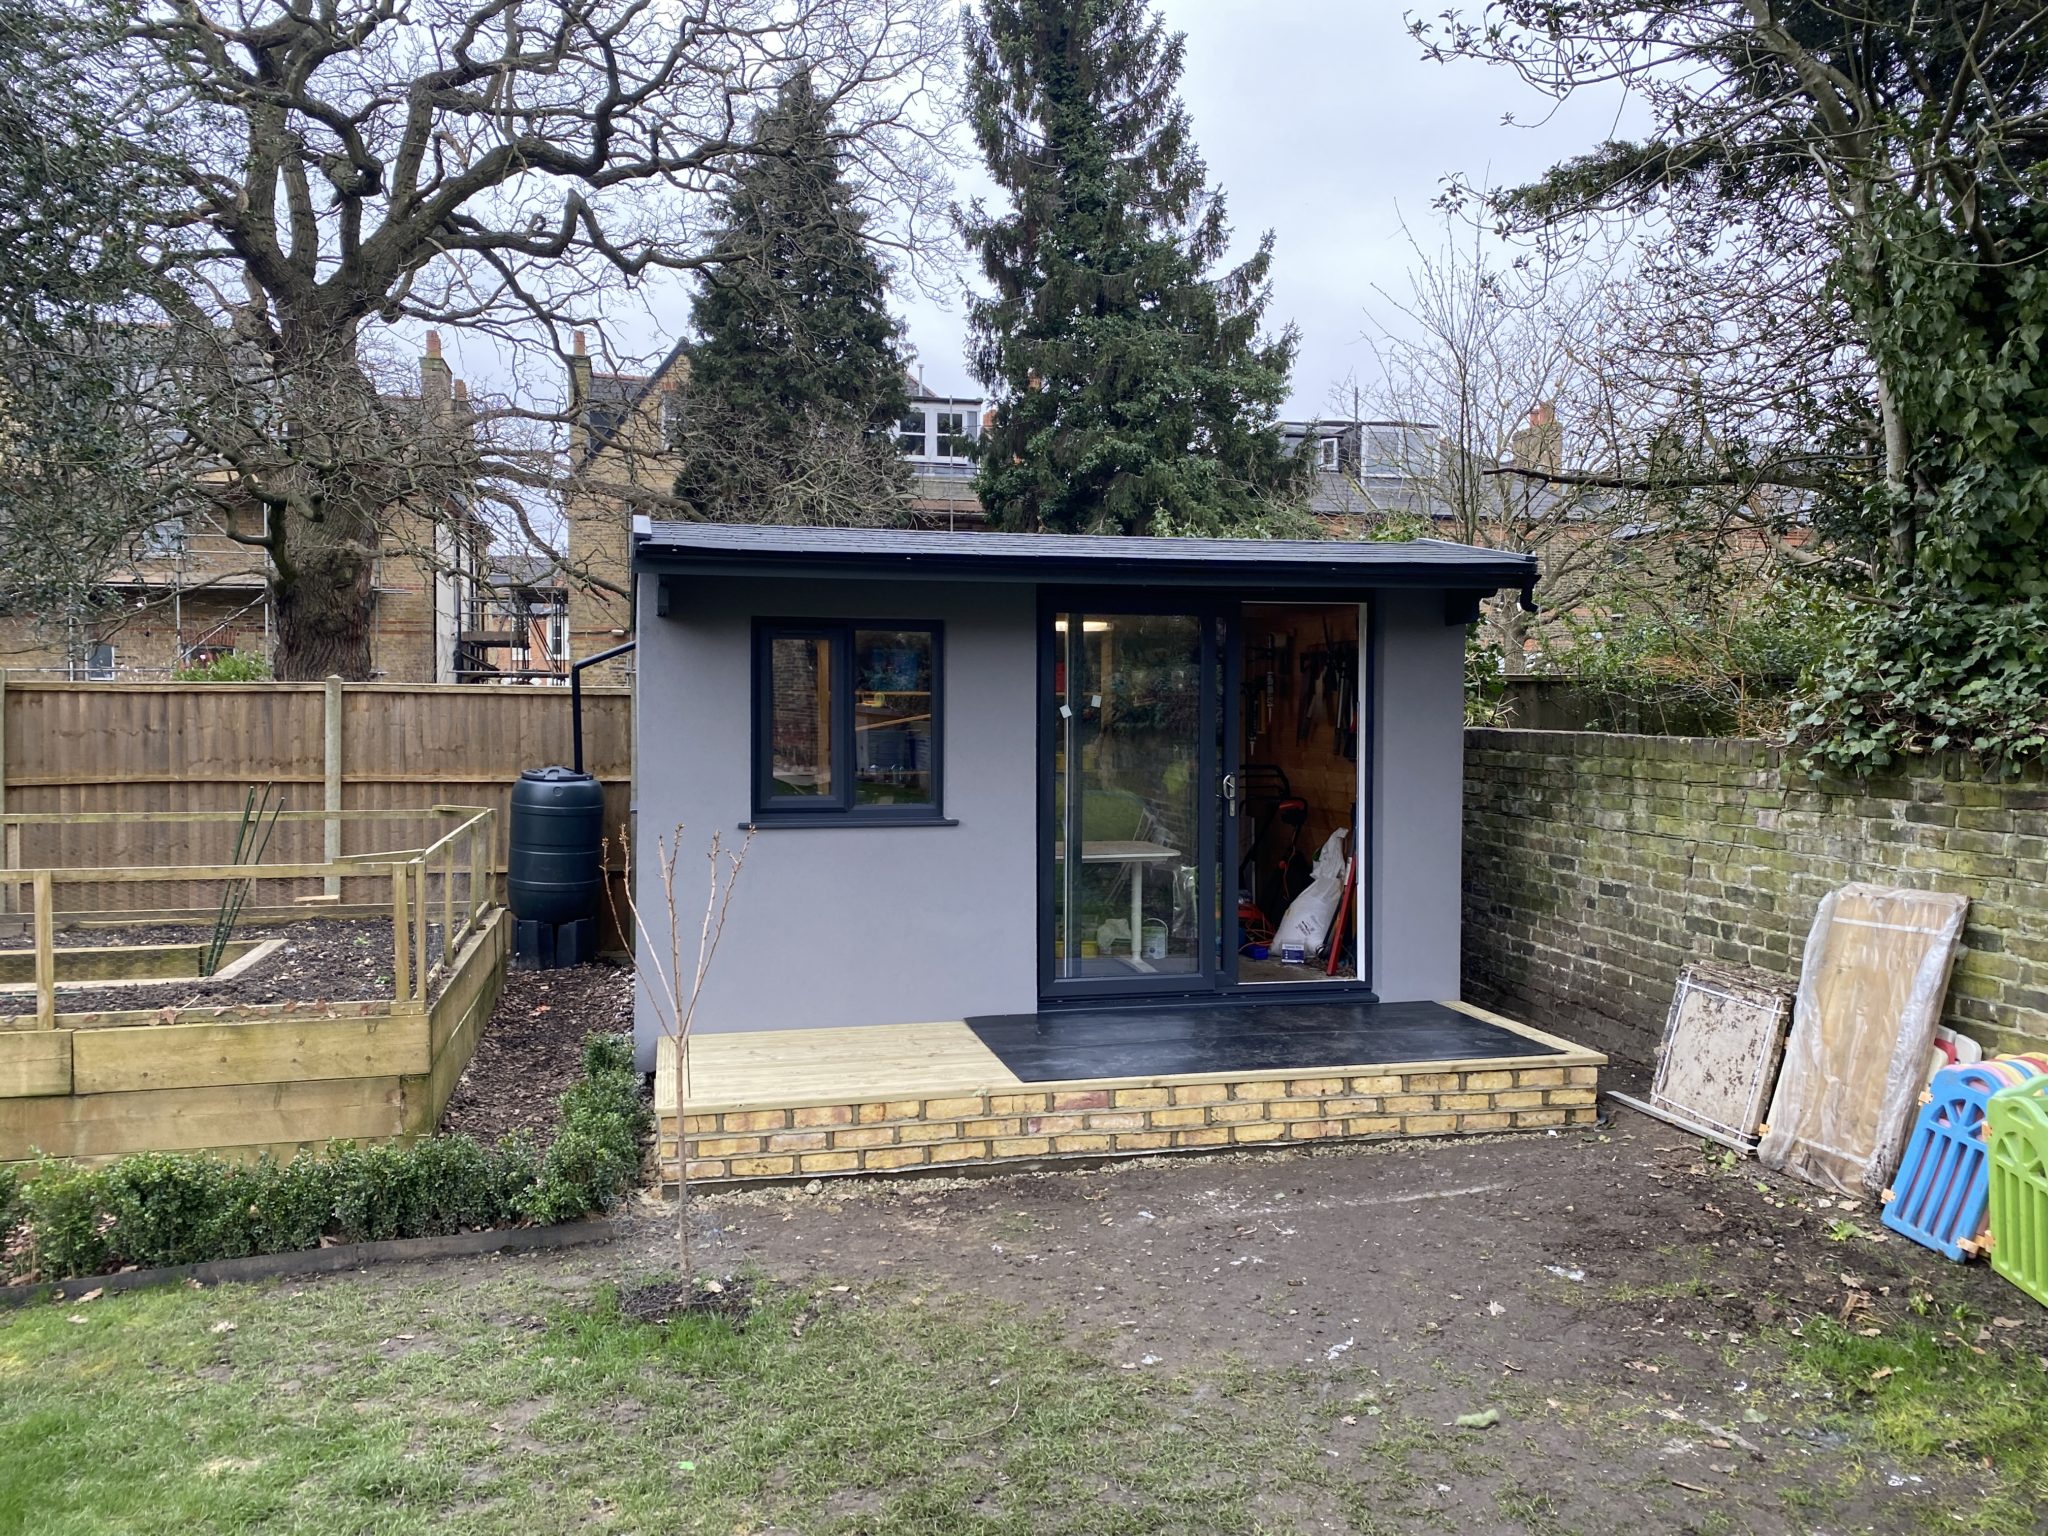
My first step was to get a bit more light into the shed. In order to do this, there were two steps – add an additional window on the side of the shed and take out a tree in front of the shed that was becoming slightly overgrown and blocking lots of light through the existing door and window. Before you say what a terrible person I am for removing the tree, it has been replaced by two, more manageable trees!
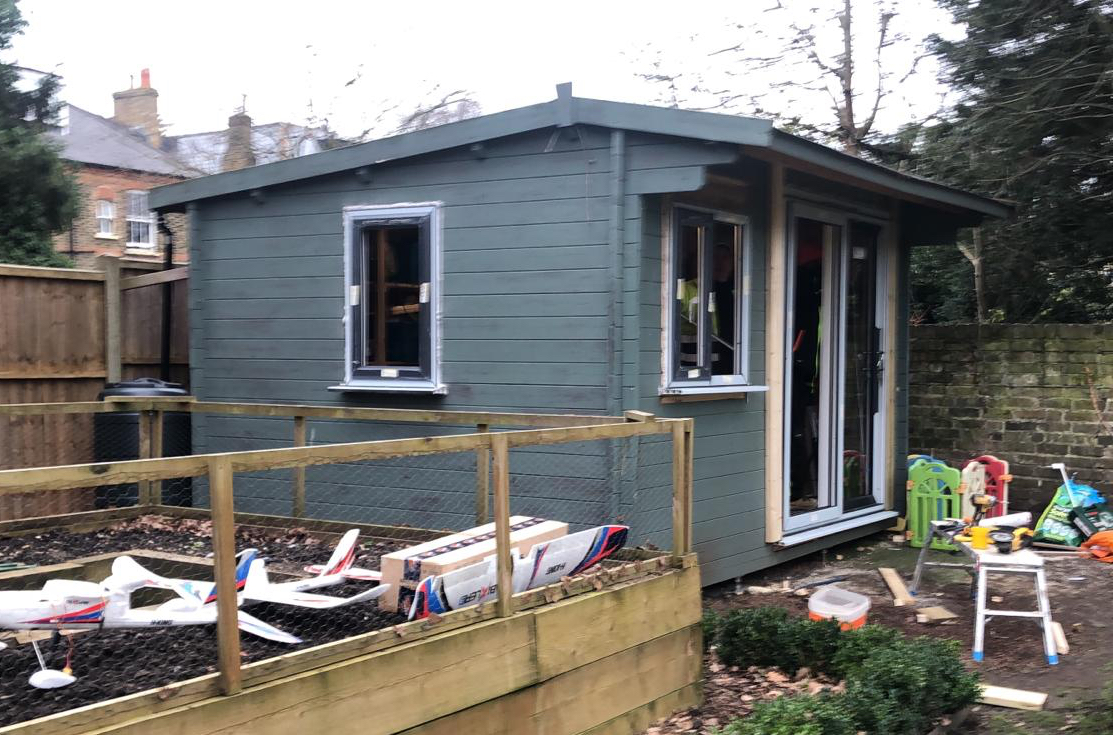
In addition to the new window on the side, I was going to replace the existing door and window already in the shed. I bought a sliding door and two windows from B&Q to achieve this. The sliding door replaced the shed’s ‘french doors’ and this was purely an aesthetics thing from my point of view and also my daughter has a new habit of getting fingers trapped in swinging doors. The hope was that by replacing all the glazing, the new sets would all match and look rather smart on my new home office as well as being far more energy efficient than the existing glazing.
In terms of actually replacing the windows and doors, the only real issue I faced was the fact the walls of the shed weren’t actually perfectly vertical, so I had to put the door in square (using 2×4 timbers) and then when it came to installing the external wall insulation, I used the foam adhesive on the back of the insulation boards to ‘straighten’ the walls.
As you can see from the photo, the overhang at the front of the shed was pretty big and although harder to see in the photo, the same is true at the back, so plenty of space to house lots of insulation. Even on the sides the overhang was 80mm so enough to squeeze a bit of insulation in!
Now when it comes to insulation there are lots of different types, expanded polystyrene (known as EPS), Kingspan k5 (like phenolic insulation), Rockwool (mineral wool) and even cork and wood fibre. In order to make this conversion as cost effective as possible I was planning on going with EPS all around the office. EPS provides a nice balance between price and thermal improvement. Kingspan is used where space is a premium because it has a lower thermal conductivity than the EPS, therefore is a better insulator – meaning you can use less of it to achieve the small thermal performance of the EPS.
Rockwool is used typically because it is A1 fire rated, so if this were going on a house, I would probably opt to use that, however both Kingspan and Rockwool are more expensive than the EPS, so my original plan was to use EPS to keep costs down.
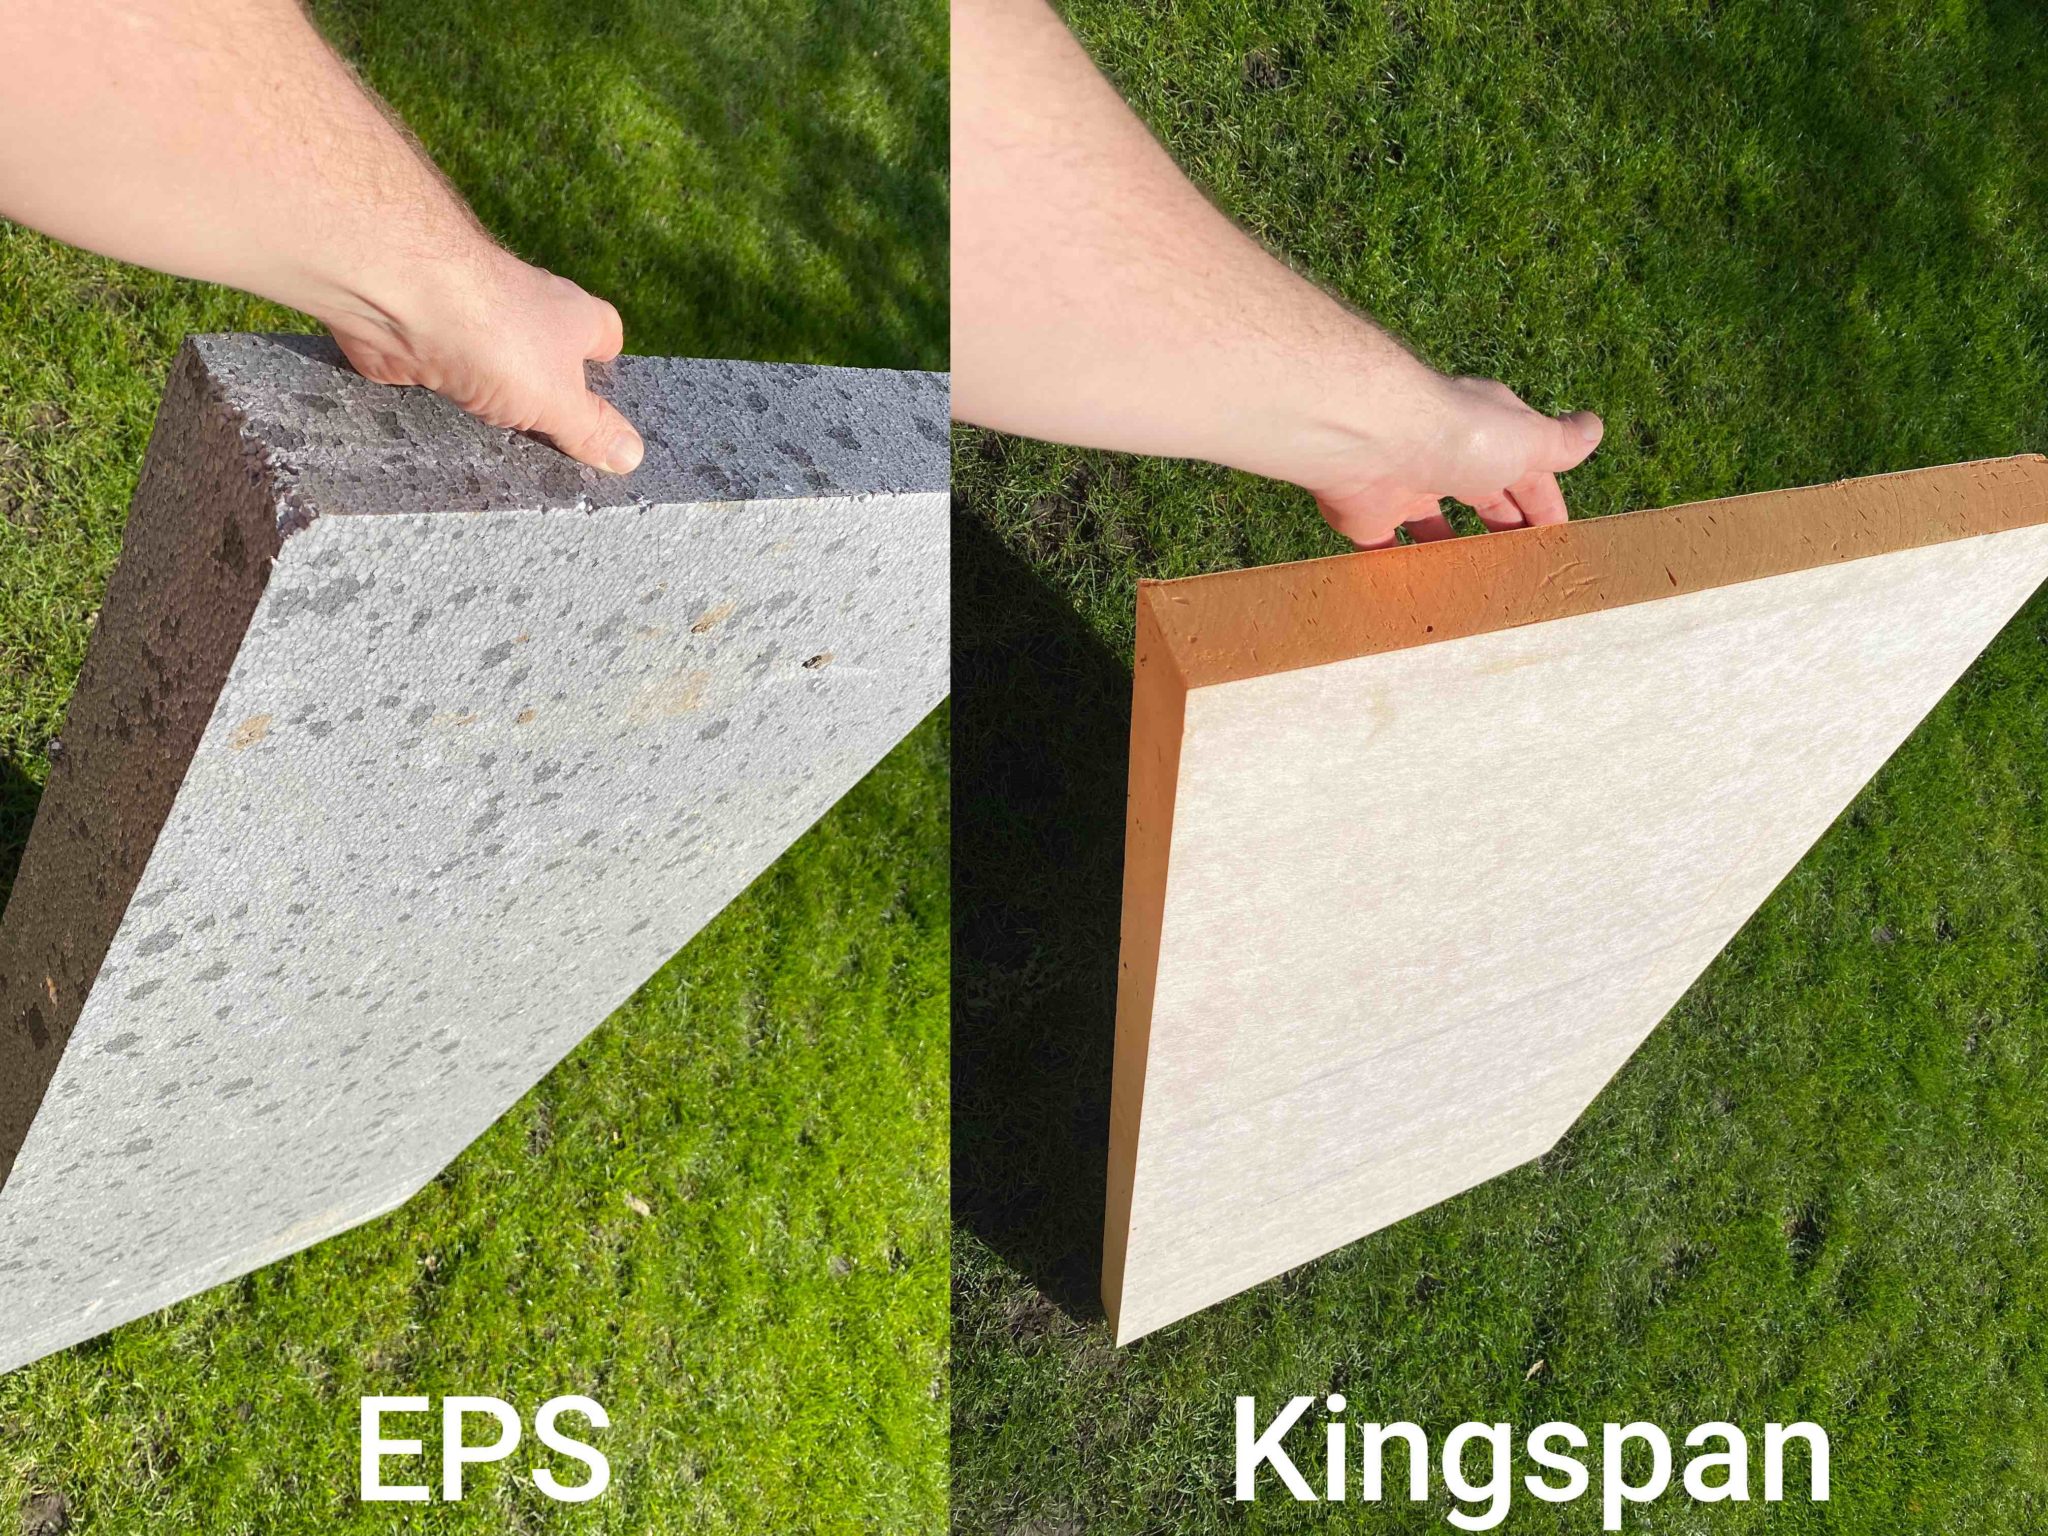
In the end, I had to use a mix of EPS and Kingspan because of the overhang on the sides of the shed / office. The overhang only let me have maximum 80mm of space to work with, without having to extend the roof line, so bearing this in mind, I decided to use 60mm Kingspan on the sides (the pink boards) and 100mm EPS on the front and back of the office (the grey boards). The u-value of the finished walls were less than 0.30w/m2k – a significant improvement on the average shed and probably an improvement on most offices in the UK!
Now you might question why I didn’t opt for internal wall insulation on my shed, and this was purely down to space. The internal dimensions were relatively small so I didn’t want to lose any of that internal foot print by applying the insulation internally. It would definitely be an option though, but by applying the insulation externally I could also modernise the look the office as external wall insulation is typically finished with a render finish.
Insulating my shed externally 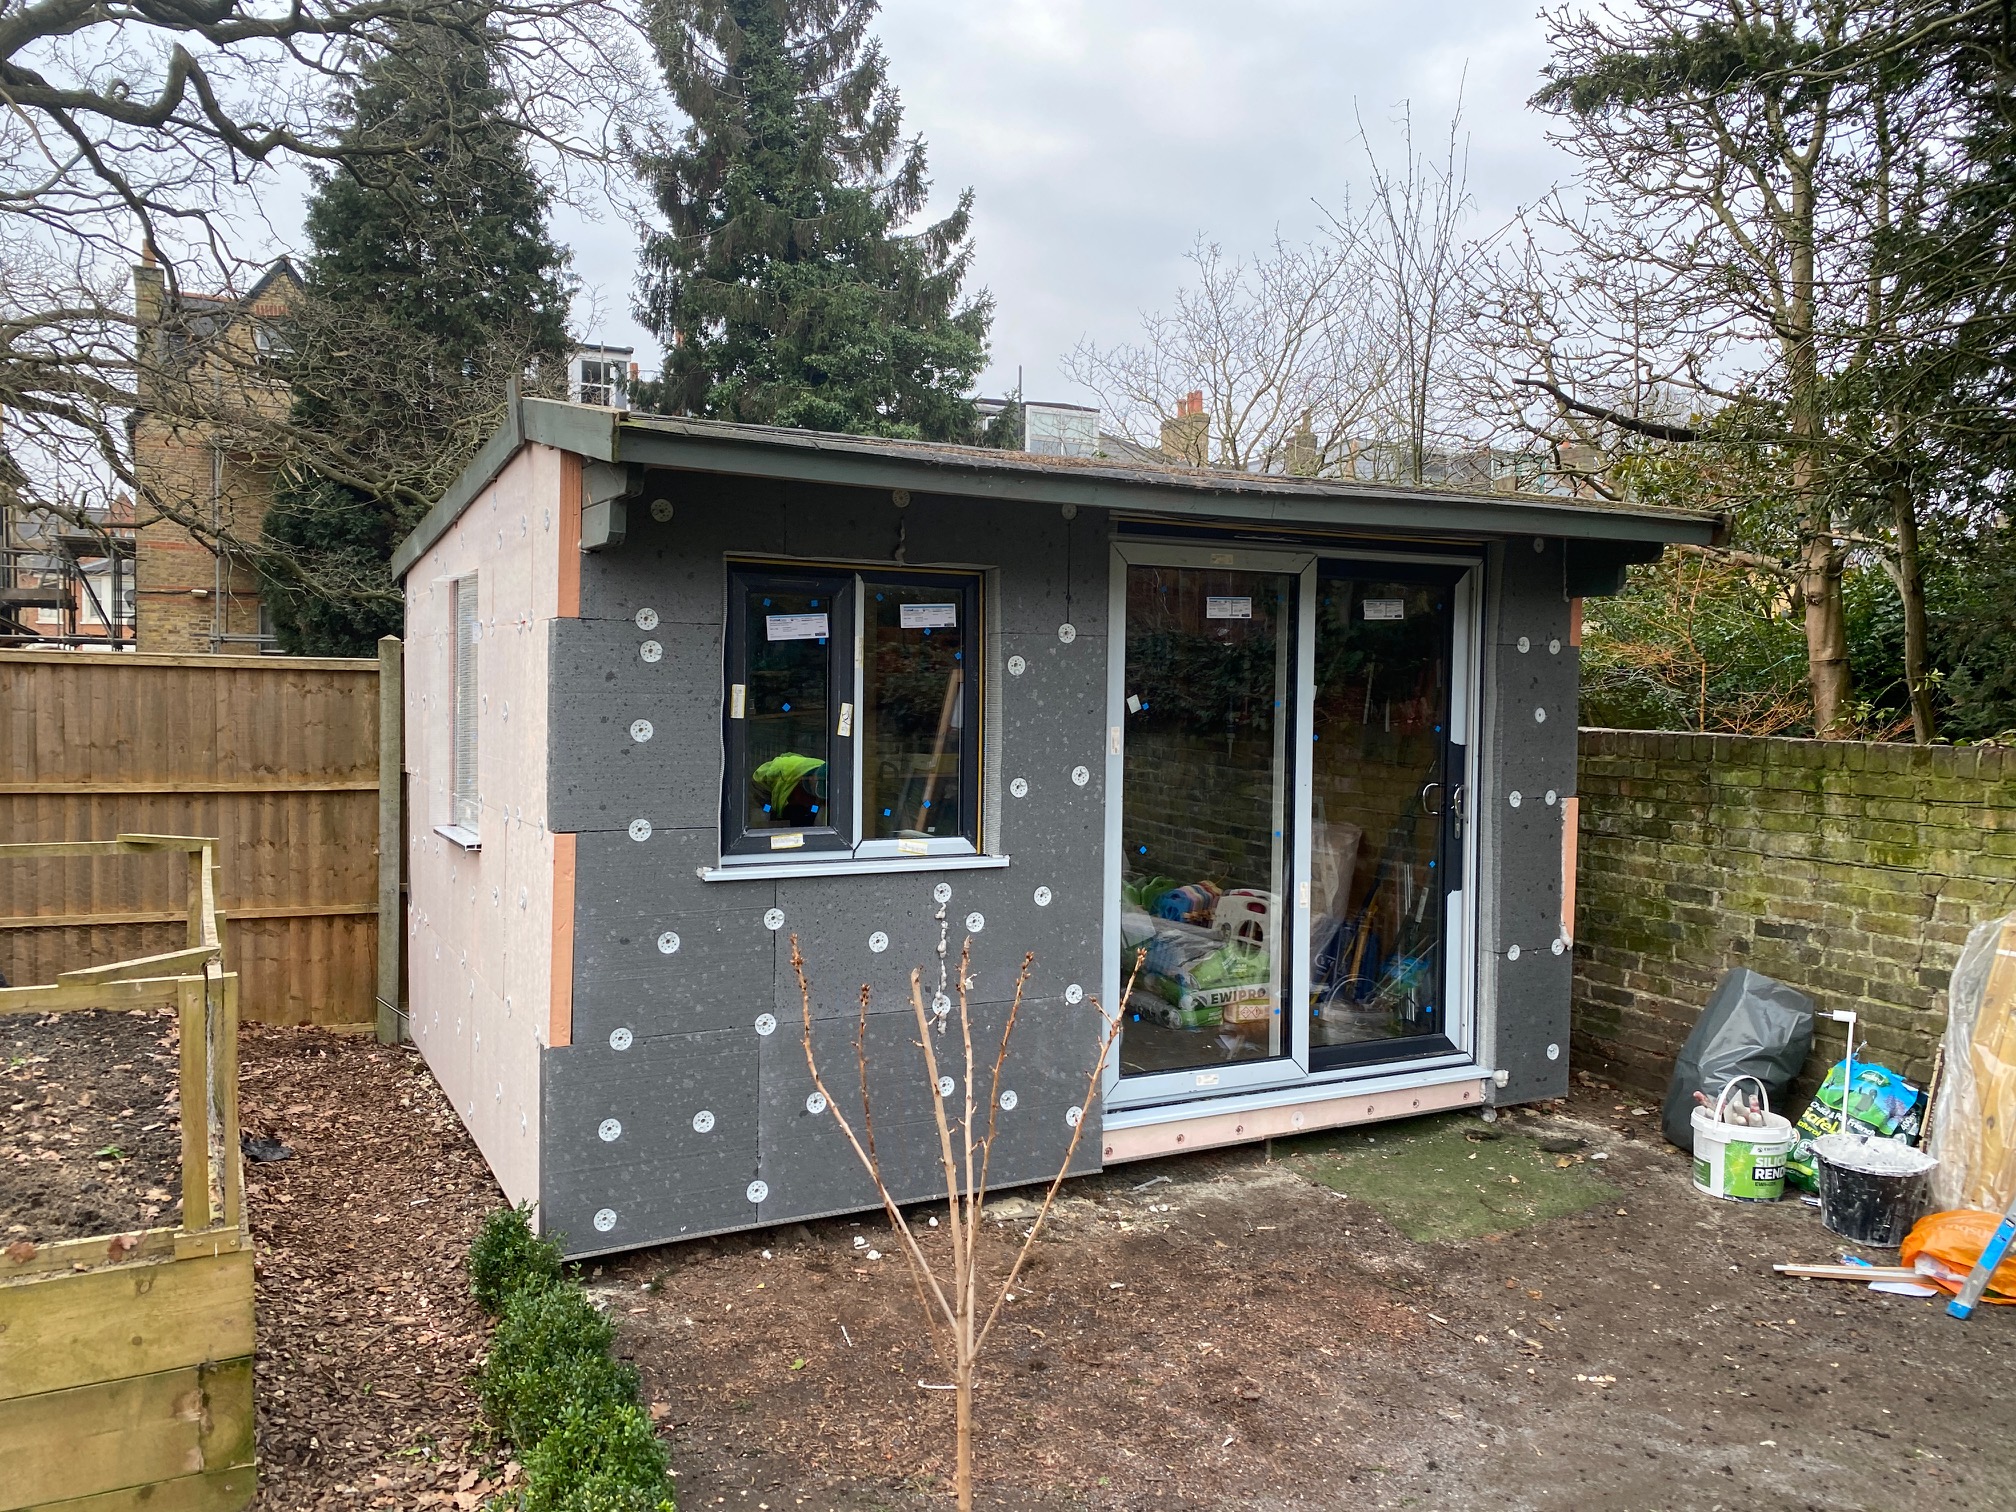
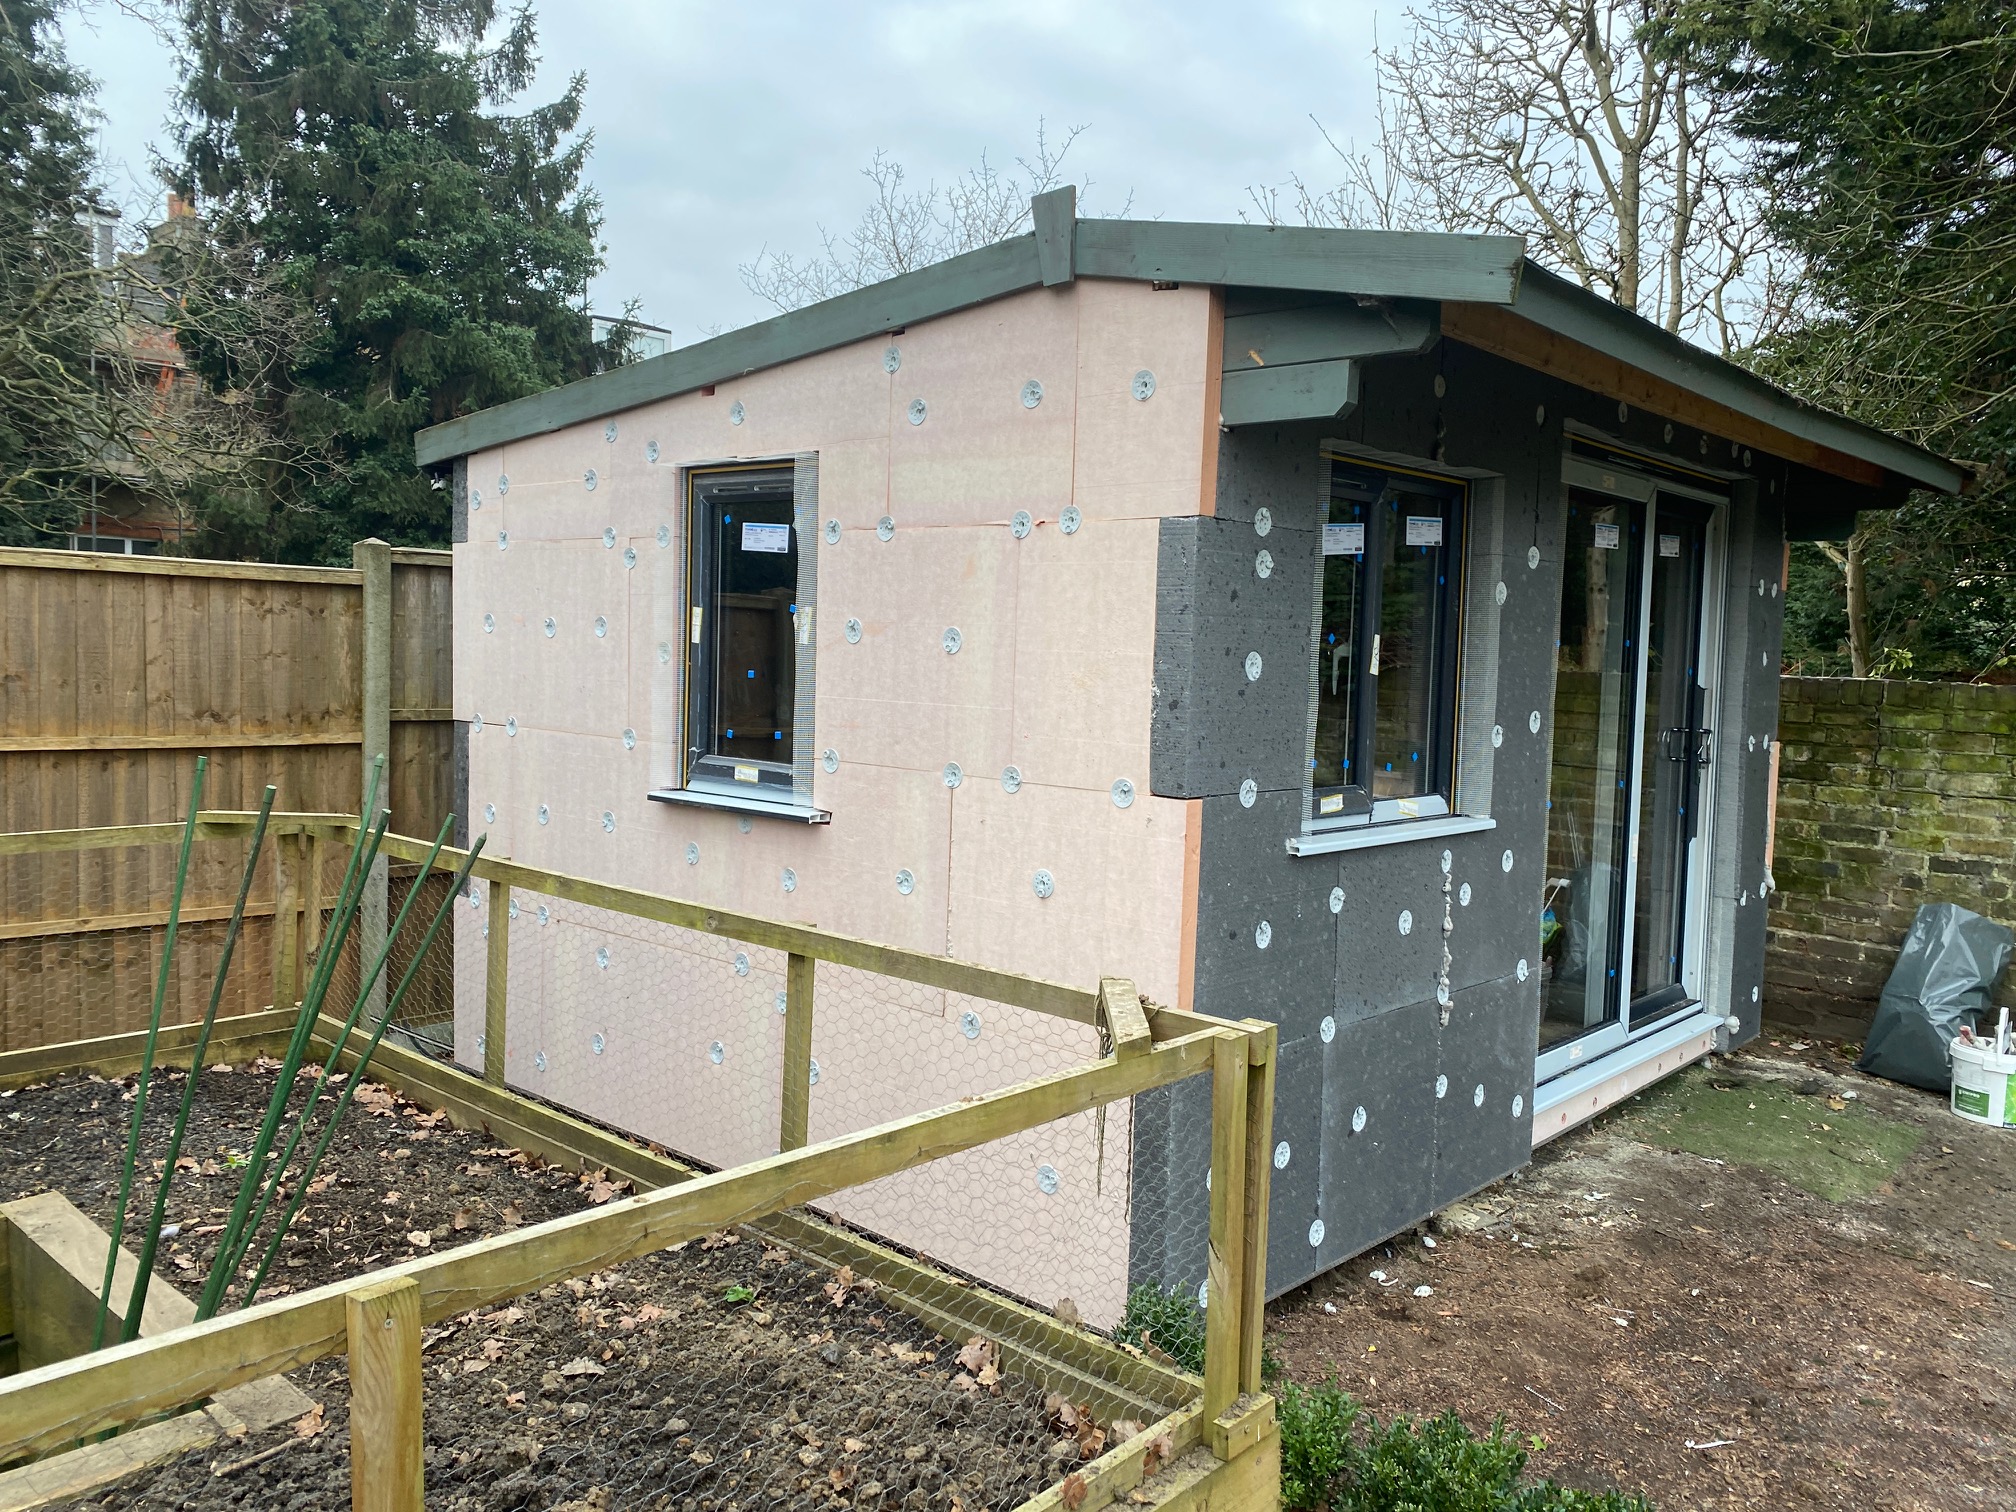
The insulation is stuck on to the wooden walls using a spray foam adhesive. Typically if applying external wall insulation to a solid brick wall, a cementitious adhesive is used, but in my case, the foam adhesive was sufficient – it also allowed me to ‘straighten’ the walls by putting more adhesive towards the top of the wall and less down the sides. The insulation boards were interlocked at the side and prior to applying any boards – I screwed a ‘starter track’ to the wall which acts as a supporting plinth on top of which you can install the insulation boards. It is really important to try and minimize the gaps between the insulation boards – since these gaps will be filled with basecoat (another cementitious product) when this is done and you can get significant thermal bridging, where heat loss occurs at a vastly quicker rate than through the insulation.
Once the insulation boards were stuck on and level (which took the best part of a day to do!), I put through mechanical fixings to tie the insulation boards to the wall. These were large grey washers that you put a wood screw through and this helps tie the insulation boards to the wall.
Installing basecoat & mesh (scrim coat) to my shed
The next part of the process is to install the basecoat layer – this is basically the cement layer (about 6mm thick) that protects the insulation. With all thin coat render finishes, I was told this part was absolutely critical to ensure I could achieve a nice finish to the render because the final render coat was just 1mm thick. I did contemplate getting in the professionals at this stage – this is notoriously the stage that goes wrong with external wall insulation, but again in an effort to keep costs to a minimum I decided to have a go myself. I have done a bit of plastering in the past, but this was something quite different (again thank you to EWIPro for all the tips!). Using a notched trowel you need to apply the basecoat to the top of the insulation boards and then sink fiberglass mesh into the basecoat. The mesh conveniently is marked at each end showing the exact overlap that should be achieved. In fact the whole process is quite fun although quite messy and quite a lot of the product ended up on the floor. I applied the basecoat in two passes to try and get it really flat.
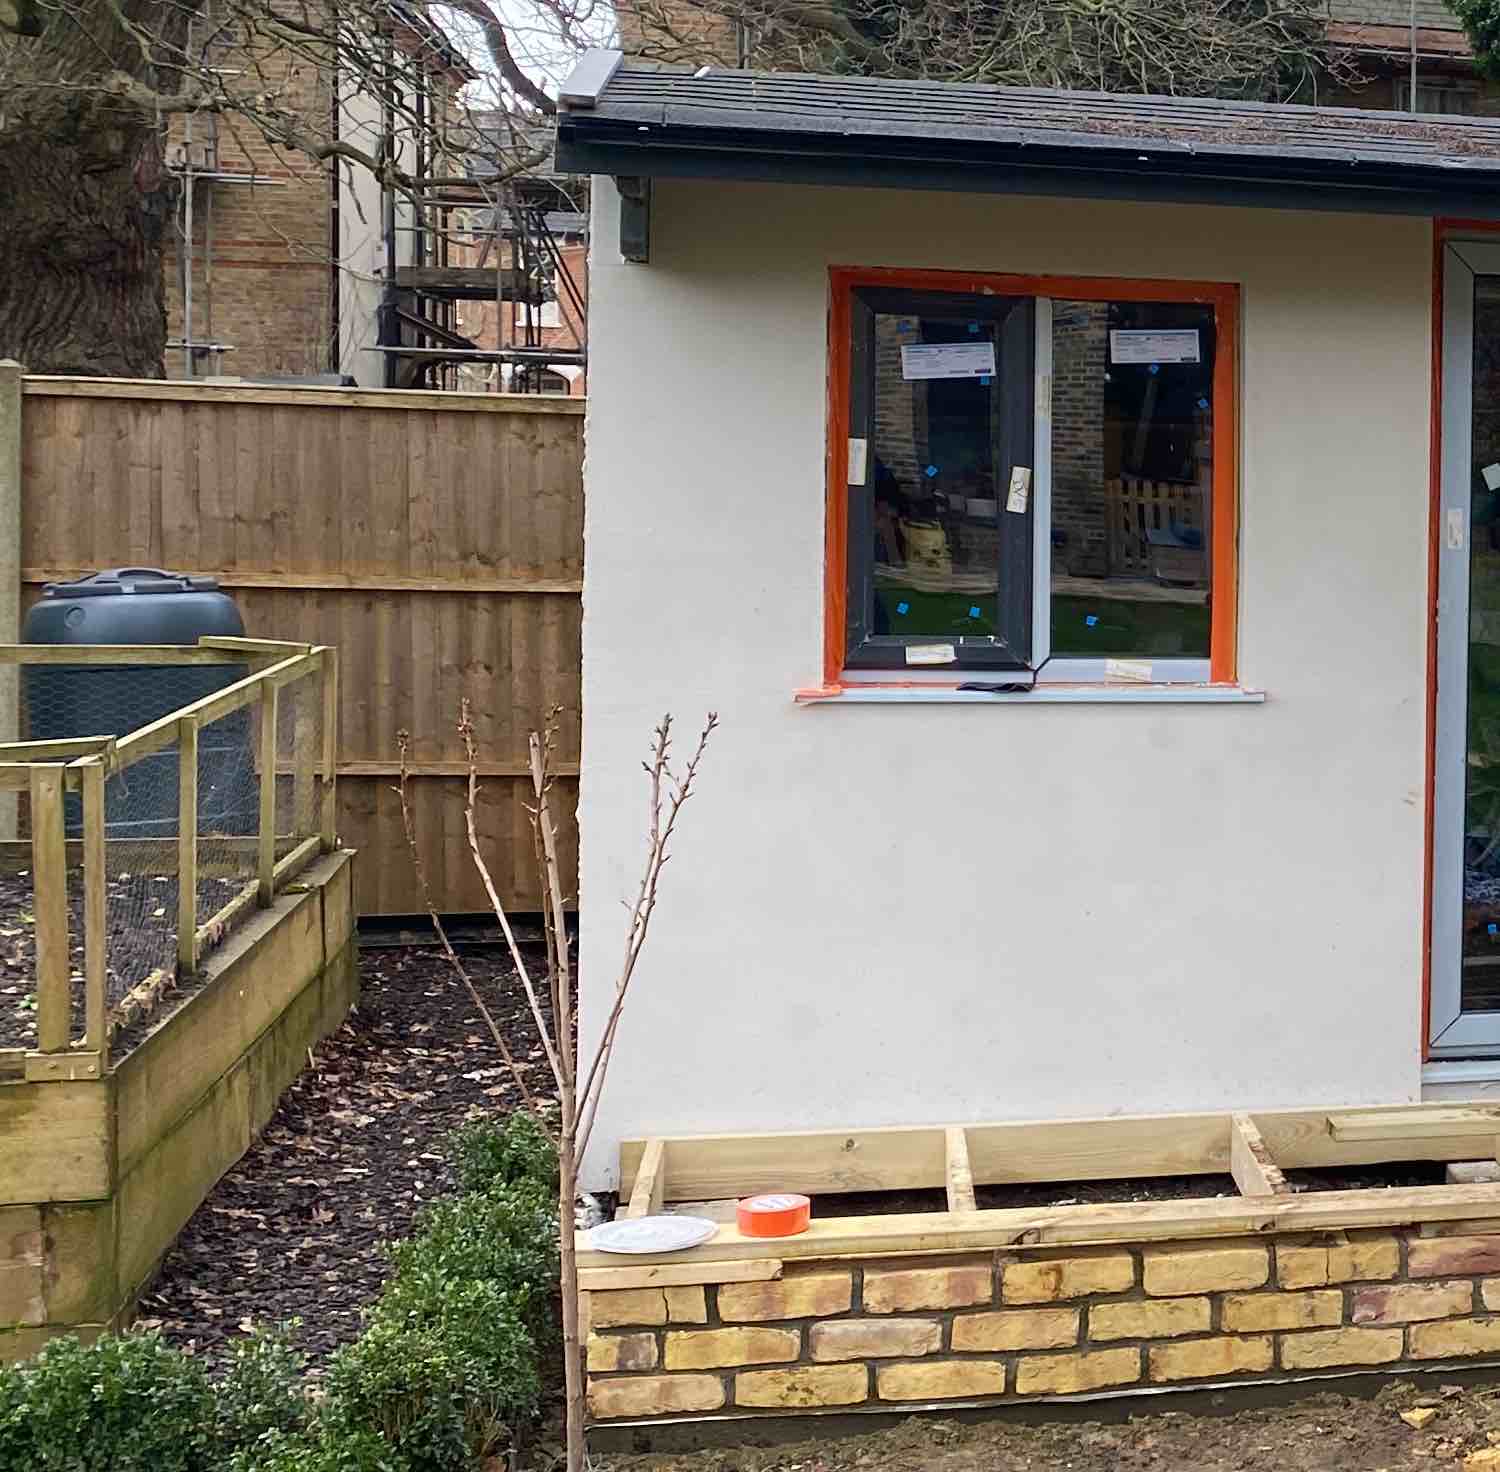
In the photo you can see the basecoat layer applied – you can also see the start of a decking area I created at the front of the shed! I decided to do this for two reasons – firstly I have this image in my head of me working in the office and my dog sitting on a decking out front!
Secondly, this area never seems to get any sun so grass never grows directly in front of the shed. I thought by bringing out the decking area by a 1.5m of so I might get around this issue!
It was once I had basecoated the wall that I noticed a leaking roof, so spent a day replacing the roof ‘felt tiles’ with new ones, again something I hadn’t costed into my shed to office conversion although the materials for this only came to £170 – the pain here was it took just under a day to replace the roof tiles.
Topcoat Silicone render application to my shed
Once the roof was finished and the basecoat was applied, it was time to apply the render – this was the Premium Bio Silicone Render 1mm and I opted for a ‘Lead’ colour as I thought this would compliment the windows although it is available in any colour as it is simply tinted (much like paint).
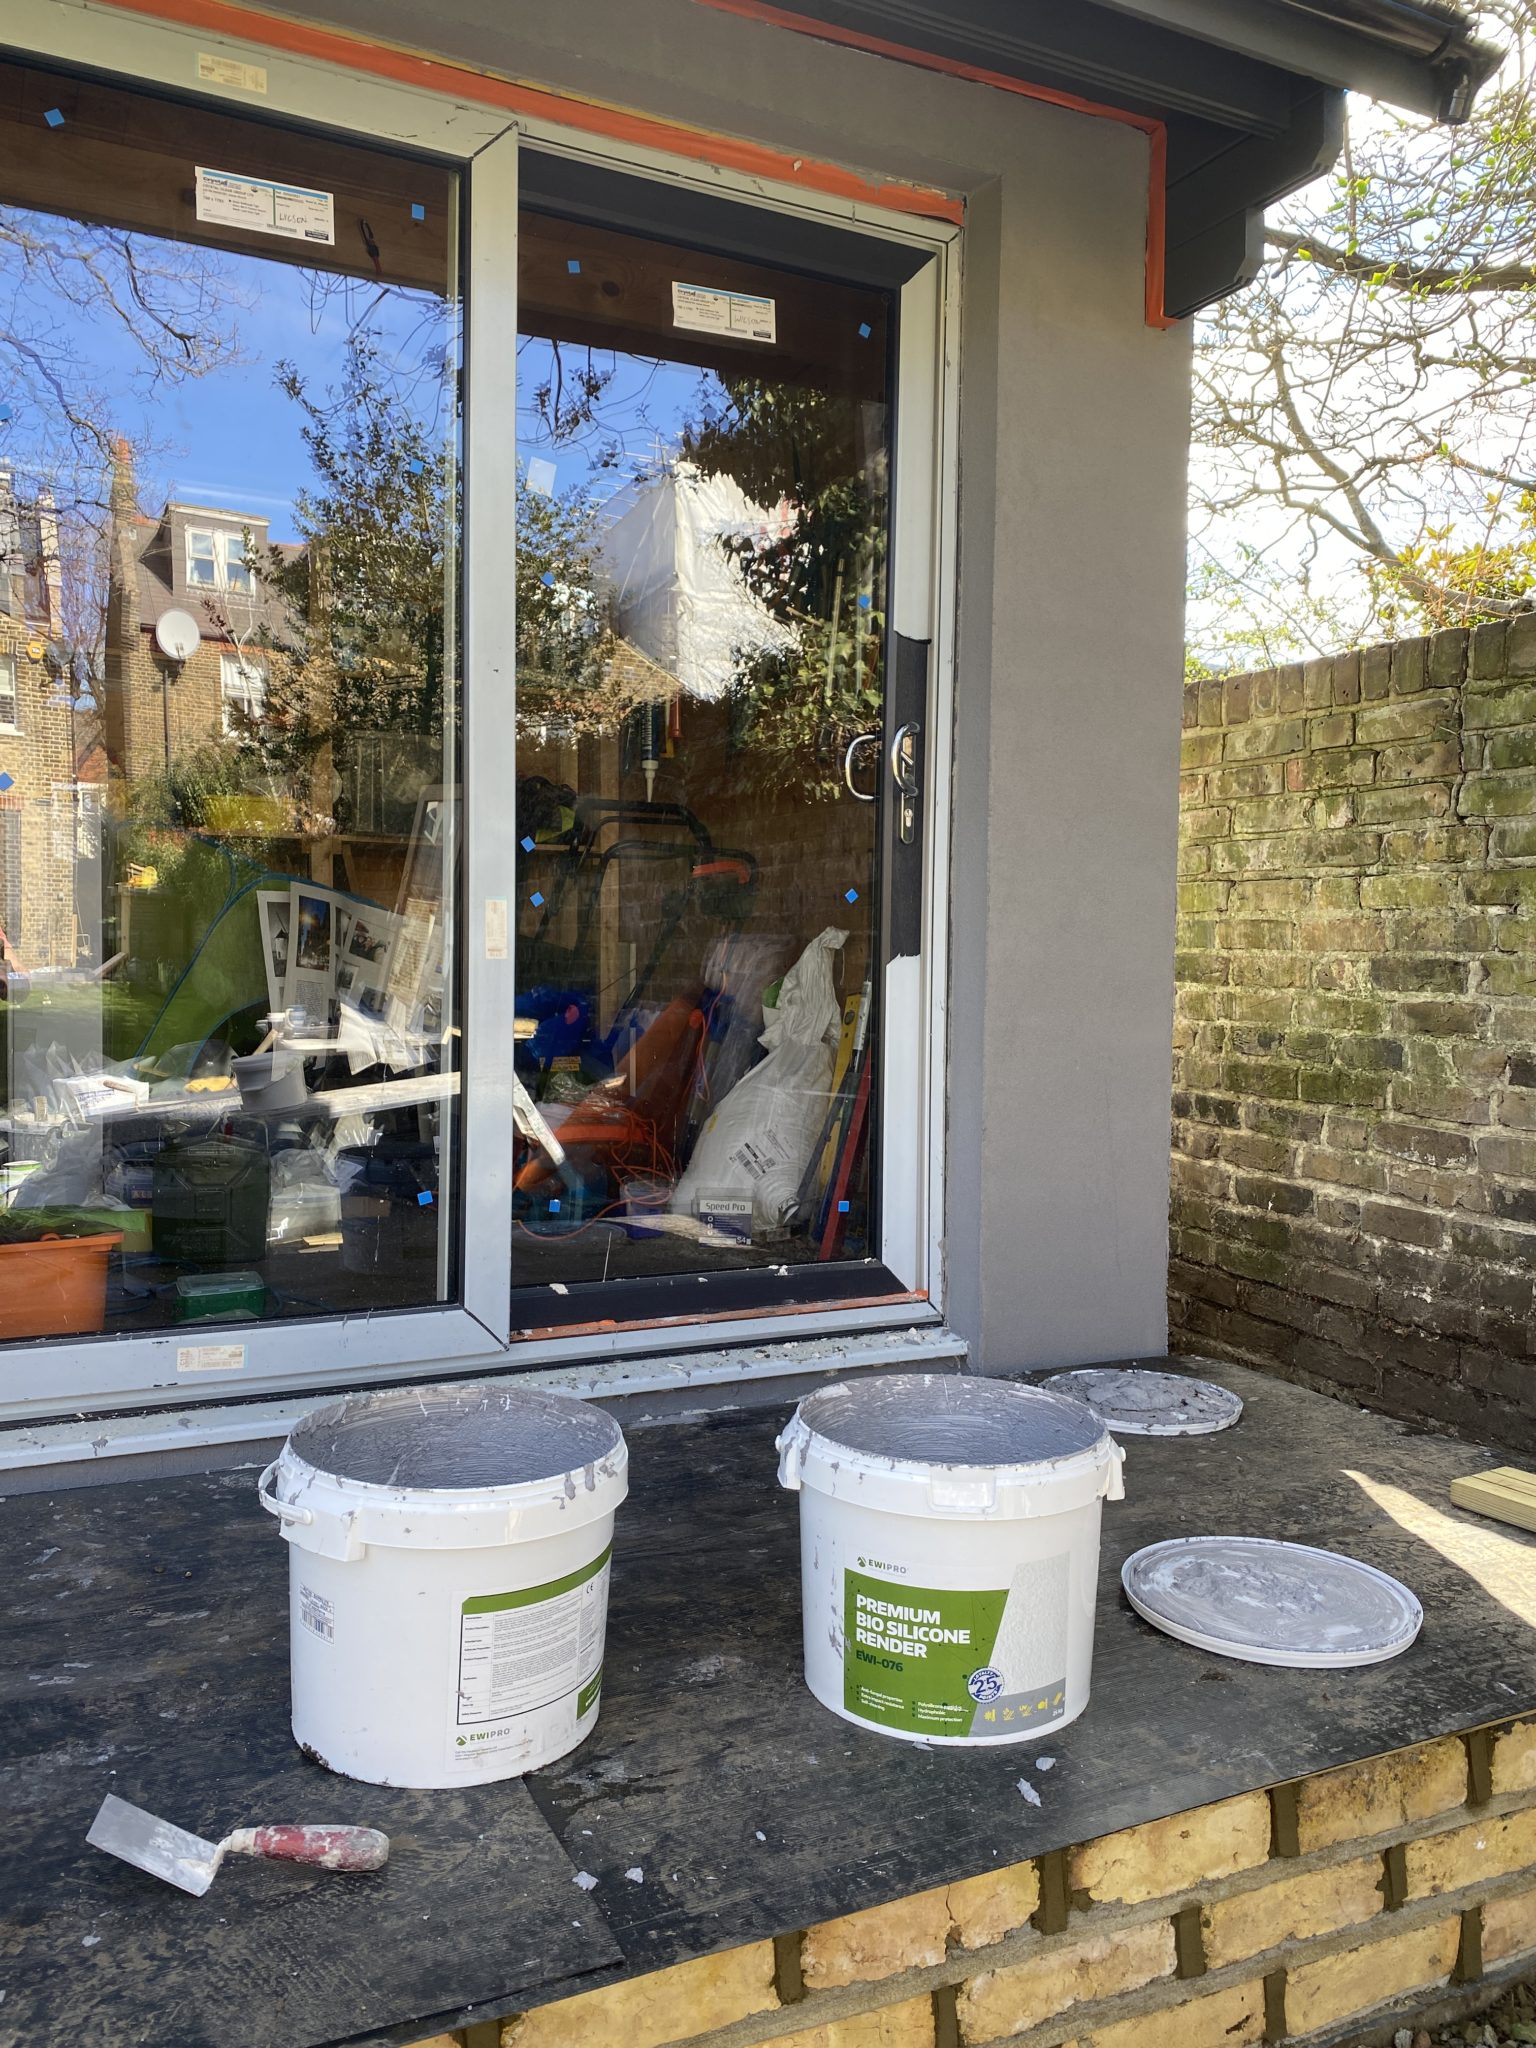
Unlike the basecoat that you can remove if it dries (although it is a bit of a challenge), if the render gets on the windows and frames and dries it is very difficult to get rid of. Therefore I used window film protector to protect all the openings against accidental spillages.
I applied the render itself with a metal trowel and then used a plastic render float to get the final finish which actually come up really nicely.
As you can see from the photos, my new office looks pretty good (in my opinion) but more importantly it is very well insulated meaning that those cold winter days should be an issue.
If you are interested in trying to re-create what I have done here, go to the EWI Store website and use the code ‘Shed12’ to get 12% off the cost of materials!
Resources I used for external installation of my shed:
- EWI Pro EPS Installation Guide
- EPS Insulation supplied by EWI Store
- EWI Pro EWI-225 Premium Basecoat, supplied by EWI Store
- EWI Pro EWI-333 Topcoat Primer, supplied by EWI Store
- EWI Pro EWI-076 Premium Bio Silicone Render, supplied by EWI Store
Next steps for my shed
I will follow this blog up in a month or two when I do the inside of it and complete my shed to office conversion!


Thank you for this. We have a shed which was supposed to be a garage with a small office at the end. The wood needs repairing in some places and I have been looking for a way to use the whole shed better and use less energy in the winter ie oil heater on all day. Please now think about how you could add solar panels. Our long roof would be ideal except it would probably not bear the weight without a separate structure outside or reinforcement inside. A Marcham
HI there, this is great thanks for sharing, may I ask now that you’ve been able to use it for a few winters, how does it feel? does it stay warm and keeps the humidity away even during those cold winter month? and looking back, is there anything you would have done differently? Thanks for the update
Hi Domi,
So I put a small electric heater in there during the winter to take the chill off. Because the room is small it warms up really quickly and so this is more than sufficient! Really happy we did it – would absolutely recommend it.
Csnt find the next stage in the blog. Interested to see how you insulated the flooring.
could i ask what you did to the rear where there was no access?
Really interesting- thanks for sharing.
Fantastic article and an amazing transformation. Very tempted to do this, any update on the interior? Would love to see it. Also would you be willing to outline your total costs? Would be interesting to see how it compares to the expensive home office offerings, I’m sure you’ve not only saved a lot of money but the home office is a much more comfortable place to work.
Where is the update? Give the people what they want!
Looks great, It looks like you had a log cabin as a starter shed where you have interlocking profiled logs stacked up to create the walls. I’ve been looking at options to insulate my own log cabin shed and have been finding it tricky to achieve. The wooden logs tend to expand and contract throughout the season and the manufacturers strongly recommend that you should let the logs move freely to prevent warping and cracking. Your insulation method obviously would not allow for this movement but i guess maybe an insulated shed wouldn’t suffer so much movement? I’m interested if you had considered this or perhaps you have already thought about it and mitigated against this in someway. Really appreciate your thoughts on it!
Cheers!
Hi Rob,
To be honest – once you have that much insulation externally – the movement is pretty limited as the internal structure stays at a pretty consistent temperature all year round. Also the Silicone Render we used (from http://www.EWISTORE.co.uk) is pretty flexible, so should absorb any movements with no issues. So fingers crossed we should all be set!
Awesome, I did wonder if that would be the case, another reason to go for external vs internal. Have you got plans for a next phase update? would be great to see how you got on with the roof and fitting out of the inside! Thanks again, Rob
Hi Rob,
So I have built the other shed now – so going through the process of moving everything out of my new ‘home office’ and then once clear I will do the roof and plasterboard it out and lay a floor. Just deciding whether it needs heating (i.e electric underfloor) as potentially it has sufficient insulation that it won’t be necassary – so I may get away with a portable heater.
Impressive! Well done on a very tidy job, James .
Also, I pressed at the brilliant guide you’ve produced freely shared.
I noticed that you missed out a word on typing….yes, I read the whole blog 🙂
‘ more importantly it is very well insulated meaning that those cold winter days should (NOT) be an issue’
Sorry to be pedantic.
Cheers, Jeremy
Very useful guide this. I am looking to do the same to my shed. Did you consider using mineral wool insulation to insulate? Also are you insulating the floor of the unit? I want it to be warm as possible as I will be using this every day even in the middle of the winter.
Hi, I did consider using mineral wool on the shed / office conversion, but actually I needed to save space on the sides so went with the Kingspan. I was also trying to save as much money as possible so I opted for the EPS over the mineral wool on the front and back. Mineral wool is a fantastic product though, so don’t let my choices put you off!
In terms of insulating the floor of the shed, I am not going to bother, as I think provided the windows and doors, walls and roof are insulated that should be sufficient. I think a bit of foam underlay under the new floor I will put in should also stop any cold draughts entering that way.
That looks great. We are looking to do the same to our shed. Just wondering how to get internet to it?