The Green Home Grant Voucher scheme is an extremely generous Government backed scheme giving homeowners the opportunity to improve the energy efficiency of their homes by adding new insulation technologies or renewable heating systems.
The scheme will cover 2/3 of the costs of the works up to a maximum of £5,000.
On this basis, if the cost of works is equal to £7,500 you will get the maximum £5,000 grant. If the cost of the works is more than £7,500 you will get the maximum £5,000 grant, but for every additional £1, you will need to cover this. If the cost of the works is less than £7,500, you will be contributing 1/3 of the costs and the Government will contribute 2/3.
Below are a couple of examples of how the numbers may work.
EXAMPLE 1
Cost of External Wall Insulation £8,000
Grant Contribution (Max) £5,000
Customer Contribution £3,000
EXAMPLE 2
Cost of External Wall Insulation £4,500
Grant Contribution £3,000
Customer Contribution £1,500
So, with this in mind, what will external wall insulation cost you with the Green Home Grant Voucher?
We are seeing installers installing under the scheme producing quotes anywhere from £100 to £200 per m2. This varies across the country with the cost of labour. It also varies from house to house depending on the size of the property. Typically, the square meterage price of a big project (anything over 150m2) will be cheaper than a smaller fiddly job of 40m2.
If you are looking to get a quote fill in the form below and a member of our team will be in touch with details.
Cavity Walls versus Solid Walls
in the rest of Europe, external wall insulation has been installed for several decades, it is still considered a relatively new technology here in the UK.
It is all related to how buildings have been built here in the UK. Pre 1930, houses were typically solid wall – A solid brick wall is exactly like it sounds, Typically, two bricks wide, with each row of bricks interlocking to form a completely solid 9 inch brick wall.
After 1930, walls were built with a cavity. Instead of having a 9-inch thick brick wall, a cavity wall has two layers of brick, with a gap in between. The gap can be anything from 20 to 100mm wide and therefore means that cavity walls tend to be much wider than a solid brick wall.
The cavity was introduced to help alleviate damp issues – essentially water could pass through the first skin of brick, it would then hit the cavity and then travel vertically down the inside of the cavity and away from the property.
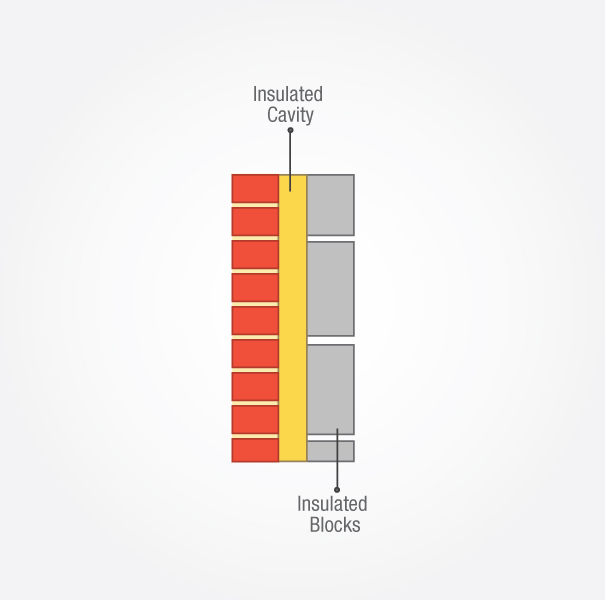
Over time, as the importance of energy preservation in building began to grow, the cavity was also used to house insulation (from approximately the 1970s), and this was installed during the build process.
In the 1980’s, a method was established for injecting empty cavities with insulation which meant that ‘empty’ cavity wall properties built between 1930 and 1980 could be retrofitted with insulation.
Up until 2010, hundreds of thousands of older cavity wall properties were being retrofitted with cavity wall insulation as it was a cheap, effective measure to install. However – the process was so successful the majority of accessible cavity wall properties were filled by this time.
What is Solid Wall insulation?
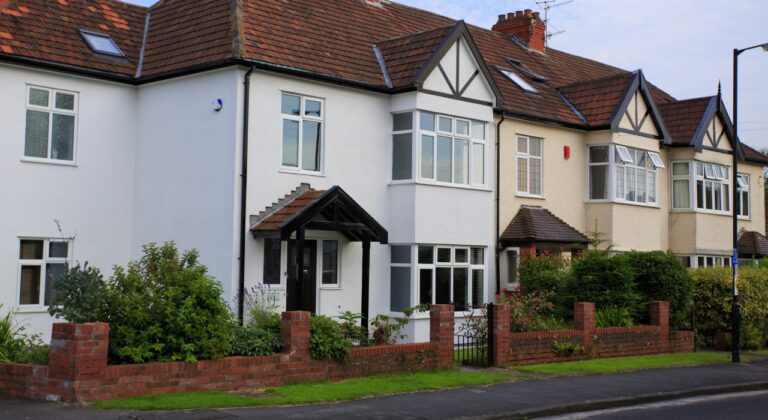
With cavity wall insulation all but finished, the Government then moved their sites to solid wall properties. In this type of property there were no cavities to fill – so solid wall insulation involves adding insulation to the exterior or interior surface of the solid wall.
The benefit of this type of insulation is that you are not limited by the cavity width in terms of how much insulation you can add – we have seen homeowners installing 250mm of external wall insulation to the outside of their property!
We would always recommend external wall insulation over internal wall insulation.
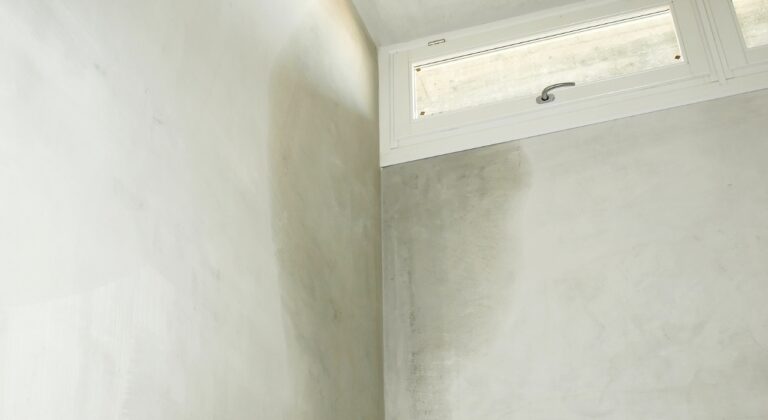
The main reason for this is related to interstitial condensation. If you imagine installing insulation to the outside of the property, when the heating comes on, the heat will travel through the solid walls and hit the insulation. The heat will therefore stay in the walls which will act as a heat store. This heat will then be radiated back into the house keeping the levels of thermal comfort in the home nice and high.
If you install internal wall insulation, the heat from your heating system never reaches the walls – it hits the insulation and then goes back into the room. The issue here is that the walls are no longer heated at all – so if the external temperature drops to below freezing, the bricks will get close to matching this temperature. If there is any moisture in the walls and it freezes then it can cause big issues with the brickwork.
Another issue related to internal wall insulation is the loss of space you will experience. In a perfect scenario to get the maximum benefit from the insulation, it needs to be applied to every wall surface that is in contact with the outside air (walls separating rooms don’t require insulation). This can lead to a lot of loss of space and also general upheaval, since radiators may need to be moved, built in furniture again might need to be pulled off the wall.
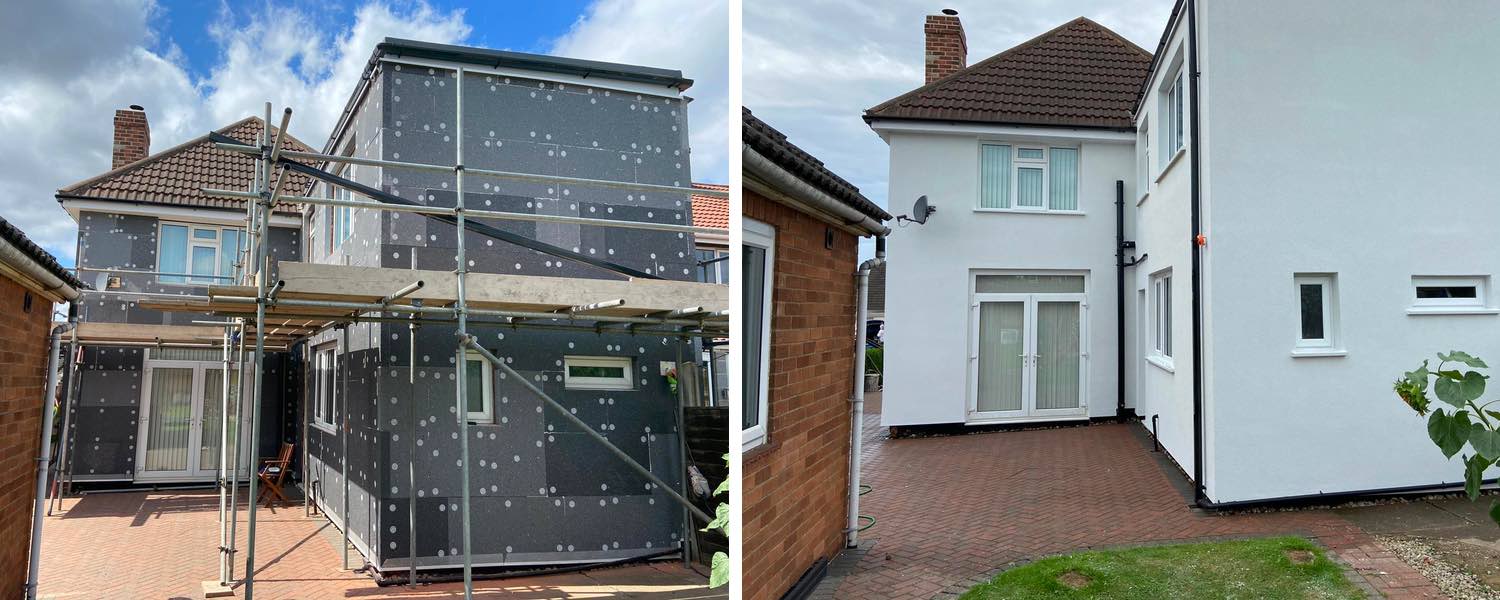
What is the process for installing external wall insulation?
We would always recommend installing a ‘wet fix’ external wall insulation. This means the insulation boards are held in place using both an adhesive (hence the wet fix) as well as mechanical fixings that tie the board to the wall. The adhesive used is typically cementitious, but sometimes a foam adhesive can be used.
There are a few insulation boards that can be used in external wall insulation systems, including EPS, Rockwool Dual Density mineral wool and Kingspan K5.
All these boards are rigid insulation boards that are specifically designed for this purpose. Do not use foil backed insulation board externally!
We really like the Rockwool Dual Density slabs here at the GreenAge, as they are breathable, better acoustically than other insulation boards and also offer great thermal performance, but they are a little more expensive than the Graphite EPS.
Once the insulation boards are stuck to the wall, mechanical fixings are installed through the boards in to the wall to ensure there is no chance of them coming away from the wall over time. Typically, these systems will come with warranties ranging from 10 years – 40 years and most systems installed correctly will last well beyond the 40 years!
Once the boards are on the wall, we recommend installing a thin coat Silicone render. Thin coat Silicone renders sit on top of flexible basecoat layers. The basecoat is typically 6mm and the render is 1 – 1.5mm on top of this, so the entire layer sitting on the insulation board is max 7.5mm.
Some systems include installing a monocouche render on top of the insulation board. These older renders give a slightly different finish, but the main difference is that they are applied very thickly (15-18mm). The problem here is a lack of flexibility – so if there are structural movements in the building this type of render will crack – a BIG issue when rendering! Likewise, because they are 2 – 3 times thicker than the thin coat silicone renders, there is far more weight going through the insulation boards which over the longer term is not ideal!
If given the choice, we would always recommend looking at thin coat silicone renders when looking to install external wall insulation.
The Silicone renders can be tinted to any colour depending on the preference of the homeowner and there are also different grain sizes that can be applied giving a slightly different appearance. Silicone renders are breathable, flexible and also hydrophobic, so a product like EWI Pro’s Nano Drex Silicone Render is completely self-cleaning requiring no upkeep! The render surface itself actively repels water and dirt keeping your home nice and clean without you having to spray wash it or brush it.
What kind of savings can I expect from External Wall Insulation?
In order to install external wall insulation under the Green Homes Grant Scheme, it needs to be done in accordance with Part L of Building Regulations. This means that as a minimum on an existing property, 90mm of EPS (100mm of Rockwool DD boards) need to be added as part of the insulation system to take the u-value of the wall to 0.3W/m2k or better. You can always install more than this if you want even greater energy savings!
It is difficult to give exact energy savings, but typically this amount of insulation will reduce your heating bill by half. So if you have dual fuel (electricity and gas) bill of £1,200, then typically your gas bill will be approx. £800, of which 80% will be heating and 20% will be hot water. So of the £640 you spend of heating per year, you will get savings of approximately £320 when insulation has been installed. Obviously, it is impossible to give exact savings, as people like to heat their homes to different temperatures, but the £320 should give you a ballpark saving and over time the saving will only go up as energy prices continue to rise.
Installing External Wall Insulation under the Green Homes Grant Scheme
There has genuinely never been a better time to install external wall insulation because of the Green Homes Grant that has become available. It has just been announced the scheme is now going to run until the end of March 2022, giving homeowners plenty of time to take advantage of it. In order to access the grant, you need to get a quote from a Trustmark approved installer who is signed up to the scheme.
For the majority of households the £5,000 should cover a good proportion of the cost of the works being completed – so get involved while you can!
If you would like one of our recommended installers, then please fill in the form below and we will come back to you shortly.


I would like a quote for external cladding please
I would like a quote for external cladding please
Not good with computers sorrey . Our postcode is sm38pj
I would like to add a comment regarding the green homes grant. If eligible on certain benefits you can claim upto £10000, on here they are only saying £5000
Hi I want to take advantage of green home grant I need a quote rendering the outside wall of the House