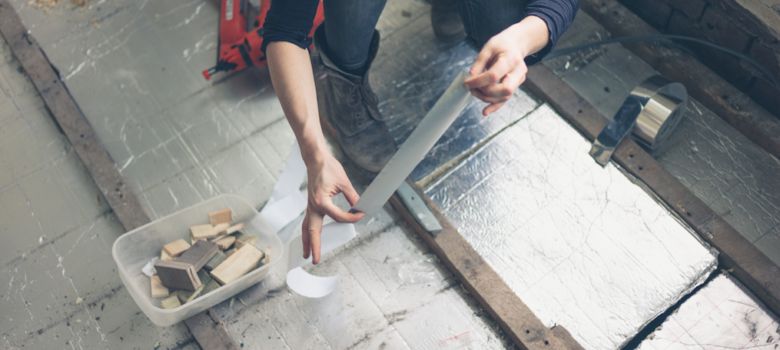
Installing floor insulation yourself
Not all home insulation work has to be carried out by a professional. It is fairly simple to do if you are a DIY enthusiast, and all the materials are available from your local DIY store. A roll of the fibre (7m long x 1m wide) will cost about £15, and the insulating boards for concrete floors are approximately £20 (2.4m x 1.2m). Obviously the wool fibres and insulating boards come in different thicknesses and therefore provide different levels of insulation, so please speak to your local DIY store representative for more detail. Filling in the gaps between the skirting board and the floor with a silicone sealant costs about £20.
Professional installation of floor insulation is obviously more expensive, so it is worth checking with a variety of local firms to get quotes.
If you do decide to carry out the insulation work yourself, be sure to take appropriate safety precautions such as wearing protective clothing, as some insulation materials are irritants and should not be handled with bare skin.
Also it is not necessary to insulate floors on the second or third floor if the rooms below are heated. If the room resides over a basement or a garage for instance you can use a similar process to the wooden floor guide above, by simply stapling the wool between the joists (if you can access them).
Insulating a suspended timber floor
A suspended timber floor, whereby the floorboards sit upon wooden joists, can be insulated in one of two ways:
1. Access the floorboards from underneath
If you can easily access the underneath of the floorboards (potentially if you have a cellar), then you can simply insert rigid insulating board between the joists and use battens to hold them in place (if required). Using a saw you need to cut the insulating board to the exact width of the joists; if you have done this correctly then you can use a wooden mallet to gently tap the insulation into place and it should stay where it is so you may not require the battens.
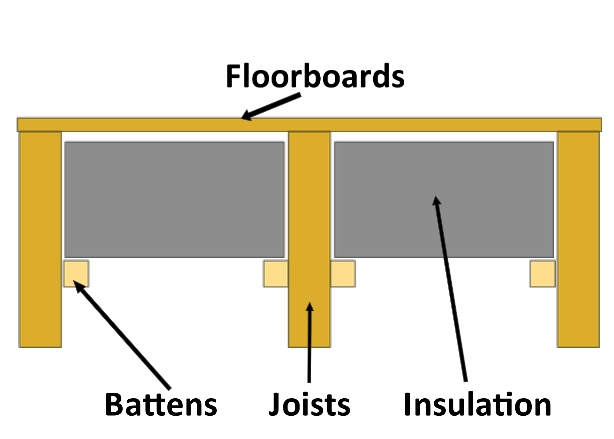
If when you have cut the insulation, the width of it is much smaller than the width of the joists, then obviously it will simply drop out of the joists, so in this instance you will need to hold them in place. The easiest way to do this is to push the insulation in place and hold it there using battens that you will need to attach to the insides of the joists as shown in the diagram.
2. No access to the underneath of the suspended floor
Unfortunately if there is no access to the underneath of the suspended floor then the job is made more difficult because the floorboards need to be removed prior to insulating. In this situation, wool insulation is used as opposed to the rigid insulating boards.
The first step is to lift the floorboards up, to expose the joists. This will probably mean moving furniture off the floor, and if the floorboards are irregular sizes, it is worth marking where they go – either drawing a map or numbering them from a corner – to ensure they fit back as before!
Once you have exposed the joists, you may notice that one or two are rotting so these can be replaced if appropriate. Next, a net needs to be spread over the whole of the floor space ensuring that it sags substantially between each of the joists. This sagging net acts as a ‘hammock’ in which the insulation sits.
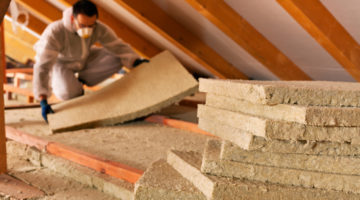
The next step is to lay the insulating wool between the joists, normally by running it parallel to the joists. It is worth trying to purchase wool with a width similar to the joists, although all insulating wool can be cut to size very easily to ensure a nice snug fit. As is the case for loft insulation, the thicker the wool, the better the insulation will be, however you definitely do not want the insulation touching the ground beneath the suspended timber floor, so make sure the net does not sag to that extent. Installing floor insulation should also act as a draught excluder, stopping cold draughts enter the home through the floor. We do recommend using sheepwool insulation (despite being more expensive), because it is more breathable than manmade insulating wool and it is also a 100% natural material that can be handled without protective clothing.
Once the insulation is in place between the joists, the floorboards need to be relaid over the joists to complete the job.
Insulating solid floors
Many homes are built with solid floors, most of which are made from concrete. These can either be insulated as and when they need replacing, or they can be specially targeted for retrofit insulation. You will, however, lose a few inches from the height of the room, as the floor will now sit slightly higher.
Insulating concrete floors cannot be done with the wool used for wooden floors, as this is soft and would compress as people walked across it. Instead, sheets of polystyrene insulating board are used (such as Celotex 50/100 mm insulating board). Polystyrene is easy to cut and drill holes in, but has high compression resistance; it also has excellent insulating properties.
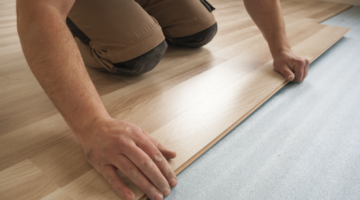
First lay a damp proof membrane over the entirety of the solid floor. Next, lay the polystyrene insulating boards together across the whole floor so there are no gaps, and join them together using glue or insulating tape. To finish, lay chipboard across the whole floor (connecting pieces to one another using the tongue and grove connection) and glue into place.





I started to do a project like this, replacing old, warped 1960’s tongue and groove flooring over about 30m2 downstairs and fitting insulation.. However, my local authority planning office saw the pile of insulation material outside my house whilst he was inspecting a neighbours extension and came to tell me that I needed Building Controls Approval because I was altering the thermal properties of the building. This will apparently require full plans for the whole house, a full thermal survey by an accredited surveyor and submission of the thermal calculations (along with fees of approximately £1000). Quite apart from the surveyors fees, this renders the whole project massively uneconomic. I managed to get the insulation and floor boarding returned for a fee but despair of the contradictory regimes in place that on the one hand tell us to improve carbon efficiency and on the other penalise us when you actually try to do something positive. Unless you are prepared to go “under the radar”, I can see no way that any minor improvement project could be financially worthwhile with the current regulations if you do things “by the book”
ridiculous
Replacing floor on an older property, propose 150 mm 28/30 concrete, membrane, 150 mm PIR board sealed/glued, membrane t&g dense chipboard. engineered timber floor finish. Does the PIR insulation accommodate/resist moisture/vapour attack. Do you know of any more efficient solution.
I am very thankful to you for providing such an awesome blog on the software development. Continue composing such kind of blogs.
I am all in favour of sheep wool as a material, however it is worth checking if clothes moths are an issue locally before opting for sheep wool insulation. We (and our neighbours) have had ongoing problems with “clothes” moths, which have not only made holes in woolly jumpers but also eaten patches from wool-mix carpets! If we had wool insulation there would be no hope of managing the moths! (I did hear of someone who had this issue, and ended up paying to get the sheep wool insulation removed from their house.)
We have wool mix carpet and under the bed over the last 7 year we got patches where there is no carpet jusnt the under leyer . It has been eaten away.
Hi, renovating our ground floor maisonette – solid concrete floor. Replacing all carpets with 6mm LVT, with thin foam backing. Don’t want to increase floor heights. Would a 1mm aluminium foil membrane (vapour barrier and thermal insulation combined) with taped joints, before laying the vinyl (hard composite type) make any improvements? We’ve already insulated the internal walls (studs, 100mm cellotex, 12.5mm plasterboard, skimmed – high dew point, so cavity wall insulation is not recommended, plus various examples of issues to those local properties who have it), plus the ceiling (aluminium frame, 75mm insulation, 12.5m plasterboard, skimmed). Thanks