Solid Wall Insulation
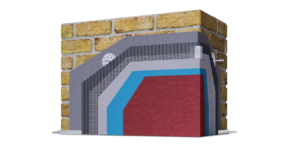
With approximately 35% of heat loss from a home occurring through the walls, insulating your solid walls will help to minimise these losses.
What is the Tesla Powerwall and should you get one?

The Tesla Powerwall is a rechargeable lithium-ion battery designed to store energy for home use. It is a product of Tesla Energy, a branch of Tesla Inc. that focuses on manufacturing solar energy products. Our friends at EWI Pro have…
What is AeroBarrier and how can it help your home?
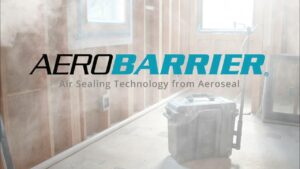
AeroBarrier is an innovative technology designed to enhance airtightness. It has been successfully implemented in the USA, Canada, and the UAE, and has now been introduced in the UK. AeroBarrier functions by sealing air leaks in buildings with a specific…
Natural building materials

Natural building materials are gaining popularity as more people become conscious of their environmental impact and seek to minimise it. This shift towards eco-friendly construction encompasses a wide range of building fabric materials such as timber, mineral wool, wood fibre,…
How Is The UK Getting To Net Zero By 2050?

The UK government has set a target to achieve net zero greenhouse gas emissions by 2050, which means that the country will emit no more carbon dioxide and other greenhouse gases than it removes from the atmosphere. Achieving this ambitious…
Draught proofing windows

Do my windows need draught-proofing? Not all windows need to be draught-proofed. Double or triple glazed windows installed since 2002 should be sufficiently well-built and installed so as not to require any. Older double glazing and single glazed windows can be…
Insulating Your Loft Joists: a Step-by-Step Guide

As we mentioned in our Introduction, there are two main ways to insulate your loft: one is via the rafters and the other is by insulating your joists. Insulating the joists is often the easier of the options and especially makes…
Cavity Wall Insulation
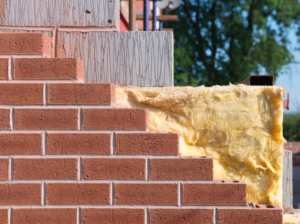
Cavity wall insulation (where appropriate) can radically decrease heat loss through walls during winter, however it requires professional installation.
Double Glazing

All homes lose heat through their windows, but installing double-glazing can limit this rate of heat loss dramatically, helping to keep your home warmer.
Insulating your Loft Rafters: a Step-By-Step Guide
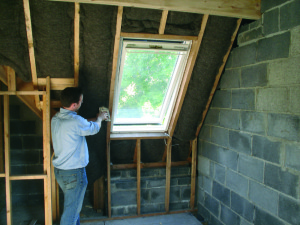
Key points before you start Insulating the rafter space will give you a warm loft. This means insulating between or below the sloping beams that form the construction and support a sloping roof. The rafters are joined together by a horizontal…