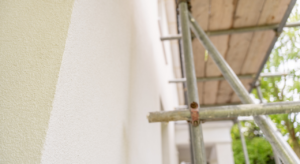
Heat Pumps Won’t Save You Money – But Insulation Will

Having spent the best part of twenty years in the energy sector – starting out in energy consulting at IBM, moving across to The GreenAge, and now at EWI Store – I’ve watched a long parade of ‘game-changing’ technologies march…
What Do Rising Energy Prices Actually Mean for Your Home in 2026?

Energy bills are still a worry for a lot of households. Even when the increase sounds small on paper, it can feel very different when it lands on your monthly bill. An extra £10, £20 or £30 a month might…
What’s Actually Using the Most Energy in Your Home?
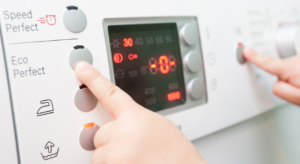
When your energy bill feels high, it’s easy to blame everything. The lights. The TV. The kettle. The phone chargers. That one plug socket you’re convinced is somehow draining half the National Grid. But the truth is usually much simpler.…
Do Solar Batteries Make Sense for UK Homes in 2026?
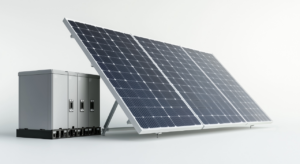
If you already have solar panels on your home, or you are thinking about getting them installed in the UK in 2026, there is a good chance you have also come across the idea of adding a solar battery. And…
Are Green Levies Really the Reason Your Energy Bills Are So High?

Why this question keeps coming up If your energy bills still feel painfully high, it is only natural to want a clear reason why. And that is probably why the “green levies” argument keeps cropping up. It sounds simple enough.…
Should You Move House or Improve Your Home?

There is a phrase that keeps popping up in home improvement conversations right now: improve, don’t move. And honestly, it makes sense. A lot of homeowners are looking around at the cost, hassle and uncertainty of moving house and thinking,…
A Quick Guide to Solar PV in the UK (2026)
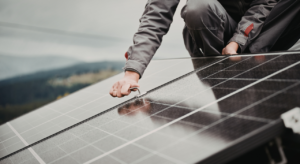
Photovoltaic. Solar Photovoltaic. It might not sound particularly exciting, but it has quickly become one of the most effective tools for UK homeowners looking to cut energy bills and reduce carbon emissions. In 2026, solar photovoltaic (PV) systems have firmly…
0% Loans for Greener Homes? Nationwide Just Made Retrofit a Lot More Interesting

There’s a slightly awkward truth about improving the energy efficiency of homes in the UK, most people want to do it, but the upfront cost can stop them in their tracks. Solar panels, insulation, new windows, heat pumps, ventilation upgrades……
Geothermal Power Is Growing in the UK. But Are Our Homes Ready?
The UK’s transition towards renewable electricity has taken a notable step forward with the launch of the United Downs Deep Geothermal Power Project. Drawing heat from three miles beneath Redruth, the site is now generating continuous renewable power, contributing to…
UK Home Energy Grants Explained
With energy costs still high and pressure mounting to improve the efficiency of UK homes, many homeowners are asking the same question: what help is actually available? Government-backed energy schemes are designed to make homes warmer, cheaper to run and…