Insulating Your Loft Joists: a Step-by-Step Guide

As we mentioned in our Introduction, there are two main ways to insulate your loft: one is via the rafters and the other is by insulating your joists. Insulating the joists is often the easier of the options and especially makes…
Cavity Wall Insulation
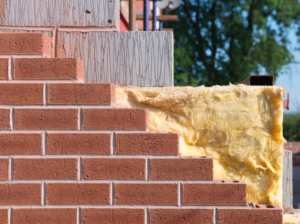
Cavity wall insulation (where appropriate) can radically decrease heat loss through walls during winter, however it requires professional installation.
Double Glazing

All homes lose heat through their windows, but installing double-glazing can limit this rate of heat loss dramatically, helping to keep your home warmer.
Insulating your Loft Rafters: a Step-By-Step Guide
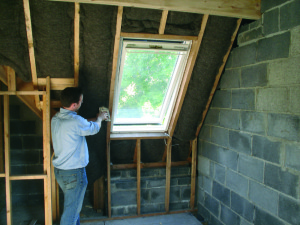
Key points before you start Insulating the rafter space will give you a warm loft. This means insulating between or below the sloping beams that form the construction and support a sloping roof. The rafters are joined together by a horizontal…
Water Tank and Pipe Insulation
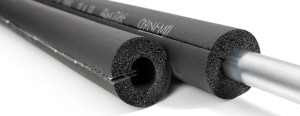
Insulating both your hot water tank and the piping around your home could save you almost £50 a year on your energy bills and is a very simple DIY job.
Introduction to floor insulation

Approximately 15% of heat in the home is lost through the floor, so insulating the floors of your home is a fantastic way to increase energy efficiency.
How warm should my house be?

Some people like to heat their homes to Sahara-like temperatures, while others prefer a more arctic feel, however the majority of us sit somewhere in between. The whole ‘how hot should my house be’ topic is a bit of a…
Can I get cavity wall insulation for free?

Cavity wall insulation is a great way to increase the energy efficiency of your home – and increased energy efficiency means lower energy bills. Until relatively recently, pretty much everyone was entitled to free cavity wall insulation. However in the…
Introduction to biomass boilers

Both wood chip and fuel boilers use biomass, in the form of wood pellets, wood chips or logs, to either heat single rooms or a whole central heating system.
How Energy Efficient are Homes in London?

London has undergone many waves of house building, with each type of home creating their own energy efficiency problems and areas for improvement. It was 1965, that Building Regulations introduced the first limits on the amount of energy that could…